Plumbing Tips | DIY Repairs, Maintenance & Local Advice – PlumberNear

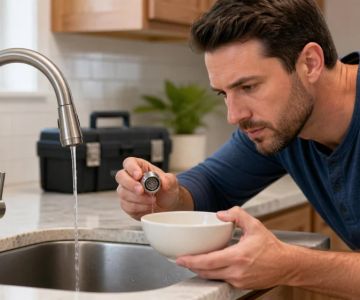
How to Increase Water Pressure in Your Whole House: Complete GuideLearn How to Increase Water Pressure in Your Whole House with practical solutions, expert tips, and step-by-step methods to fix low water pressure and improve your home's water flow.
How to Fix a Broken PVC Water Line: Step-by-Step GuideLearn how to fix a broken PVC water line with this detailed guide covering repair methods, tools, common problems, and expert tips for long-lasting plumbing solutions.
Water Main Break Repair Cost: What Homeowners Should KnowLearn the cost to repair water main breaks, including factors that affect pricing, common repair methods, warning signs, and how homeowners can prepare for unexpected plumbing expenses.
Why Is My Water Heater Making Rumbling Sound? Causes and FixesLearn why your water heater is making a rumbling sound, what causes the noise, how sediment buildup affects performance, and when to consider repairs or replacement options.
What Causes Hot Water Pressure to Drop? Common Fixes ExplainedLearn what causes hot water pressure to drop, including clogged pipes, water heater issues, sediment buildup, and plumbing problems. Discover practical solutions to restore strong hot water flow.
How to Fix a Leaking Pipe Joint Without SolderingLearn how to fix a leaking pipe joint without soldering using practical DIY methods, repair techniques, and professional tips to stop leaks safely and protect your plumbing system.
Why Is My Toilet Tank Water Level Too High? Causes & FixesDiscover why your toilet tank water level is too high, including common causes like faulty fill valves and float problems. Learn how to adjust, repair, and prevent toilet tank overflow issues with practical plumbing tips.
How to Install a New Bathroom Plumbing Rough-In GuideLearn how to install a new bathroom plumbing rough-in with this detailed guide covering pipe layout, drainage, water supply lines, common mistakes, and professional installation tips.
What Causes Water Heater to Leak from Drain Valve?Learn what causes a water heater to leak from the drain valve, including common problems, repair methods, prevention tips, and when to replace damaged components.
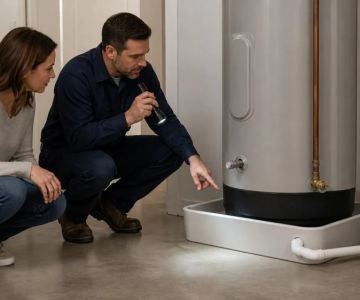
Why Is My Water Heater Not Draining? Causes and FixesIs your water heater not draining properly? Learn the common causes, troubleshooting steps, and maintenance tips to fix water heater draining problems safely.Why Is My Water Heater Not Draining? Causes and FixesWater Heater Won’t Drain? Common Reasons and What You Can Dowater-heater-not-draining-causessediment-buildup-and-mineral-depositschecking-the-drain-valve-and-connectionssafe-steps-to-drain-a-water-heaterwhen-to-call-a-professionalpreventing-future-water-heater-draining-issues1. Why Is My Water Heater Not Draining?Few household problems are more frustrating than discovering that your water heater is not draining when you are trying to perform routine maintenance or prepare for a replacement. Many homeowners expect water to flow out immediately after opening the drain valve, but sometimes nothing happens, only a small trickle appears, or the water stops flowing after a few seconds.If you are wondering, “Why is my water heater not draining?” the answer usually comes down to a few common issues: sediment buildup inside the tank, a clogged drain valve, a blocked opening caused by mineral deposits, or a pressure problem preventing water from leaving the tank.A water heater works by storing and heating water inside a large tank. Over time, minerals from the water supply settle at the bottom of the tank. These deposits can become thick enough to interfere with normal operation, including the draining process. This is especially common in homes with hard water.Many homeowners only think about their water heater when there is no hot water, but regular maintenance plays a major role in extending the life of the unit. Understanding the reasons behind water heater draining problems can help you avoid expensive repairs and keep your system working efficiently.Common situations where draining problems appearWater heater drainage issues often happen during annual maintenance, when replacing an old unit, or when homeowners try to flush the tank for the first time. A common experience is opening the drain valve and expecting several gallons of water to come out, only to find that the tank appears completely blocked.For example, one homeowner noticed that their 10-year-old water heater would not drain before installation of a new unit. After opening the valve, only a few drops came out. The problem was not the plumbing connection but years of sediment accumulation that had hardened at the bottom of the tank.Situations like this are more common than many people realize. A water heater can continue producing hot water while slowly collecting debris inside, making drainage problems appear suddenly later.2. How Sediment Buildup Prevents a Water Heater From DrainingOne of the biggest reasons a water heater is not draining is sediment buildup. Inside every traditional tank-style water heater, minerals naturally separate from the water and settle at the bottom of the tank.Calcium, magnesium, and other minerals can combine with dirt and rust particles to create a thick layer that resembles hardened sand or mud. Over years, this material can become compacted and block the drain opening.Why hard water creates bigger problemsHomes located in areas with hard water often experience faster sediment accumulation. Hard water contains higher levels of dissolved minerals, which means the tank collects deposits more quickly.As sediment builds up, homeowners may notice additional warning signs:Strange popping or rumbling sounds from the tankLonger heating timesReduced hot water capacityHigher energy billsCloudy or rusty-looking waterThe sediment layer acts like insulation between the burner or heating element and the water. This forces the system to work harder, reducing efficiency and increasing wear on internal components.Why flushing the tank mattersRegular flushing helps remove loose sediment before it becomes a serious blockage. Many manufacturers recommend flushing a water heater once a year, although homes with hard water may require more frequent maintenance.Taking preventive action is usually much easier than dealing with a completely clogged water heater drain valve later.3. Problems With the Water Heater Drain ValveIf sediment is not the main problem, the drain valve itself may be preventing water from leaving the tank. The drain valve is a small component, but it plays an important role during maintenance.Over time, drain valves can become clogged, damaged, or stuck. Plastic valves are especially vulnerable because they can crack or become brittle after years of exposure to heat.Signs of a clogged drain valveA clogged drain valve often creates specific symptoms:No water comes out after opening the valveWater flows extremely slowlyThe valve leaks around the handleThe valve cannot be opened properlySometimes the valve is technically open, but sediment has blocked the small internal passage. In this situation, the tank may still contain dozens of gallons of water that cannot escape.Checking the valve safelyBefore inspecting any water heater component, safety should come first. Turn off the power supply for electric water heaters or shut off the gas supply for gas models. The water inside the tank may be extremely hot, so allowing time for cooling is important.If the valve appears damaged or stuck, replacing it may be necessary. However, forcing an old valve can sometimes create leaks or cause additional damage.4. How to Drain a Water Heater CorrectlyKnowing how to drain a water heater properly can help prevent future problems and improve system performance. The process requires patience because a full tank can contain a significant amount of water.Step 1: Turn off the energy sourceFor electric units, switch off the circuit breaker. For gas units, turn the thermostat setting to the appropriate off position and follow manufacturer instructions.Step 2: Shut off the water supplyClose the cold-water inlet valve located above the water heater. This prevents additional water from entering while the tank is draining.Step 3: Connect a proper drainage hoseAttach a garden hose designed for hot water use to the drain valve. Place the other end somewhere safe, such as a floor drain or approved outdoor location.Step 4: Open a hot water faucetOpening a faucet inside your home allows air to enter the system, helping water flow more smoothly from the tank.Step 5: Open the drain valve carefullyIf the water does not flow, do not immediately assume the tank is empty. A blockage may be preventing drainage. In many cases, the issue requires clearing sediment or replacing the valve.5. When a Water Heater Draining Problem Needs Professional HelpWhile some maintenance tasks can be handled by experienced homeowners, certain situations require professional assistance. A water heater contains hot water, pressure, gas connections, and electrical components, so mistakes can create safety risks.Professional help may be needed when:The drain valve is broken or leakingThe tank contains severe sediment blockageThe water heater is very oldThe tank shows signs of corrosionThere are electrical or gas-related concernsA professional technician can inspect the system, safely remove blockages, replace damaged parts, and determine whether repair or replacement makes more financial sense.For homeowners looking for reliable maintenance products, replacement components, or water heater solutions, visiting trusted home improvement resources such as HomeFix Solutions can help you find options designed for long-term performance and easier maintenance.6. How to Prevent Water Heater Drainage ProblemsThe best way to avoid asking “Why is my water heater not draining?” is regular maintenance. A small amount of attention each year can prevent major issues later.Flush your water heater regularlyAnnual flushing helps remove sediment before it becomes compacted. This simple habit can improve efficiency and extend the lifespan of your water heater.Monitor water qualityIf your home has hard water, consider using water treatment solutions to reduce mineral buildup. Less mineral accumulation means fewer problems inside the tank.Inspect the drain valveDuring routine checks, look for leaks, corrosion, or difficulty operating the valve. Replacing a worn valve before it fails can prevent emergency situations.Pay attention to unusual soundsPopping and cracking noises often indicate sediment heating inside the tank. These sounds are early warnings that maintenance may be needed.Understanding Your Water Heater Before Problems Get WorseA water heater that will not drain is usually a sign of an underlying maintenance issue rather than a random failure. Whether the cause is sediment buildup, a clogged valve, or internal blockage, identifying the problem early can save time, money, and stress.Many homeowners wait until their water heater stops working completely before taking action. However, simple maintenance products, replacement parts, and professional-grade solutions can make caring for your system much easier.If you are dealing with a water heater not draining problem or want to improve your home's hot water system, explore quality water heater maintenance products and solutions that can help keep your unit running efficiently. Taking action today can help prevent costly repairs tomorrow and keep your home comfortable year-round.
Why Your Water Heater Keeps Turning Off Randomly and How to Fix ItLearn why your water heater turning off randomly happens, what causes shutdowns, and how to fix pilot light, thermostat, gas, or electrical issues effectively.
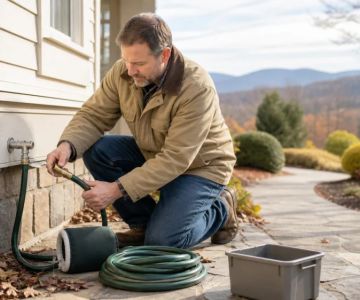
How to Fix a Leaking Outdoor Hose Connection Step by Step GuideLearn how to fix a leaking outdoor hose connection with simple step-by-step methods. Discover DIY repair tips, common causes, and long-lasting solutions for hose leaks.
What Causes Plumbing Pipes to Freeze Quickly? Cold Weather Pipe Freeze GuideLearn what causes plumbing pipes to freeze quickly, how cold weather affects your plumbing system, real homeowner stories, and practical prevention methods to avoid costly pipe damage.
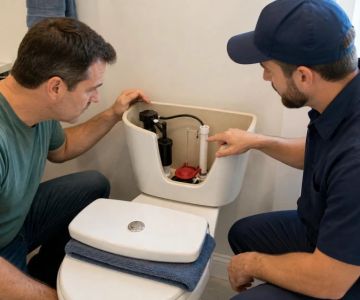
How to Replace a Broken Toilet Fill Valve: Step-by-Step Fix GuideLearn how to replace a broken toilet fill valve with a simple step-by-step DIY guide. Fix a running toilet, stop leaks, and restore efficient flushing with this practical home repair tutorial.How to Replace a Broken Toilet Fill Valve: Step-by-Step Fix GuideA Practical Home Fix for a Running Toilet: Replacing the Fill Valve Without StressUnderstanding-the-problem-why-toilet-fill-valves-fail - Learn how a broken fill valve affects water flow, noise, and efficiencyTools-and-preparation-before-you-start - What you need to safely begin the repair at homeStep-by-step-toilet-fill-valve-replacement - A clear walkthrough for replacing the faulty partCommon-mistakes-to-avoid-during-installation - Real issues beginners run into and how to prevent themReal-home-scenario-and-lessons-learned - A relatable homeowner story showing why timing mattersMaintenance-tips-and-long-term-toilet-care - How to prevent future failures and extend system lifeWhen-to-consider-upgrading-your-toilet-components - Knowing when replacement beats repeated repairsUnderstanding Why a Toilet Fill Valve Breaks in the First PlaceA toilet that keeps running or refilling randomly is usually dealing with a worn-out fill valve. This small component controls how water enters the tank after every flush. When it starts to fail, you may hear constant hissing, slow tank refills, or even water spilling into the overflow tube. Many homeowners ignore these early warnings, assuming it is a minor annoyance, but over time it can waste a surprising amount of water and increase utility bills.In most residential homes, fill valves wear out due to mineral buildup, fluctuating water pressure, or simple aging. If you live in an area with hard water, the internal seals can degrade even faster. Understanding this helps you recognize why replacing the part is often more effective than trying temporary fixes.Preparing for a Safe and Smooth Repair ProcessBefore starting the replacement, it is important to shut off the water supply behind the toilet. This simple step prevents accidental flooding and keeps your workspace dry. Once the water is off, flush the toilet to empty most of the tank.Having the right tools makes the process easier. Most homeowners only need an adjustable wrench, a sponge or towel for residual water, and a replacement fill valve compatible with standard toilet tanks. Choosing a high-quality replacement part is essential because cheaper models may wear out faster, leading to repeated repairs.If you are unsure which model fits your toilet, checking the manufacturer details or tank size can save you frustration later. Some homeowners prefer upgrading to modern universal fill valves that adjust automatically, reducing long-term maintenance issues.Step-by-Step Process to Replace a Broken Toilet Fill ValveStep 1: Empty and Dry the TankAfter shutting off the water, flush the toilet and hold the handle down to remove as much water as possible. Use a sponge to soak up remaining water. A dry tank makes the replacement cleaner and easier to manage.Step 2: Disconnect the Old Fill ValveLocate the water supply line beneath the tank and carefully unscrew it. Inside the tank, loosen the locknut securing the fill valve. Once removed, lift the old unit out gently.Step 3: Install the New Fill ValvePlace the new valve into the same opening and adjust the height according to your tank size. Secure it tightly with the locknut underneath. Make sure the refill tube is properly positioned toward the overflow pipe.Step 4: Reconnect Water and TestTurn the water supply back on slowly. Let the tank fill and observe how the valve behaves. If everything is installed correctly, the water should stop at the proper level without continuous running or noise.Common Mistakes Homeowners Make During InstallationOne of the most frequent errors is over-tightening the locknut, which can crack the tank base or damage the seal. Another issue is incorrect float adjustment, leading to either underfilled or overfilled tanks. Some beginners also forget to check for small leaks around the connection points after installation.In one real case from a suburban home renovation project, a homeowner replaced the valve but skipped testing the overflow tube alignment. The result was continuous water flow for days before they noticed the increased water bill. Small oversights like this highlight why careful step-by-step attention matters.Real-Life Example: A Simple Fix That Prevented Bigger DamageA homeowner in a busy household noticed their toilet refilling every 20 minutes. At first, they ignored it, assuming it was normal wear. After a month, their water bill increased significantly. Once inspected, the fill valve was found to be stuck open due to mineral buildup.By replacing the valve in under an hour, they immediately stopped the water waste. This small repair prevented potential long-term damage to internal toilet components and reduced unnecessary expenses. Situations like this are more common than many people realize, especially in older homes.Maintenance Habits That Extend Toilet System LifespanRegular inspection of your toilet system can help you avoid sudden breakdowns. Checking for slow refilling, unusual sounds, or inconsistent water levels can signal early valve issues. Cleaning the inside of the tank every few months also helps reduce sediment buildup.Using water softening solutions in areas with hard water can significantly reduce mineral deposits. These small preventive steps can extend the life of your fill valve and reduce the need for frequent replacements.When Upgrading Becomes the Smarter ChoiceSometimes replacing the fill valve is not just a repair but an opportunity to upgrade. Modern valves are designed to be more efficient, quieter, and more adjustable than older versions. If your toilet has needed multiple repairs in a short time, upgrading the internal components can be more cost-effective in the long run.Homeowners looking for reliable plumbing solutions often explore trusted sources like BeachCo Roofing Hub for guidance on durable home improvement components and professional recommendations. Choosing the right part can make a noticeable difference in water efficiency and system stability.Final Practical Advice for Long-Term SuccessLearning how to replace a broken toilet fill valve is one of the most useful DIY plumbing skills for homeowners. It saves money, reduces water waste, and prevents unnecessary stress when issues appear unexpectedly. With the right preparation and attention to detail, most people can complete the repair in less than an hour.If you are planning your next home maintenance upgrade or looking for dependable replacement parts, take the time to choose quality components. A well-installed fill valve ensures your toilet operates smoothly for years without recurring issues.
How to Fix Low Water Pressure After a Leak Repair: Step-by-Step GuideLearn how to fix low water pressure after a leak repair with practical plumbing steps, real homeowner stories, and expert troubleshooting tips to restore full water flow safely.
How to Replace a Toilet Flush Valve – Step-by-Step Repair GuideLearn How to Replace a Toilet Flush Valve with a clear step-by-step guide, real troubleshooting tips, and practical DIY advice for fixing common toilet issues.
How to Unclog a Bathroom Sink with Hair Blockage FastLearn how to unclog a bathroom sink with hair blockage using practical, step-by-step methods. This guide explains real-life solutions, tools, and prevention tips to fix stubborn sink clogs caused by hair buildup.
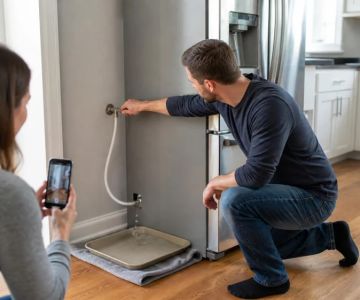
How to Fix a Leaking Ice Maker Water Line and Prevent Costly Water DamageLearn how to fix a leaking ice maker water line step by step. Discover causes, real repair methods, and prevention tips to avoid costly kitchen water damage.
Categories
Top Visited Sites
BMB & Sons LLC4.0 (101 reviews)
QSP Plumbing Services Inc4.0 (66 reviews)
Stilwell Plumbing & Drain Cleaning4.0 (277 reviews)
Askey's Plumbing5.0 (2 reviews)
Bruno Mechanical Inc.4.0 (19 reviews)
Ostroski Plumbing & Heating Inc.4.0 (156 reviews)Must-Read Plumbing Tips Posts
Top Plumber Searches
Trending Plumbing Tips Posts
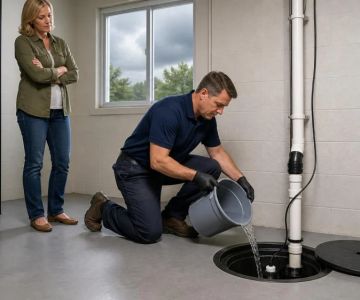
Step-by-Step Guide to Sump Pump Failure: How to Prevent and Fix Common Issues
Ultimate Guide to Clogged Drains: How to Prevent and Fix Them
How Often Should You Replace Old Pipes?
How Long Does It Take to Prevent Winter Plumbing Issues
Step-by-Step Guide to Fixing a Leaking Toilet Tank Bolt
Step-by-Step Guide to Replacing a Leaking Tub Drain Gasket