
Plumbing Tips | DIY Repairs, Maintenance & Local Advice – PlumberNear
 Water Heater Thermostat Replacement Cost Guide: What Homeowners Should Expect
Learn What Is the Cost to Replace Water Heater Thermostat? Explore real repair price ranges, DIY vs professional replacement, case studies, and expert insights to help homeowners make the right repair decision.
 Why Is My Toilet Tank Filling Slowly? Causes and Fixes Explained
Why is my toilet tank filling slowly? Learn the most common causes like fill valve issues, water pressure problems, and clogged parts, plus practical fixes you can try at home.
 How to Install a Shower Pan Liner Correctly for a Leak-Free Bathroom
Learn how to install a shower pan liner step by step. This guide explains waterproofing, shower base preparation, and common mistakes to avoid for a leak-free bathroom.
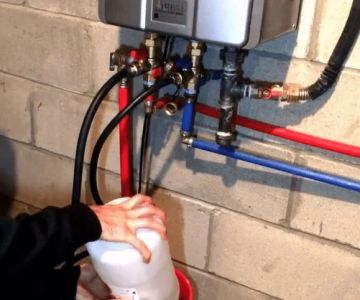 How to Install a Tankless Water Heater Flush Kit Step-by-Step Guide
Learn how to install a tankless water heater flush kit step by step with practical DIY guidance, maintenance tips, and expert insights to extend your heater’s lifespan.How to Install a Tankless Water Heater Flush Kit Step-by-Step GuideA Practical Homeowner’s Guide to Keeping Tankless Water Heaters Running SmoothlyUnderstanding-the-system-basics - Why tankless heaters need flushing and how mineral buildup affects performancePreparing-for-installation - Tools, safety steps, and what to check before starting the flush kit setupStep-by-step-installation-process - A clear breakdown of how to install a tankless water heater flush kit correctlyMaintenance-and-real-life-insights - Long-term care habits and a homeowner story of system recoveryUpgrading-and-choosing-equipment - When to replace parts and how to pick reliable flushing systemsUnderstanding Why Tankless Water Heaters Need Regular FlushingTankless water heaters are known for efficiency and endless hot water, but what many homeowners don’t realize is that their internal heating system is highly sensitive to mineral buildup. In regions with hard water, calcium and lime gradually accumulate inside the heat exchanger. Over time, this reduces heating efficiency, increases energy consumption, and can even trigger error codes or system shutdowns.A tankless system doesn’t store water like traditional tanks, so scale buildup happens directly on the heating elements. This is exactly why learning how to install a tankless water heater flush kit becomes essential for long-term maintenance rather than an optional upgrade.One homeowner from Arizona shared that their unit started delivering lukewarm water after only two years of use. After inspection, a technician found heavy scaling inside the unit. A simple flushing process restored performance almost instantly, highlighting how critical preventive maintenance really is.Preparing for a Safe and Effective InstallationBefore installing a flush kit, preparation is more important than the actual installation itself. Working with water heating systems involves both plumbing connections and electrical safety awareness. The system must always be fully powered down before beginning any work.The flush kit typically includes hoses, a submersible pump, and connection adapters. Some advanced kits also come with inline valves for easier maintenance in the future. Understanding the layout of your heater is key—most systems have dedicated service ports clearly labeled for flushing purposes.It’s also important to ensure proper ventilation in the working area. Even though this is not a high-risk gas installation, moisture and cleaning solution fumes can accumulate during the flushing process.Step-by-Step Process for Installing a Tankless Water Heater Flush KitLocating Service Valves and Preparing ConnectionsStart by identifying the hot and cold service valves on your tankless unit. These are the connection points where the flush kit hoses will attach. Most modern units are designed with user-friendly access, but older systems may require careful inspection.Attach the inlet and outlet hoses from the flush kit securely to these valves. A common mistake beginners make is not tightening the connections enough, which can lead to leaks during circulation.Setting Up the Circulation Pump SystemThe submersible pump is the heart of the flushing system. Place it inside a cleaning bucket filled with descaling solution. This solution helps break down calcium deposits effectively without damaging internal components.Once the pump is placed correctly, connect the hose from the bucket to the cold-water inlet valve. The outlet hose should return back into the bucket, creating a closed loop system that continuously circulates cleaning fluid through the heater.Running the Flushing CycleTurn on the pump and allow the solution to circulate for 45 to 60 minutes. During this time, you may notice bubbles or slight discoloration in the bucket—this is a sign that mineral deposits are being dissolved.In one real-world case shared by a Florida homeowner, the first flush cycle revealed cloudy water with visible sediment. After two full cycles, the system returned to near-original efficiency, reducing heating time significantly.Rinsing and System ResetAfter flushing, disconnect the system and flush clean water through the heater to remove any remaining solution. This step ensures no chemical residue is left behind.Once complete, reconnect the heater to normal water supply and restore power. Check for leaks and run hot water taps throughout the home to confirm stable operation.Common Mistakes and Professional InsightsMany DIY users underestimate how often tankless heaters should be flushed. In areas with hard water, professionals recommend doing it once or twice a year. Skipping maintenance can shorten the lifespan of the system significantly.Another common mistake is using the wrong descaling solution. Harsh acids can damage internal seals, while weak solutions may not fully remove buildup. Using manufacturer-approved cleaning agents is always the safest approach.Experienced plumbers often emphasize that installing a flush kit is not just about the initial setup—it’s about making future maintenance easier. A properly installed system can reduce service time dramatically and prevent emergency breakdowns.Real-Life Scenario: A Costly Repair AvoidedA homeowner in Texas once ignored annual maintenance, assuming their tankless system was “self-cleaning.” After three years, the unit stopped producing hot water entirely. The repair estimate exceeded several hundred dollars due to severe internal scaling.After replacing the unit, they installed a flush kit immediately and began routine maintenance. Two years later, the system is still operating efficiently with no issues. This case highlights how small preventative actions can save significant long-term costs.Choosing Quality Equipment for Long-Term ReliabilityNot all flush kits are created equal. High-quality kits include durable pumps, heat-resistant hoses, and corrosion-resistant fittings. Cheaper alternatives may work temporarily but often fail under repeated use.For homeowners looking to maintain their systems properly, investing in a reliable kit is essential. Platforms like Pickering Roofing also provide access to trusted home maintenance solutions and can guide users toward compatible equipment and services that ensure long-term system health.A good flush kit not only simplifies installation but also ensures consistent performance across multiple maintenance cycles.Why Regular Maintenance Protects Your InvestmentTankless water heaters are designed for longevity, often lasting over 15 years when properly maintained. However, neglecting descaling can cut that lifespan in half. Regular flushing preserves energy efficiency, prevents overheating, and reduces repair frequency.Homeowners who adopt a consistent maintenance routine often report lower utility bills and fewer service calls. It’s a small effort that delivers long-term financial and operational benefits.Understanding how to install a tankless water heater flush kit empowers homeowners to take control of their plumbing system rather than relying solely on emergency repairs.
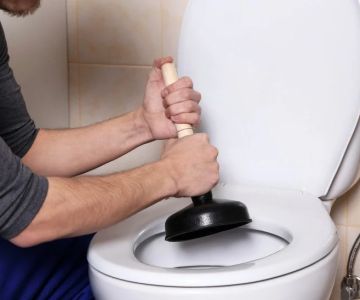 What to Do If Your Toilet Overflows and How to Handle It Fast
Learn exactly what to do if your toilet overflows with step-by-step emergency actions, cleanup methods, and prevention tips to avoid future plumbing disasters.
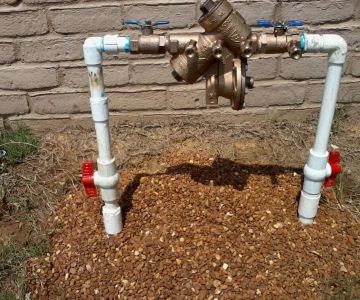 How to Install a Backflow Preventer at Home Step by Step Guide
Learn how to install a backflow preventer at home with a detailed step-by-step guide, real homeowner examples, plumbing safety tips, and expert insights for protecting your water system.
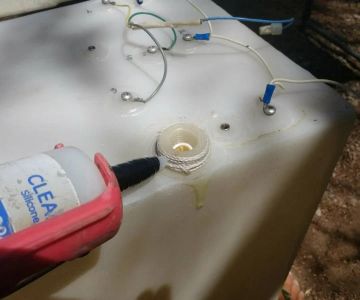 How to Fix a Cracked Water Heater Tank: Repair Guide & Solutions
Learn how to identify and handle a cracked water heater tank, explore real repair options, safety risks, and when replacement is necessary in this practical guide.
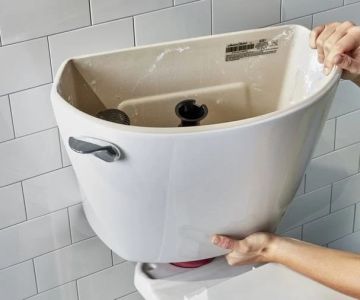 Why Is My Toilet Tank Cracked? Causes, Fixes, and Prevention Guide
Learn why your toilet tank cracked, common causes, repair options, and prevention tips. A practical guide to toilet tank cracked issues with expert advice and real-life examples.
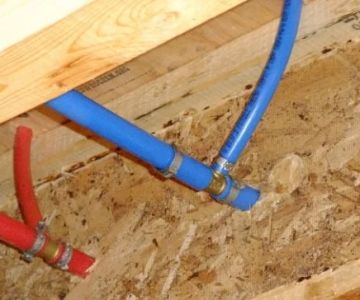 How to Fix a Leaking PEX Pipe Connection Step-by-Step Guide
Learn how to fix a leaking PEX pipe connection with step-by-step instructions, common causes, repair methods, and real homeowner examples to prevent future leaks.
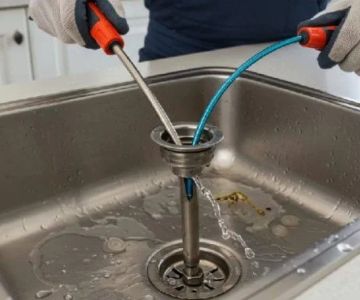 How to Fix a Slow Draining Kitchen Sink Permanently and Stop Recurring Clogs
Learn how to fix a slow draining kitchen sink permanently with proven DIY methods, real household case studies, and expert plumbing insights to stop clogs and restore full drainage.
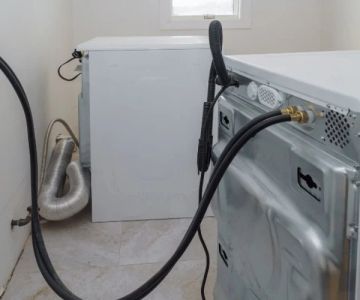 Why Is My Washing Machine Drain Backing Up? Causes and Fixes
Learn why your washing machine drain is backing up, what causes it, and how to fix it safely. A practical guide to washer drainage problems, clogs, and plumbing solutions.
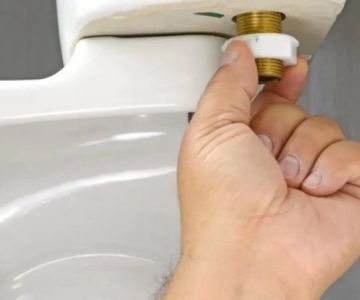 How to Replace a Broken Toilet Fill Valve Step-by-Step Guide
Learn how to replace a broken toilet fill valve step by step. This DIY guide explains tools, troubleshooting, and repair methods to fix toilet tank issues safely and efficiently.How to Replace a Broken Toilet Fill Valve Step-by-Step Guidediagnosis-basics-step-by-step-reasoning-for-toilet-fill-valve-failuretools-preparation-what-you-need-before-starting-repairremoval-process-how-to-safely-take-out-old-fill-valveinstallation-guide-how-to-install-new-toilet-fill-valve-correctlytesting-adjustment-how-to-ensure-proper-water-flow-and-functionUnderstanding Why Toilet Tanks Stop Filling ProperlyA toilet that suddenly stops filling correctly can feel like a small household crisis. In many American homes, the root cause is often a broken or worn-out fill valve. When learning how to replace a broken toilet fill valve, it helps to first understand what actually goes wrong inside the tank. The fill valve controls the water entering the tank after every flush, and once it starts failing, symptoms appear quickly—slow refill, constant running water, or even no refill at all.One real example comes from a homeowner in Texas who noticed their toilet taking nearly ten minutes to refill. At first, they assumed it was low water pressure in the area, but after inspection, the fill valve diaphragm was clogged with mineral buildup. This is a common issue in regions with hard water, especially in older plumbing systems.Preparing for a Safe and Efficient DIY RepairBefore starting any repair work, preparation is the difference between a smooth fix and a messy bathroom situation. The most important step in understanding how to replace a broken toilet fill valve is gathering the right tools and making sure the water supply is fully shut off.Typical tools include an adjustable wrench, a sponge or towel for water cleanup, and a replacement fill valve compatible with your toilet model. Some modern fill valves come with universal fittings, which make installation easier for beginners.In a real household scenario, a renter in California attempted a quick fix without turning off the water completely. The result was a small overflow inside the tank. While it wasn’t damaging, it highlights why careful preparation matters more than speed.For homeowners who prefer guided solutions or want reliable plumbing parts, checking resources like Reliable Damage Hub can help connect you with suitable repair tools and professional-grade replacement components.Shutting Off Water and Emptying the Toilet Tank ProperlyThe first physical step in how to replace a broken toilet fill valve is turning off the water supply valve located behind or near the toilet base. Once the water is shut off, flushing the toilet removes most of the remaining water in the tank.Any leftover water should be removed using a sponge or small cup. This step is often overlooked, but leaving water inside the tank can make the replacement process uncomfortable and less precise.A plumbing technician once shared that nearly 40% of DIY mistakes happen because people rush through draining the tank. Taking a few extra minutes here ensures a cleaner and safer installation process later.Removing the Old Fill Valve Without Damaging the TankOnce the tank is empty, the next step is disconnecting the old fill valve. This involves unscrewing the water supply line and loosening the locking nut beneath the tank. Carefully lifting the old valve out prevents cracks or damage to the ceramic surface.When working on older toilets, especially those over 15 years old, parts may be corroded or stuck. In such cases, gentle pressure combined with steady rotation usually works better than force.A homeowner in Florida shared a case where excessive force cracked a plastic connector, turning a simple replacement into a full tank hardware replacement. This reinforces the importance of patience during removal.Installing the New Fill Valve for Reliable Water FlowThe installation process is the core of how to replace a broken toilet fill valve correctly. The new valve should be adjusted to match the height of the existing overflow tube inside the tank. Most modern valves are adjustable, allowing customization for different toilet models.Once positioned, the locking nut should be tightened just enough to secure the valve without over-compressing the rubber gasket. Over-tightening can cause leaks later, which is a common beginner mistake.After securing the valve, reconnect the water supply line carefully. Ensuring all connections are snug but not overly forced helps maintain long-term durability.For homeowners looking to upgrade rather than just repair, modern fill valves offer quieter refill systems and water-saving features, which can reduce monthly utility bills over time.Testing the System and Making Final AdjustmentsOnce installation is complete, slowly turn the water supply back on. Watch the tank fill cycle carefully to ensure smooth operation. The float level may need slight adjustment depending on the toilet model and desired water level.If the toilet continues running after filling, it usually indicates that the float is set too high or the valve is not seated properly. Minor adjustments usually solve the issue within minutes.A case from a property manager in New York showed that simple float calibration reduced tenant complaints about running toilets by nearly 80%. Small adjustments often make a big difference in long-term performance.When Professional Help Might Still Be the Better OptionAlthough learning how to replace a broken toilet fill valve is a manageable DIY task, there are situations where professional assistance is more practical. Severe corrosion, multiple simultaneous tank issues, or recurring leaks may indicate deeper plumbing problems.In such cases, combining DIY knowledge with expert support ensures long-term reliability. Even experienced homeowners occasionally rely on specialists for complex plumbing configurations.If you are considering upgrading your bathroom plumbing system or replacing multiple components, exploring trusted resources like Reliable Damage Hub can help you find suitable solutions and maintenance options tailored to your home.Building Confidence in Basic Toilet RepairsUnderstanding toilet repair builds long-term confidence in household maintenance. Once you know how to replace a broken toilet fill valve, similar repairs like flapper replacement or handle adjustments become much easier to handle.Many homeowners find that after completing their first successful repair, they begin approaching other maintenance tasks with less hesitation. It’s not just about fixing a toilet—it’s about gaining control over everyday home systems and reducing unnecessary service costs.
 What Causes Hot Water to Smell Bad? Understanding the Real Reasons Behind It
Discover what causes hot water to smell bad, including bacteria buildup, sulfur reactions, and plumbing issues. Learn real solutions, case stories, and prevention tips for cleaner water.
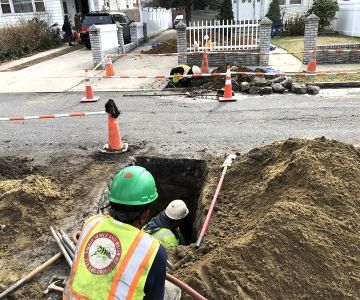 What Is the Cost to Replace Main Drain Line? Homeowner Guide
Learn what affects the cost to replace a main drain line, including materials, labor, and damage level. A practical homeowner guide with real examples and expert insights.
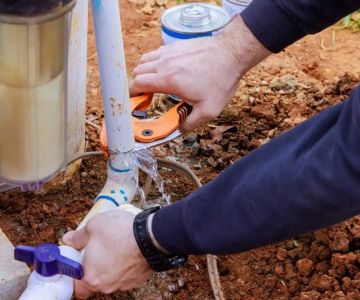 How to Fix a Leaking Outdoor Water Line: Step-by-Step Repair Guide
Learn how to fix a leaking outdoor water line with practical step-by-step methods, real homeowner stories, and expert repair insights. Discover how to detect leaks, repair underground pipes, and prevent costly outdoor water damage.
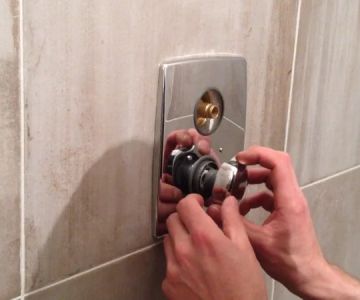 How to Install a New Bathroom Shower Valve – Step-by-Step Guide
Learn how to install a new bathroom shower valve with a clear step-by-step guide, real-life tips, and professional insights for safe and effective plumbing upgrades.
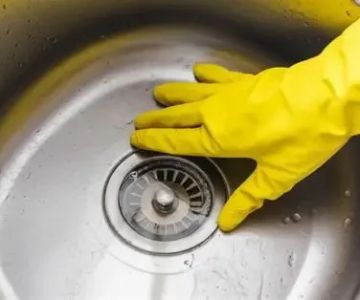 Best DIY Methods to Unclog a Kitchen Sink with Standing Water That Actually Work
Learn the best DIY methods to unclog a kitchen sink with standing water using safe, effective home techniques. Practical tips, real examples, and step-by-step solutions included.Best DIY Methods to Unclog a Kitchen Sink with Standing Water That Actually WorkSimple Ways to Fix a Stubborn Kitchen Sink Backup Without Panic Understanding the Problem - Why standing water forms in kitchen sinks and what it usually means Safe First Response - What to do immediately when water stops draining Natural DIY Methods - Simple household solutions that often restore flow Mechanical Clearing - Using basic tools to break or remove clogs Preventing Future Clogs - Long-term habits to avoid repeating the issue Real-Life Scenario - A common household case and how it was resolvedWhy a Kitchen Sink Suddenly Fills With Standing WaterA kitchen sink that refuses to drain is usually not a random failure. In most American homes, the issue develops slowly as grease, soap residue, and food particles accumulate inside the pipe walls. Over time, this buildup narrows the passage until water has nowhere to go.One of the most overlooked causes is how modern cooking habits affect drainage systems. Oils from frying pans, even when rinsed with hot water, cool down inside the pipes and harden. When combined with coffee grounds, rice, or vegetable scraps, the result is a compact blockage that traps water above it.In apartment settings, this problem can become even more frustrating because shared plumbing lines may contribute to recurring backups. In such cases, identifying whether the issue is local or system-wide becomes essential before attempting repairs.What to Do First When Water Starts Backing UpWhen standing water appears, the first instinct is often to run more water or continue using the sink. That usually makes things worse. The safer approach is to stop all water use immediately and assess the situation calmly.Start by removing visible debris from the sink basin. If water is still draining slowly, avoid adding chemicals right away. Instead, observe whether the water level changes over 10–15 minutes. This helps determine whether the clog is partial or complete.A common household story involves a family in Chicago who ignored early slow drainage for weeks. Eventually, their sink overflowed during dinner prep, turning a minor blockage into a messy kitchen cleanup. Early response could have prevented the escalation.Best DIY Methods to Unclog a Kitchen Sink With Standing WaterThere are several reliable home techniques that often restore flow without professional tools. These methods are especially useful for mild to moderate blockages.Hot Water Flush TechniqueBoiling water is one of the simplest solutions. Carefully pour it in stages, allowing heat to soften grease buildup. This method works best when the clog is primarily fat-based rather than solid debris.Baking Soda and Vinegar ReactionA combination of baking soda followed by vinegar creates a bubbling reaction that helps loosen residue. After letting it sit for 20–30 minutes, flushing with hot water can clear partially blocked pipes.Dish Soap and Warm Water MethodDish soap is surprisingly effective because it breaks down grease. When combined with warm water pressure, it can help move soft clogs further down the line.Many homeowners find that rotating between these natural methods over a short period can gradually restore drainage without harsh chemicals that might damage older plumbing systems.Using Simple Tools to Remove Stubborn BlockagesWhen natural methods fail, mechanical tools become necessary. A basic sink plunger is often the first line of defense. The key is ensuring enough water coverage to create suction pressure.If plunging does not work, a drain snake or hand auger can physically break apart or retrieve deeper clogs. This is especially useful when food debris has compacted far down the pipe.In one real case from a suburban household in Texas, repeated clogs were traced to a lost utensil fragment stuck in the P-trap. Once removed, drainage returned to normal immediately. This highlights how physical obstructions sometimes require direct extraction.Long-Term Habits That Keep Kitchen Drains FlowingPrevention is often more effective than repair. Small habits can significantly reduce the chances of future sink blockages.Avoid pouring cooking oil directly into the sink, even with hot water. Instead, dispose of grease in a sealed container. Installing a simple mesh drain catcher can also prevent food particles from entering the pipes.Routine maintenance using hot water flushes once or twice a week helps keep buildup under control. These small steps often eliminate the need for emergency unclogging in the future.Homeowners looking for reliable plumbing tools and maintenance solutions can explore Reliable Damage Hub, where practical equipment and home repair resources are available to support long-term plumbing care.A Real Household Situation and How It Was ResolvedA young couple in a rental apartment noticed their kitchen sink draining slower each week. At first, they ignored it, assuming it was temporary. Eventually, water began pooling during dishwashing, creating daily inconvenience.They first tried boiling water and baking soda without success. After consulting basic plumbing guidance, they used a simple drain snake and discovered a thick grease-and-food blockage. Once cleared, they adopted regular maintenance habits and never faced the issue again.This kind of situation is extremely common, especially in busy households where cooking is frequent and sink maintenance is overlooked. Understanding early warning signs can prevent costly repairs later.Final Practical Insight for HomeownersDealing with a blocked kitchen sink is less about panic and more about methodical action. Whether using natural solutions or simple tools, most cases of standing water can be resolved at home with patience and the right approach.For homeowners who want to stay ahead of future issues, investing in proper maintenance tools and learning basic drain care routines can make a noticeable difference in daily kitchen comfort and plumbing reliability.
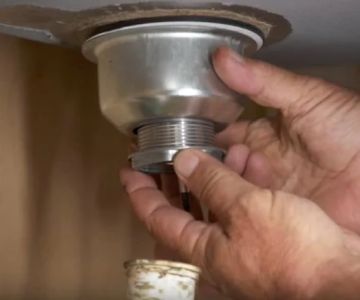 How to Install a New Utility Sink Drain Step-by-Step Guide
Learn How to Install a New Utility Sink Drain with step-by-step instructions, real homeowner examples, and practical plumbing tips for a successful DIY utility sink installation.
Categories
Top Visited Sites
 Jerry's Plumbing0.0 (0 reviews)
 Eagle Plumbing & Repairs4.0 (23 reviews)
 Cain's Able Plumbing4.0 (619 reviews)
 CAC Plumbing, LLC4.0 (29 reviews)
 Pinkerton Plumbing5.0 (19 reviews)
 Jeff Underwood Plumbing5.0 (2 reviews)
Must-Read Plumbing Tips Posts
Top Plumber Searches
Trending Plumbing Tips Posts
 Plumbing Recurrence Log: A Practical US Checklist
 Plumbing Shutoff Map: A Practical US Checklist
 Drain Odour Check: Traps, Vents, and Safe Next Steps
 Plumbing Pressure Reading: Fixtures, Time, and Safe Limits
 Frozen Pipe Prevention: Insulation, Heat, and Safe Thawing
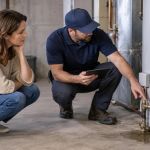 Water Heater Leak Check: Shutoff, Source, and Plumber Call