
A Practical Homeowner’s Guide to Keeping Tankless Water Heaters Running Smoothly
- Understanding-the-system-basics - Why tankless heaters need flushing and how mineral buildup affects performance
- Preparing-for-installation - Tools, safety steps, and what to check before starting the flush kit setup
- Step-by-step-installation-process - A clear breakdown of how to install a tankless water heater flush kit correctly
- Maintenance-and-real-life-insights - Long-term care habits and a homeowner story of system recovery
- Upgrading-and-choosing-equipment - When to replace parts and how to pick reliable flushing systems
Understanding Why Tankless Water Heaters Need Regular Flushing
Tankless water heaters are known for efficiency and endless hot water, but what many homeowners don’t realize is that their internal heating system is highly sensitive to mineral buildup. In regions with hard water, calcium and lime gradually accumulate inside the heat exchanger. Over time, this reduces heating efficiency, increases energy consumption, and can even trigger error codes or system shutdowns.
A tankless system doesn’t store water like traditional tanks, so scale buildup happens directly on the heating elements. This is exactly why learning how to install a tankless water heater flush kit becomes essential for long-term maintenance rather than an optional upgrade.
One homeowner from Arizona shared that their unit started delivering lukewarm water after only two years of use. After inspection, a technician found heavy scaling inside the unit. A simple flushing process restored performance almost instantly, highlighting how critical preventive maintenance really is.
Preparing for a Safe and Effective Installation
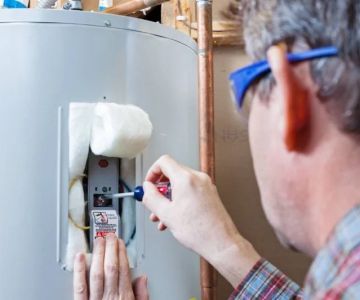
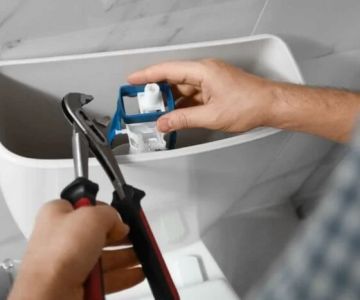
Before installing a flush kit, preparation is more important than the actual installation itself. Working with water heating systems involves both plumbing connections and electrical safety awareness. The system must always be fully powered down before beginning any work.
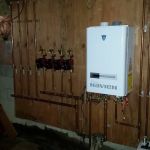
The flush kit typically includes hoses, a submersible pump, and connection adapters. Some advanced kits also come with inline valves for easier maintenance in the future. Understanding the layout of your heater is key—most systems have dedicated service ports clearly labeled for flushing purposes.
It’s also important to ensure proper ventilation in the working area. Even though this is not a high-risk gas installation, moisture and cleaning solution fumes can accumulate during the flushing process.
Step-by-Step Process for Installing a Tankless Water Heater Flush Kit
Locating Service Valves and Preparing Connections
Start by identifying the hot and cold service valves on your tankless unit. These are the connection points where the flush kit hoses will attach. Most modern units are designed with user-friendly access, but older systems may require careful inspection.
Attach the inlet and outlet hoses from the flush kit securely to these valves. A common mistake beginners make is not tightening the connections enough, which can lead to leaks during circulation.
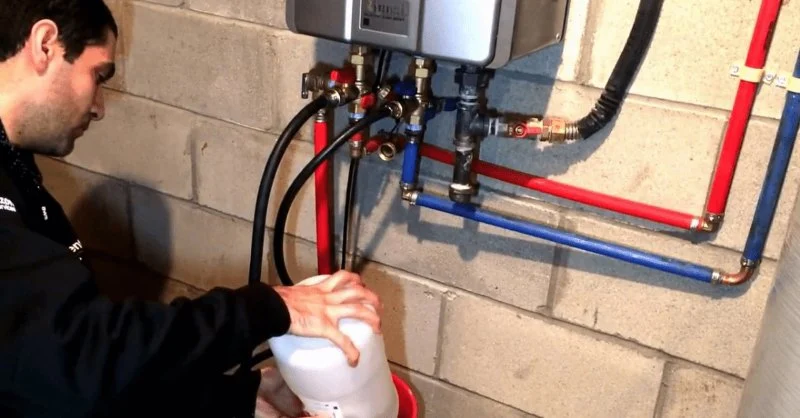
Setting Up the Circulation Pump System
The submersible pump is the heart of the flushing system. Place it inside a cleaning bucket filled with descaling solution. This solution helps break down calcium deposits effectively without damaging internal components.
Once the pump is placed correctly, connect the hose from the bucket to the cold-water inlet valve. The outlet hose should return back into the bucket, creating a closed loop system that continuously circulates cleaning fluid through the heater.
Running the Flushing Cycle
Turn on the pump and allow the solution to circulate for 45 to 60 minutes. During this time, you may notice bubbles or slight discoloration in the bucket—this is a sign that mineral deposits are being dissolved.
In one real-world case shared by a Florida homeowner, the first flush cycle revealed cloudy water with visible sediment. After two full cycles, the system returned to near-original efficiency, reducing heating time significantly.
Rinsing and System Reset
After flushing, disconnect the system and flush clean water through the heater to remove any remaining solution. This step ensures no chemical residue is left behind.
Once complete, reconnect the heater to normal water supply and restore power. Check for leaks and run hot water taps throughout the home to confirm stable operation.
Common Mistakes and Professional Insights
Many DIY users underestimate how often tankless heaters should be flushed. In areas with hard water, professionals recommend doing it once or twice a year. Skipping maintenance can shorten the lifespan of the system significantly.
Another common mistake is using the wrong descaling solution. Harsh acids can damage internal seals, while weak solutions may not fully remove buildup. Using manufacturer-approved cleaning agents is always the safest approach.
Experienced plumbers often emphasize that installing a flush kit is not just about the initial setup—it’s about making future maintenance easier. A properly installed system can reduce service time dramatically and prevent emergency breakdowns.
Real-Life Scenario: A Costly Repair Avoided
A homeowner in Texas once ignored annual maintenance, assuming their tankless system was “self-cleaning.” After three years, the unit stopped producing hot water entirely. The repair estimate exceeded several hundred dollars due to severe internal scaling.
After replacing the unit, they installed a flush kit immediately and began routine maintenance. Two years later, the system is still operating efficiently with no issues. This case highlights how small preventative actions can save significant long-term costs.
Choosing Quality Equipment for Long-Term Reliability
Not all flush kits are created equal. High-quality kits include durable pumps, heat-resistant hoses, and corrosion-resistant fittings. Cheaper alternatives may work temporarily but often fail under repeated use.
For homeowners looking to maintain their systems properly, investing in a reliable kit is essential. Platforms like Pickering Roofing also provide access to trusted home maintenance solutions and can guide users toward compatible equipment and services that ensure long-term system health.
A good flush kit not only simplifies installation but also ensures consistent performance across multiple maintenance cycles.
Why Regular Maintenance Protects Your Investment
Tankless water heaters are designed for longevity, often lasting over 15 years when properly maintained. However, neglecting descaling can cut that lifespan in half. Regular flushing preserves energy efficiency, prevents overheating, and reduces repair frequency.
Homeowners who adopt a consistent maintenance routine often report lower utility bills and fewer service calls. It’s a small effort that delivers long-term financial and operational benefits.
Understanding how to install a tankless water heater flush kit empowers homeowners to take control of their plumbing system rather than relying solely on emergency repairs.
 Coastal Inc Plumbing & Heating5.0 (8 reviews)
 4FastPlumber LLC3.0 (37 reviews)
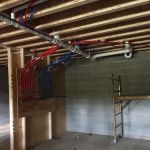 alternative plumbing3.0 (2 reviews)
 B & B Hot Water Tanks Inc5.0 (9 reviews)
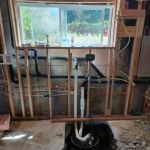 Nexus New York Plumber & Drain5.0 (54 reviews)
 2Johns Plumbing and Heating3.0 (3 reviews)
 How to Unclog a Bathtub Drain Safely and Effectively
 How to Fix a Frozen Pipe Without Causing Further Damage
 How Long Does It Take to Prevent Winter Plumbing Issues
 When Should You Call a Plumber? Tips for Finding a Reliable Plumber Near You
 When Should You Call a Plumber for Water Damage in Your Bathroom? | PlumberNear
 When Should You Call a Plumber for a Running Toilet?