
Installing a Utility Sink Drain Without the Headache: A Real DIY Approach
- #planning-layout - Understanding the Utility Sink Drain Setup Before Installation
- #tools-materials - Essential Tools and Parts Needed for Drain Installation
- #remove-old-drain - Safely Removing the Existing Drain System
- #install-drain-assembly - Step-by-Step Utility Sink Drain Installation Process
- #p-trap-connection - Proper P-Trap Alignment and Leak Prevention
- #venting-flow - Ensuring Proper Drain Ventilation and Water Flow
- #testing-leaks - How to Test Your New Drain for Leaks and Issues
- #common-mistakes - Mistakes Homeowners Make During Sink Drain Installation
- #real-diy-story - Real Home Installation Experience and Lessons Learned
- #maintenance-tips - Keeping Your Utility Sink Drain Working Long-Term
Understanding the Utility Sink Drain Setup Before Installation
Learning how to install a new utility sink drain starts long before you touch a wrench. The first thing most homeowners underestimate is how the drain system actually works. A utility sink is not just a basin—it is a complete plumbing loop that depends on gravity, proper slope, and sealed connections.
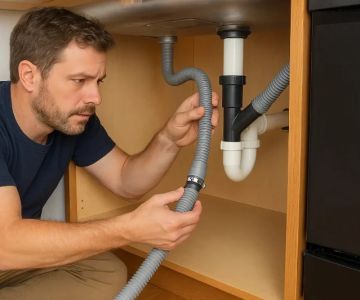
In most American homes, especially basements and garages, utility sinks connect to a P-trap and then into a branch drain line. If any part of this setup is misaligned, you’ll end up with slow drainage or unpleasant sewer odors creeping back into the space.
A homeowner in Ohio once shared how their newly installed laundry sink constantly smelled “like a swamp.” The issue wasn’t the sink—it was an incorrectly angled drain pipe that disrupted proper water sealing in the trap. This is why planning matters more than rushing into installation.

coastal & son, llc / aj appliance toms river nj
Toms RiverOcean CountyNew Jersey
1106 Verdant Rd, Toms River, NJ 08753, USA
Essential Tools and Parts Needed for Drain Installation
Before starting the process of how to install a new utility sink drain, gathering the right tools is half the battle. A missing fitting or wrong pipe size can stall the entire project halfway through.
Most installations require a standard P-trap kit, PVC pipes, pipe cement, adjustable wrench, plumber’s tape, and a hacksaw for adjustments. The exact materials may vary depending on whether your home uses PVC, ABS, or metal plumbing lines.
A DIY enthusiast in Texas once tried to complete a sink installation using mismatched fittings from an old repair kit. The result was multiple leaks that forced a full reinstallation. That experience highlights why compatibility matters just as much as skill.

Mike the Plumber / mike the plumber
1545 Ocean Ave A3, Bohemia, NY 11716, USA
Safely Removing the Existing Drain System
If you're replacing an old setup, the first physical step in how to install a new utility sink drain is removing the existing drain assembly carefully. This stage often involves dealing with tight spaces and corroded fittings.
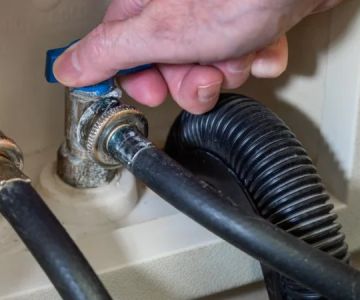
Turn off any connected water supply before loosening pipes. Use an adjustable wrench to disconnect the P-trap first, as this is usually the easiest access point. Keep a bucket underneath to catch residual water.
A homeowner in Michigan described how skipping the bucket step led to a messy basement cleanup. Small oversights like this often become the most memorable lessons in DIY plumbing projects.
Step-by-Step Utility Sink Drain Installation Process
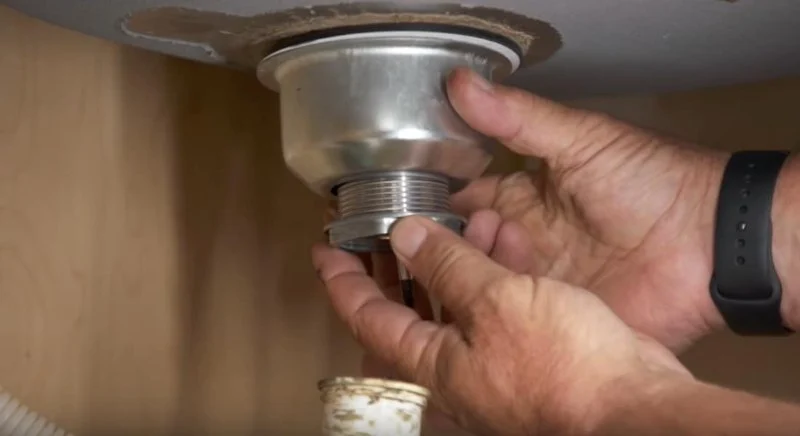
Once the old system is removed, the actual process of how to install a new utility sink drain begins. Start by attaching the sink strainer tightly to the bottom of the basin using plumber’s putty to ensure a watertight seal.
Next, connect the tailpiece to the strainer and align it with the P-trap assembly. The key here is ensuring a smooth downward slope from the sink outlet to the drain line. Gravity is your system’s best friend.
In many DIY installations across suburban homes in the U.S., improper slope is the number one cause of slow drainage. Even a slight upward tilt can trap debris and lead to clogging over time.
Proper P-Trap Alignment and Leak Prevention
The P-trap is one of the most important components in how to install a new utility sink drain. Its curved design holds water that blocks sewer gases from entering your home.
When installing, make sure both inlet and outlet pipes align perfectly with the trap. Over-tightening fittings can crack PVC joints, while loose fittings can lead to leaks.
A plumbing contractor in New Jersey once noted that nearly 40% of callback repairs involved improperly sealed P-traps. This shows how small mistakes can lead to recurring issues if not handled carefully.
Ensuring Proper Drain Ventilation and Water Flow
Proper venting is often overlooked in how to install a new utility sink drain, but it plays a critical role in maintaining smooth water flow. Without ventilation, negative pressure can slow drainage or cause gurgling sounds.
In modern homes, vent pipes are integrated into the wall system, but older homes may require additional venting solutions. Checking local plumbing codes is essential before making modifications.
A DIY remodeler in California discovered that poor venting caused repeated drain backups in their garage sink until a proper air admittance valve was installed.
How to Test Your New Drain for Leaks and Issues
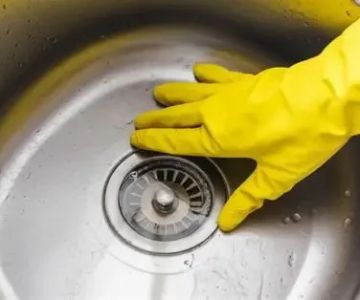
After completing installation, testing is the final step in how to install a new utility sink drain. Fill the sink with water and release it quickly while observing all joints.
Look closely at the P-trap, tailpiece, and connection points. Even minor drips should be addressed immediately by tightening or resealing joints.
A homeowner in Arizona shared that catching a small leak early saved them from water damage to their garage shelving and stored tools.
Mistakes Homeowners Make During Sink Drain Installation
Many first-time installers underestimate the complexity of how to install a new utility sink drain. One common mistake is using too much or too little pipe sealant, which can compromise connection integrity.
Another frequent issue is failing to properly align the trap, causing water to drain too quickly or not hold a proper seal. These mistakes often lead to odors or slow drainage problems.
Experienced plumbers often say that patience is more important than speed when working on drainage systems.
Real Home Installation Experience and Lessons Learned
A homeowner in Illinois once decided to upgrade their basement laundry area by learning how to install a new utility sink drain without professional help. Initially confident, they rushed through pipe alignment and ignored minor slope issues.
Within a week, they noticed water pooling under the sink. After rechecking the installation, they realized the P-trap was slightly misaligned, causing backflow. After correcting it, the system worked perfectly and has remained reliable ever since.
This type of hands-on learning experience is common among DIY homeowners and highlights the importance of precision and testing.
Keeping Your Utility Sink Drain Working Long-Term
Once you successfully complete how to install a new utility sink drain, maintenance becomes the key to long-term performance. Regular flushing with hot water helps prevent buildup of grease and debris.
Inspecting connections every few months ensures early detection of leaks or loosening fittings. Avoid pouring harsh chemicals that could degrade PVC joints over time.
Many homeowners find that simple preventive care extends the lifespan of their plumbing system significantly and reduces repair costs.
For those planning upgrades or looking for better-quality plumbing parts, exploring trusted resources like DIY plumbing guides and curated product selections can make a major difference. If you're ready to take your project further, it’s worth exploring high-quality drain kits and professional-grade fittings designed specifically for utility sinks. These small upgrades can dramatically improve durability and ease of installation—making your next DIY project even smoother.

 CITY Plumbing Heating A/C & Drain Rooter4.0 (14 reviews)
 Paul the Plumber - Nashua4.0 (98 reviews)
 Denommee Plumbing, HVAC & Electric4.0 (399 reviews)
 Parkway Plumbing Inc4.0 (26 reviews)
 Rossano Home Services5.0 (4 reviews)
 W.R.F. & Son Plumbing & Heating5.0 (8 reviews)
 What Causes a Burst Pipe and How to Prevent It in Winter | Essential Tips
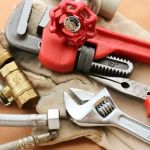 The Complete Guide to Plumbing Tools Every Homeowner Should Have
 How to Fix a Toilet That’s Not Flushing Properly
 How to Fix a Frozen Pipe Without Bursting It Safely
 Why Is My Faucet Whistling? Troubleshooting & Solutions
 How to Detect and Fix Leaking Water Pipes in Your Home