
How to Fix a Leaking Pipe in Garage Ceiling: A Step-by-Step Guide
- Understanding the Cause of a Leaking Pipe in the Garage Ceiling
- Tools and Materials You’ll Need
- Step-by-Step Guide to Fixing a Leaking Pipe
- Common Mistakes to Avoid During the Repair
- Case Study: A Homeowner’s Experience with Fixing a Leaking Pipe
- Tips to Prevent Future Leaks
Understanding the Cause of a Leaking Pipe in the Garage Ceiling
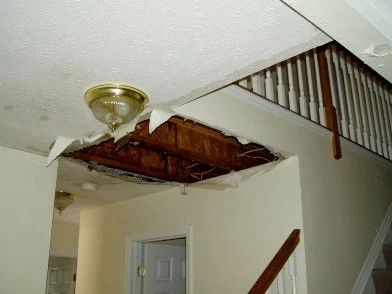
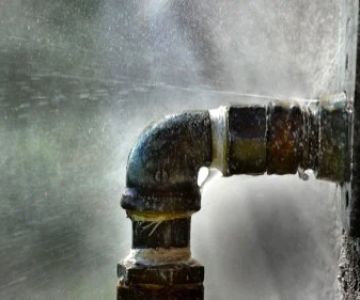
Leaking pipes in garage ceilings are a common issue, often caused by wear and tear, freezing temperatures, or poor installation. Understanding the root cause of the leak is essential before starting the repair process. If the leak is due to corrosion or a crack in the pipe, it will require a different approach than if the problem is related to a loose joint or improper sealing.
Hardy Plumbing / hardy plumbing
Port ClintonSchuylkill CountyPennsylvania
149 Penn St, Port Clinton, PA 19549, USA
Tools and Materials You’ll Need
Before you start fixing the leak, it’s important to gather all the necessary tools and materials to ensure a smooth and successful repair. Here’s what you’ll need:
- Pipe wrench
- Adjustable pliers
- Pipe cutter or hacksaw
- Pipe sealant or epoxy
- Replacement pipe or fitting
- Bucket and towels (to catch water)
- Gloves and safety goggles
Step-by-Step Guide to Fixing a Leaking Pipe
Follow these easy-to-understand steps to fix the leaking pipe in your garage ceiling:
- Step 1: Shut Off the Water Supply - Before you begin, ensure that the water supply to the affected pipe is turned off. Locate your main water shut-off valve and turn it clockwise to stop the flow of water.
- Step 2: Locate the Leak - Examine the ceiling to find the exact location of the leak. You may need to cut a small section of drywall to access the pipe if it is not easily visible.
- Step 3: Dry the Area - Once you’ve located the leak, use towels and a bucket to catch any remaining water. Dry the surrounding area thoroughly before proceeding with the repair.
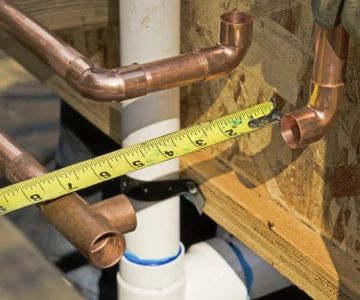
- Step 4: Cut the Pipe (if necessary) - If the leak is due to a crack or corrosion, you may need to replace the affected pipe section. Use a pipe cutter or hacksaw to carefully remove the damaged pipe.
- Step 5: Apply Sealant or Install a New Fitting - For small leaks, apply a pipe sealant or epoxy to the affected area. If the pipe is severely damaged, replace the section with a new pipe or fitting and secure it with a pipe wrench and pliers.
- Step 6: Test the Repair - Once the sealant or new pipe section is in place, turn the water supply back on and check for leaks. Let the pipe run for a few minutes to ensure the repair is holding.
Common Mistakes to Avoid During the Repair
While fixing a leaking pipe might seem straightforward, there are several mistakes that many homeowners make. Avoid these to ensure your repair lasts:
- Skipping Proper Drying: Failing to dry the area before applying sealant can result in poor adhesion and an ineffective repair.
- Using the Wrong Pipe Size: Always ensure the replacement pipe or fitting matches the size of the original pipe. Using the wrong size can cause leaks or further damage.
- Not Testing the Repair: Always check for leaks after the repair is completed. Testing ensures that the repair is holding and prevents future water damage.
Case Study: A Homeowner’s Experience with Fixing a Leaking Pipe
Jane, a homeowner from Ohio, experienced a leaking pipe in her garage ceiling after a particularly cold winter. After discovering the issue, she followed a similar step-by-step approach, replacing the damaged section of pipe with a new fitting. Jane was able to complete the repair in just a few hours, avoiding costly professional plumbing services. By properly sealing the new pipe, she has not had any issues with leaks since.
Stashluk Mechanical Contractors Inc. / stashluk
Franklin TownshipHunterdon CountyNew Jersey
998 Croton Rd, Pittstown, NJ 08867, USA
Tips to Prevent Future Leaks
Once you’ve repaired the leaking pipe, here are some tips to prevent future issues:
- Insulate Pipes: Especially in areas like garages where temperatures can drop, insulate exposed pipes to prevent freezing during winter.
- Regular Inspections: Periodically inspect your pipes for signs of wear, corrosion, or leaks. Early detection can save you from bigger problems later on.
- Maintain Proper Pressure: High water pressure can lead to pipe damage. Install a pressure-reducing valve if necessary to maintain the right pressure level in your home.
 Nuckols Plumbing, Heating & Cooling4.0 (205 reviews)
 ABS Plumbing4.0 (112 reviews)
 Red Hook Plumbing & Heating4.0 (9 reviews)
 Classic Plumbing Solutions4.0 (201 reviews)
 Universal Services Plumbing Heating Cooling5.0 (39 reviews)
 Opus Plumbing and Heating LLC5.0 (4 reviews)
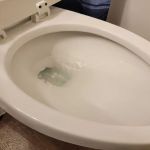 How to Stop a Gurgling Toilet: Common Causes and Fixes
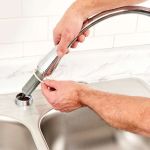 How to Install a New Sink: A Beginner’s Step-by-Step Guide
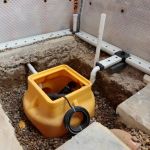 How to Prevent Your Sump Pump from Failing
 Beginner's Guide to a Broken Water Heater – What to Do and When to Call for Help
 How to Fix a Leaking Pipe Under Concrete
 Why Plumbing Maintenance is Essential for Homeowners