
Stop the Drip Below the Slab: A Practical Guide to Slab Leak Repairs
- Warning-Signs-of-a-Leaking-Pipe-Under-Concrete
- Why-Pipes-Leak-Under-Concrete-and-What-It-Means-for-Your-Home
- First-Actions-to-Take-Before-Any-Repair-Work
- How-to-Fix-a-Leaking-Pipe-Under-Concrete-Repair-Paths
- Tools-Materials-and-Decision-Points-That-Matter
- Real-Homeowner-Story-From-Discovery-to-Repair
- How-to-Avoid-Repeat-Leaks-and-Protect-Your-Slab
- Next-Steps-Choosing-the-Right-Repair-Product-or-Service
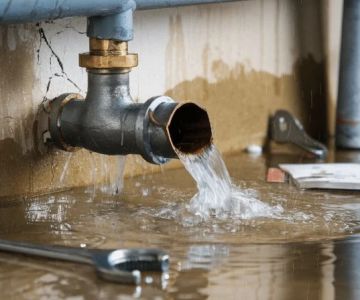
Warning Signs of a Leaking Pipe Under Concrete
A leaking pipe under concrete rarely announces itself with an obvious puddle. Most of the time it whispers—your water bill creeps up, the floor feels oddly warm in one spot, or a faint musty smell shows up even after you’ve cleaned. Homeowners often dismiss these clues because the leak is out of sight, and “out of sight” feels like “not urgent.” Unfortunately, slab leaks tend to get more expensive the longer they run.
O'Neill Bros. Plumbing / oneill plumbing
RockvilleMontgomery CountyMaryland
12348 Wilkins Ave, Rockville, MD 20852, USA
1. The subtle signs most people miss
You might notice 1 or 2 of these at first, and that’s exactly why they’re so easy to ignore:
Hardy Plumbing / hardy plumbing
Port ClintonSchuylkill CountyPennsylvania
149 Penn St, Port Clinton, PA 19549, USA
Common early indicators
1. A sudden jump in your water bill without a change in usage
2. The sound of running water when all fixtures are off
3. A warm patch on the floor (often hot-water line leaks)
4. Cracks in flooring or grout that seem to appear “randomly”
5. Damp carpet edges or baseboards with no visible source
6. Low water pressure that comes and goes
2. When a slab leak becomes a health or structural problem
If moisture has been present long enough, mold can develop around flooring, baseboards, or wall cavities—even if you never see standing water. In severe cases, ongoing saturation can contribute to shifting or cracking in the slab and cause flooring adhesives to fail. If you smell persistent mildew or see recurring discoloration, treat it as a serious signal rather than a cosmetic annoyance.
Why Pipes Leak Under Concrete and What It Means for Your Home
Understanding what caused the leak helps you choose the right fix and avoid doing the same repair twice. A lot of people assume a slab leak means “old house,” but newer homes can develop leaks too—especially in areas with shifting soil or aggressive water chemistry.
1. Typical root causes
What usually triggers failures under slabs
1. Pipe corrosion (often copper reacting to soil or water chemistry)
2. Abrasion where pipes rub against concrete or rebar
3. Poor installation: tight bends, unsupported runs, weak joints
4. Ground movement or settling that stresses plumbing lines
5. High water pressure causing slow joint fatigue over time
2. What the location tells you
A leak near a bathroom cluster might indicate a drain or supply line issue related to heavy use. A warm spot in the middle of a living room often points to a hot-water line run. The “where” matters because it affects access, repair strategy, and whether a reroute might be smarter than breaking concrete.
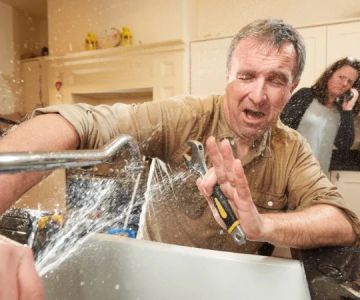
First Actions to Take Before Any Repair Work
Before you think about breaking concrete, do two things: confirm the leak and reduce damage. The goal here is to stop guessing and start narrowing down what you’re dealing with.
1. Confirm the leak with a simple meter test
If you have a water meter, turn off all fixtures and appliances that use water (including ice makers). Watch the meter for 10–15 minutes.
How to interpret the meter
1. If the meter continues moving, you likely have a leak somewhere
2. If it stops, the problem may be intermittent or fixture-related
3. If it moves faster than expected, treat it as urgent
2. Protect your home while you diagnose
If you suspect an active slab leak, reduce risk immediately:
Damage-control priorities
1. Shut off the main water supply if the leak seems significant
2. Turn off the water heater if a hot line is suspected (avoid running it dry)
3. Move furniture and rugs away from suspect areas
4. Run fans or a dehumidifier to slow moisture buildup
3. Decide whether you need professional leak detection
A good leak detection technician can pinpoint location using acoustic listening devices, thermal imaging, or pressure tests. This often saves money because it reduces unnecessary demolition. If your home has multiple bathrooms or complex plumbing runs, detection is usually worth it.
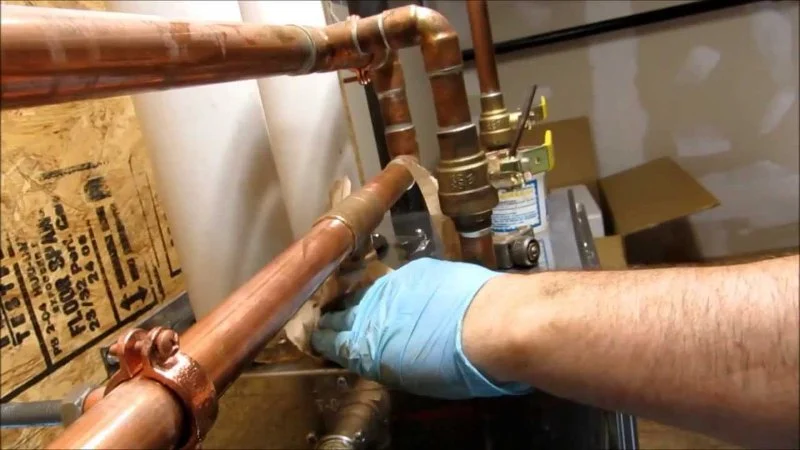
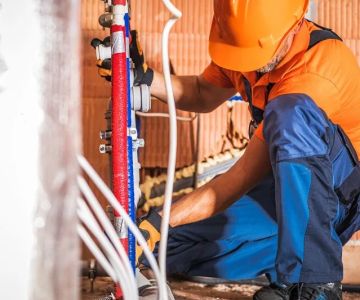
How to Fix a Leaking Pipe Under Concrete: Repair Paths
There isn’t one “best” method for every home. The best repair depends on pipe material, leak location, severity, and how much disruption you can tolerate. When people ask how to fix a leaking pipe under concrete, what they really mean is: “How do I fix this without turning my house into a construction zone?” The honest answer is: sometimes you can, sometimes you can’t—but you can almost always control the damage with the right strategy.
1. Spot repair with slab access
This is the most direct method: locate the leak, break the concrete, cut out the damaged section, and replace it. It’s common when the leak is localized and the piping system is otherwise in good shape.
When spot repair makes sense
1. The leak is in a single, clearly identified section
2. The rest of the piping shows no signs of widespread corrosion
3. The location is accessible without destroying high-value flooring
What to expect
Spot repairs are fast once the leak is exposed, but the mess is in the access work. Dust control, debris removal, and patching floors can be the bigger headache than the plumbing itself.
2. Rerouting the line
Instead of breaking the slab, a plumber may bypass the leaking section by rerouting pipes through walls, ceilings, or attic spaces. This is surprisingly common in parts of the U.S. where slab leaks happen repeatedly, especially with aging copper.
When rerouting is the smarter long-term play
1. Multiple leaks have occurred in different slab locations
2. The pipe material is known to be failing system-wide
3. The leak sits under expensive tile, hardwood, or built-ins
3. Epoxy pipe lining or trenchless solutions
Some supply lines and many drain systems can be repaired using trenchless methods. Epoxy lining creates a new internal surface inside the existing pipe. It can be less invasive, but it’s not a universal fix—eligibility depends on pipe condition, diameter, and the type of leak.
Where trenchless methods shine
1. Long pipe runs where demolition would be extensive
2. Situations where access is difficult or disruptive
3. Homes where preserving floors is a major priority
4. Temporary stabilization while planning a permanent repair
If the leak is minor and you need time to schedule a proper fix, some homeowners use pressure reduction, shutoff scheduling, or targeted drying to minimize damage. Temporary “miracle fixes” that promise to seal leaks without access are risky. If a product claims it can permanently stop a slab leak without professional evaluation, treat it with skepticism.
Tools, Materials, and Decision Points That Matter
A repair under concrete is less about brute force and more about good decisions. Two homes can have the same symptom but require completely different solutions.
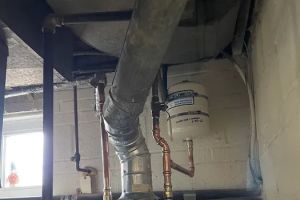
1. Know what you’re repairing: copper, PEX, or PVC
Copper often fails from corrosion or abrasion. PEX typically fails at fittings or where it was installed poorly. PVC issues are more common in drain lines and can involve cracks or joint separation.
How material influences the fix
1. Copper often points toward replacement or reroute if multiple leaks occur
2. PEX can be easier to reroute and replace in accessible areas
3. Drain line repairs may qualify for trenchless lining more often
2. Pressure matters more than most people realize
If your home runs at very high water pressure, even a perfect repair can become a short-term win. Many plumbers recommend checking pressure and using a pressure regulator if needed. A stable pressure system can reduce stress on joints and fittings over time.
3. Flooring and lifestyle factor into the “best” fix
If you’re living in the home during repairs, rerouting may be less disruptive than breaking slab and restoring flooring. But if the leak is in a utility area with unfinished floors, spot repair may be the easiest and cheapest path.
Real Homeowner Story: From Discovery to Repair
A homeowner in Phoenix noticed something odd: every morning the kitchen floor felt slightly warm near the pantry, even though the thermostat was set low. At first, they chalked it up to sunlight—until the warmth showed up at night too. Then came the water bill: about 35% higher than the previous month.
They tried the meter test and watched it tick forward with everything off. Leak detection confirmed a hot-water line leak under the slab, running through the kitchen. The first instinct was to open the floor, but the home had newly installed tile and a large island that would complicate demolition.
1. The decision they made (and why it worked)
Instead of breaking concrete, they chose a reroute through the attic and down an interior wall. It wasn’t “cheap,” but it avoided tearing up the kitchen and reduced downtime dramatically. Once completed, their floor dried out over the next couple of weeks, and the water bill returned to normal.
2. What they said they’d do differently
They admitted they ignored early signs—especially the warm spot—because they didn’t want to deal with it. Their biggest takeaway was simple: the earlier you act, the more options you have. Waiting turns a manageable repair into a full restoration project.
How to Avoid Repeat Leaks and Protect Your Slab
Fixing one leak is good. Preventing the next one is better. After a slab leak repair, a few maintenance habits can reduce the odds of a repeat problem.
1. Keep water pressure in a safe range
If your pressure is consistently high, a regulator can reduce wear on plumbing. This is especially helpful for older copper systems.
2. Pay attention to water quality
In some areas, water chemistry contributes to corrosion over time. A basic water test can reveal whether your home is dealing with factors that accelerate pipe wear.
3. Watch patterns, not just one-time symptoms
A single high bill might be a fluke. Two in a row is a pattern. The same goes for warm floor spots, mildew smell, or pressure drops. Patterns point to problems worth investigating.
Next Steps: Choosing the Right Repair Product or Service
If you’re still wondering how to fix a leaking pipe under concrete without making it worse, here’s the practical truth: the “right” fix usually comes from matching the repair method to your specific plumbing system and the leak’s location. That’s why leak detection and a clear plan matter so much.
When you’re ready to move from worry to action, consider looking into specialized slab leak repair services, pressure regulators, moisture monitoring tools, and trenchless repair options that fit your home and budget. Many homeowners find it helpful to compare updated repair products and local service options before committing, especially when flooring protection and long-term reliability are priorities.
To take the next step, explore the latest solutions designed specifically for how to fix a leaking pipe under concrete—whether that means professional leak detection equipment, modern rerouting materials, or trenchless repair systems. Learn more, compare options, and choose the approach that protects your home for the long run.


 Roto-Rooter Plumbing & Water Cleanup4.0 (434 reviews)
 Rainbow Plumbing4.0 (20 reviews)
 Nilsen Plumbing Heating & Clng0.0 (0 reviews)
 Advanced Performance Plumbing & Heating, Inc.4.0 (1 reviews)
 B&C Sewer and Drains Inc5.0 (6 reviews)
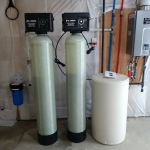 E. Cooke Plumbing and Heating LLC5.0 (96 reviews)
 Preventing Winter Plumbing Issues: Essential Tips for Homeowners
 Is It Safe to Have Water Damage in Your Bathroom? | Plumbing Insights
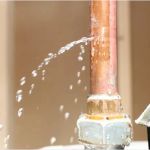 How to Fix Detecting a Hidden Water Leak: Essential Tips for Homeowners
 DIY Fixes for a Broken Water Heater
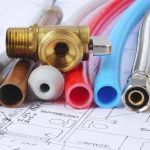 Choosing the Right Pipe Materials: A Comprehensive Guide
 What Causes Reducing Your Water Bill and How to Lower It