
DIY Steps for Replacing a Broken Toilet Seat Anchor
- 1 - Essential Tools and Materials
- 2 - Removing the Broken Toilet Seat Anchor
- 3 - Installing a New Toilet Seat Anchor
- 4 - Testing and Adjusting for Stability
- 5 - Pro Tips and Maintenance Advice
1. Essential Tools and Materials
Before beginning the repair, gather all necessary tools. Typical requirements include:

Mike the Plumber / mike the plumber
1545 Ocean Ave A3, Bohemia, NY 11716, USA
1.1 Tools
- Adjustable wrench or pliers
- Screwdriver set (flathead and Phillips)
- Cleaning supplies (mild detergent, cloth)
- Safety gloves

Warrior Plumbing & Heating / warrior plumbing
4123 Roland Ave, Baltimore, MD 21211, USA
1.2 Materials
- Replacement toilet seat anchor kit
- New toilet seat (if required)
- Optional silicone sealant for added stability
Having everything prepared saves time and prevents unnecessary frustration during the replacement process. Investing in a high-quality anchor kit ensures long-lasting results.
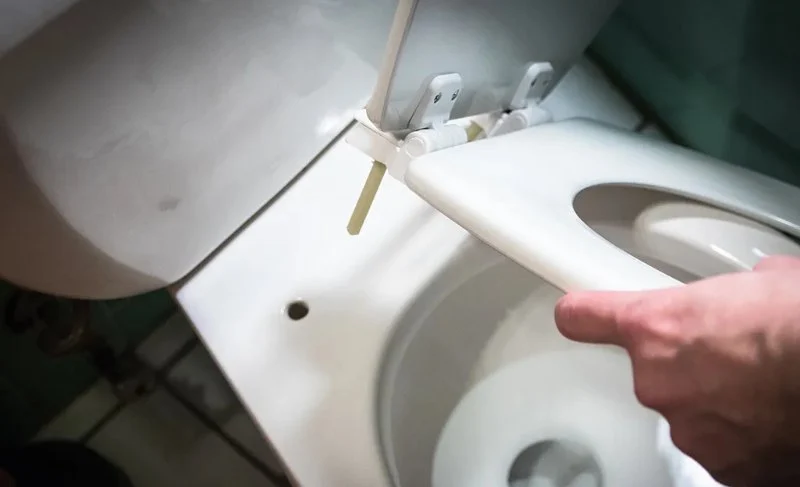
2. Removing the Broken Toilet Seat Anchor
Start by lifting the toilet seat lid and locating the anchor bolts. These are usually covered with plastic caps that can be gently pried off.
2.1 Unscrewing the Bolts
Using a screwdriver, loosen the bolts while holding the nuts underneath the toilet bowl steady with a wrench or pliers. If the bolt is stripped or corroded, apply a penetrating lubricant to ease removal.
2.2 Removing Damaged Components
Once unscrewed, carefully remove the broken anchor, taking note of any washers or spacers. Clean the surrounding area to ensure the new anchor sits flush and stable. A clean surface prevents wobbling or misalignment.
3. Installing a New Toilet Seat Anchor
Follow these steps for a secure installation:
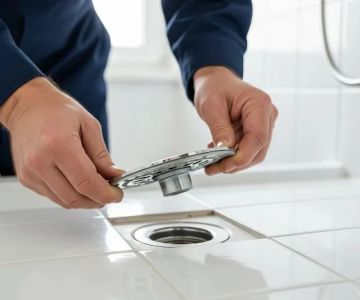
3.1 Position the New Anchor
Insert the new anchor through the existing mounting holes. Ensure it aligns properly and rests evenly on the toilet bowl surface.
3.2 Secure the Seat
Place the toilet seat over the anchor bolts, then add washers and nuts. Tighten gradually with a wrench while ensuring the seat remains centered. Avoid over-tightening to prevent cracking the toilet or damaging the hardware.
4. Testing and Adjusting for Stability
4.1 Initial Test
Once installed, gently sit on the seat to check for movement. If there is any wobble, adjust the nuts slightly and retest. Stability is key for safety and comfort.
4.2 Fine-Tuning
Double-check bolt alignment and consider adding a small amount of silicone sealant under the anchor base for extra security. This can prevent loosening over time, especially in high-use bathrooms.
5. Pro Tips and Maintenance Advice
5.1 Regular Inspections
Check the toilet seat and anchor bolts periodically. Tighten as needed to maintain stability and prevent future damage. This simple habit extends the life of your toilet hardware.
5.2 Choosing Quality Parts
Opt for corrosion-resistant materials such as stainless steel or reinforced plastic. This reduces the risk of future breakage and ensures your replacement lasts longer. Platforms like P2Bars offer reliable anchor kits and hardware designed for durability.
5.3 Learning from Experience
One homeowner shared that their previous toilet seat repeatedly loosened due to low-quality anchors. After switching to a premium anchor kit and following the proper installation steps outlined here, the seat remained stable for years, avoiding costly repairs and frustration.
By following these detailed steps, anyone can confidently replace a broken toilet seat anchor. For high-quality replacement kits and additional guidance, check out P2Bars to ensure a secure and long-lasting installation.
 Roto-Rooter Plumbing & Water Cleanup4.0 (1421 reviews)
 William J Millard Mechanical4.0 (5 reviews)
 Philco Plumbing and Heating4.0 (356 reviews)
 Stivan Plumbing & Heating Co4.0 (47 reviews)
 Yannuzzi Inc.5.0 (2 reviews)
 A Hampton Roads Plumbing & Sewer3.0 (64 reviews)
 Best Ways to Understand Plumbing Codes
 What to Do If Your Sink Won’t Drain: Simple Solutions
 Why Is My Bathtub Faucet Dripping After I Turn It Off?
 How to Fix a Leaking Compression Fitting: A Step-by-Step Guide
 What Causes Sump Pump Failure? | Preventive Tips and Maintenance
 Why Is My Toilet Flush Valve Leaking? Common Causes and Solutions