
Running Toilet Diagnosis: Safe Checks Before Repair
On this page
Quick answer
A toilet that refills by itself usually loses water from the tank into the bowl or has a fill valve that does not shut off correctly. Remove the tank lid carefully, observe the water level and overflow tube, and note when the sound starts and stops. Do not force old shutoffs or fittings. If water is escaping outside the fixture, close the supply only if the valve moves normally and call a plumber.
Diagnosis should identify the side of the system producing the symptom before any part is purchased. Toilet designs differ, and a part that looks similar may have a different height, seal, or installation method.

Mike the Plumber / mike the plumber
1545 Ocean Ave A3, Bohemia, NY 11716, USA
Confirm the toilet is actually running
Listen after a normal flush. A healthy fill cycle should stop. Intermittent bursts minutes later, a continuous hiss, visible ripples in the bowl, or water entering the overflow tube are useful clues. Also check whether another fixture or an appliance is making the sound.
Dry the floor and inspect around the supply valve, connector, tank bolts, tank-to-bowl joint, and toilet base. Moisture outside the toilet changes the priority from water-waste diagnosis to property protection. Do not keep flushing to reproduce an exterior leak.
Record the toilet brand or model markings, the tank water level, and a short video of the cycle. These details can help a plumber or parts supplier identify compatible components.

coastal & son, llc / aj appliance toms river nj
Toms RiverOcean CountyNew Jersey
1106 Verdant Rd, Toms River, NJ 08753, USA
Inspect the tank without forcing parts
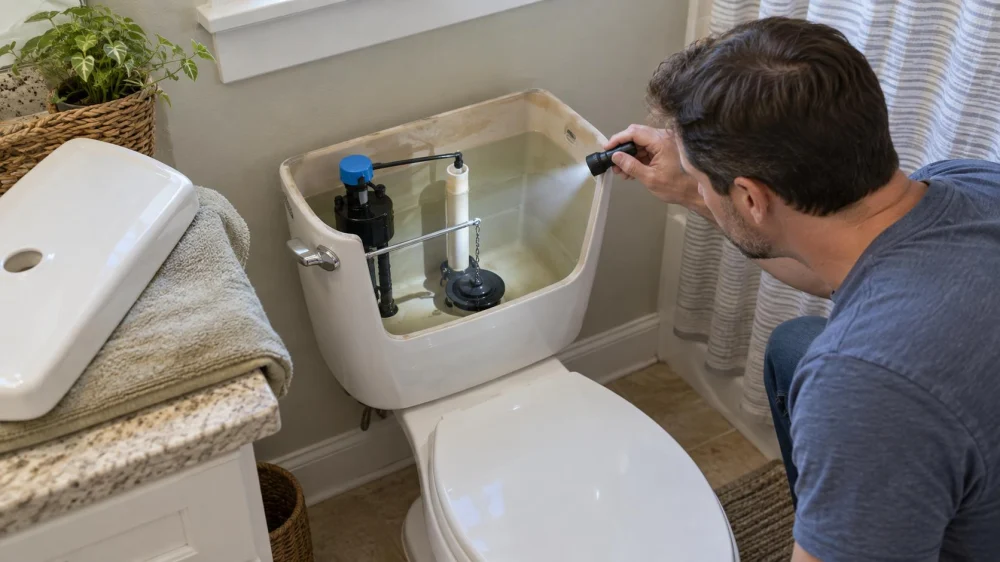
Set the tank lid on a padded, stable surface; porcelain lids are heavy and can crack. Use a flashlight rather than reaching into moving parts. Look for a tangled chain, a flush lever that does not return, a seal that does not sit evenly, or a float rubbing the tank wall.
The water should normally stop below the top of the overflow tube at the level specified by the toilet or fill-valve manufacturer. Water flowing into the overflow tube points toward a fill-level or fill-valve problem. A stable level that slowly falls between fill cycles points more toward leakage through the flush-valve seal or another tank opening.
Do not bend, cut, or adjust a component until you have its instructions. Aging plastic and corroded metal can break with little warning.
Separate fill-side and flush-side clues
Fill-side clues include water continuing into the overflow tube, a float that sticks, and a valve that never fully quiets. Flush-side clues include a poorly seated flapper or canister seal, excess chain tension, and a tank level that drops while the supply is off.
If the supply shutoff turns smoothly and there is no sign of damage, you may close it gently and mark the tank level with removable tape. Wait without flushing and observe whether the level drops. Never force a seized valve; it can leak at the stem or pipe connection.
A food-color test is often suggested online, but pigments may stain some surfaces or conflict with manufacturer guidance. Plain observation and level marking can provide useful evidence without adding dye.
Use a safe diagnostic checklist
- Confirm which toilet or fixture is making the noise.
- Check the floor and exterior connections for active water.
- Remove and secure the tank lid with dry hands.
- Observe the refill cycle, water level, float, chain, and overflow tube.
- Photograph model markings and the installed parts.
- If the shutoff moves normally, close it gently and watch the marked water level.
- Reopen the valve slowly and check the valve and connector for seepage.
- Share the evidence before buying or installing a replacement part.
Know the repair boundary
A compatible seal, chain adjustment, or manufacturer-approved fill-valve service may be a reasonable DIY task for someone with the instructions, tools, and a reliable shutoff. Replace deteriorated connectors or internal parts only with products approved for the fixture and application.
Call a licensed plumber when the shutoff is seized or leaking, the tank or bowl is cracked, fasteners are badly corroded, the toilet rocks, water appears at the base, or the symptom continues after an appropriate internal repair. Local plumbing rules and permit requirements vary.
Limitations and urgent situations
Close the appropriate water supply and seek prompt help for uncontrolled flow, water reaching electrical equipment, a cracked fixture, or sewage backing up. Keep people away from wet electrical areas and use the building's emergency procedure when needed.
This guide addresses common gravity toilets in US homes. Pressure-assisted, wall-hung, smart, commercial, and specialty toilets may require model-specific service. It cannot identify concealed damage or replace an onsite assessment.
Sources and evidence notes
The diagnostic approach follows common manufacturer service logic: observe the fill level and overflow path, distinguish fill-valve behavior from leakage through the flush seal, verify model compatibility, and avoid forcing the supply valve. The US Environmental Protection Agency's WaterSense program also identifies toilet leaks as a preventable source of household water waste.
Frequently asked questions
Why does my toilet run for a few seconds at random?
The tank may be slowly losing water into the bowl, causing the fill valve to restore the level. Observe the level and seal rather than replacing parts by guesswork.
Can I ignore a running toilet?
It may waste substantial water and can mask a failing component. Inspect it soon, and respond immediately if water is outside the fixture.
Should water enter the overflow tube?
A small refill stream may be routed into the tube by design, but the tank's standing water should not continuously spill over its top. Check the model instructions.
Can I force a stuck shutoff valve?
No. Forcing it can damage the valve or pipe and create a larger leak. A plumber can assess safe isolation and replacement.
Do universal toilet parts fit every tank?
No. Confirm the toilet model, valve type, dimensions, and manufacturer instructions before choosing a part.
Conclusion and next steps
First protect the floor, then observe a complete fill cycle and document the water level, overflow tube, float, chain, and seal. Use those clues to distinguish fill-side behavior from tank-to-bowl leakage. Stop when a valve resists, water escapes externally, porcelain is damaged, or the design requires specialist service.
 IMP Plumbing & Heating Corp.4.0 (13 reviews)
 Best Yet Installations, Inc. - Plumbing, Appliance Installation & Electrical4.0 (822 reviews)
 Precision Plus4.0 (46 reviews)
 Tanner Plumbing & Heating5.0 (5 reviews)
 Martex Improvement LLC0.0 (0 reviews)
 Mav Mechanical LLC - Plumbing, Heating0.0 (0 reviews)
 Step-by-Step Guide to Replacing a Leaking Tub Drain Gasket
 How Often Should You Address Sump Pump Failure? Key Insights for Homeowners
 Why a Sink Gurgles When Another Fixture Drains
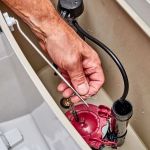 Why Is My Toilet Flush Valve Leaking?
 Step-by-Step Guide to Low Water Pressure: Causes and Solutions
 How Much Does It Cost to Choosing the Right Pipe Materials for Your Project