
Mastering the Art of Fixing a Leaking Tub Drain Gasket
- 1-Identifying-The-Leak-Source
- 2-Gathering-Essential-Tools-And-Materials
- 3-Removing-The-Old-Drain-Gasket
- 4-Preparing-The-Surface-For-New-Gasket
- 5-Installing-The-New-Tub-Drain-Gasket
- 6-Testing-And-Verifying-The-Repair
- 7-Common-Mistakes-To-Avoid
- 8-Real-Life-Success-Stories
- 9-Maintaining-Tub-Drains-To-Prevent-Leaks
- 10-Recommendations-For-Quality-Products
1. Identifying the Leak Source
Before starting any repair, it’s critical to pinpoint the exact cause of the leak. Leaking tubs often result from a worn-out drain gasket that has become brittle over time. Sometimes, the leak may also originate from loose connections or corroded pipes beneath the tub. A careful inspection ensures that you target the gasket replacement accurately, saving both time and effort.
1.1 Signs of a Leaking Drain Gasket
Look for water pooling around the base of the tub, persistent musty odors, or water stains on the ceiling below if it’s an upstairs bathroom. Early detection prevents water damage and makes DIY repairs manageable.
1.2 Diagnosing the Leak
Running a controlled water test by filling the tub to a certain level and observing the surrounding areas can confirm if the drain gasket is the source. Note the exact leak location to avoid unnecessary disassembly.
2. Gathering Essential Tools and Materials
Preparation is key for any DIY plumbing repair. For replacing a leaking tub drain gasket, you will need:
- Adjustable wrench or drain wrench
- Flathead screwdriver
- Plumber’s putty or silicone sealant
- Replacement tub drain gasket compatible with your tub model
- Cleaning cloth and mild detergent
- Bucket and gloves for safety
Having these tools ready ensures a smooth and efficient repair process.
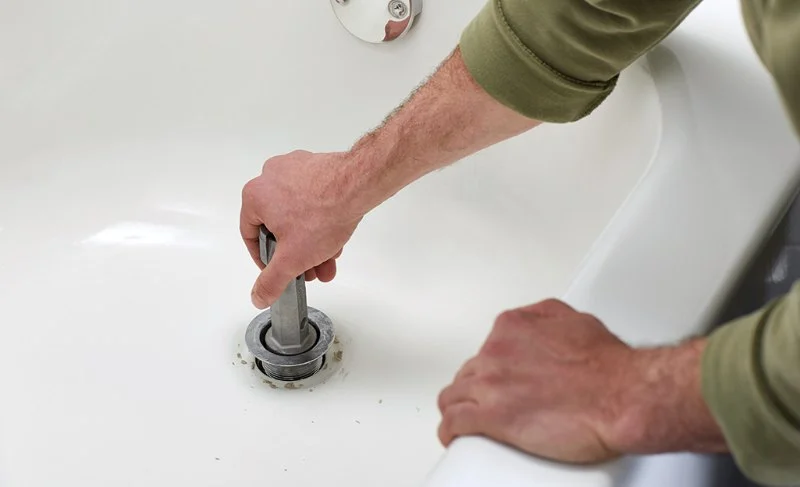
3. Removing the Old Drain Gasket
3.1 Detaching the Drain Assembly
Use an adjustable wrench to unscrew the drain flange. If it’s stuck, apply gentle pressure to avoid damaging the tub. Removing the drain assembly gives full access to the old gasket.
3.2 Extracting the Gasket
Carefully peel away the worn gasket. Some older gaskets may stick due to hardened plumber’s putty. Use a flathead screwdriver to gently lift the edges, taking care not to scratch the tub surface.
4. Preparing the Surface for New Gasket
Clean the area thoroughly with mild detergent to remove debris, grime, and leftover putty. A clean, dry surface ensures that the new gasket seals effectively, preventing future leaks.
4.1 Inspecting the Drain Pipe
Check the drain pipe for corrosion or damage. If any structural issues are present, consider replacing the pipe section before installing the new gasket to avoid recurring leaks.
5. Installing the New Tub Drain Gasket
5.1 Applying Plumber’s Putty or Silicone
Roll a small amount of plumber’s putty into a rope-like shape and place it under the edge of the new gasket. Alternatively, use a silicone sealant for a stronger, more durable seal. Press the gasket firmly in place.
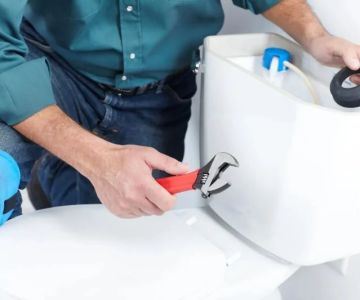
5.2 Reassembling the Drain
Insert the drain assembly back into the tub opening, ensuring the gasket is seated evenly. Tighten the flange with a wrench, being careful not to over-tighten, which could crack the tub.
6. Testing and Verifying the Repair
6.1 Running a Water Test
Fill the tub with water and observe for leaks. Check both the tub surface and underneath if accessible. A properly installed gasket should prevent any water seepage.
6.2 Troubleshooting Minor Issues
If minor leaks persist, tighten the flange slightly and ensure the gasket is correctly aligned. Rarely, repositioning the gasket or adding more sealant is needed to achieve a perfect seal.
7. Common Mistakes to Avoid
- Over-tightening the drain assembly, which may crack the tub
- Failing to clean the surface properly, leading to ineffective sealing
- Using the wrong size gasket for your tub model
- Neglecting to test the repair before finishing
8. Real-Life Success Stories
One homeowner, facing repeated leaks, successfully replaced their tub drain gasket using this exact method. By carefully preparing the surface and using a silicone sealant, the leak was permanently fixed, saving hundreds in professional plumbing costs.
8.1 Another Practical Example
A couple dealing with water stains on their bathroom ceiling discovered a cracked old gasket. With proper tools and guidance, they replaced it themselves and now enjoy a leak-free tub, demonstrating that even novices can perform this repair with patience and attention to detail.
9. Maintaining Tub Drains to Prevent Leaks
9.1 Routine Cleaning
Keep the drain free of debris to avoid pressure buildup on the gasket. Regular cleaning prolongs gasket life and prevents leaks.
9.2 Periodic Inspections
Check the drain and surrounding areas for signs of wear or moisture. Early detection allows quick gasket replacement before significant water damage occurs.
10. Recommendations for Quality Products
Choosing a high-quality replacement gasket is essential for long-term leak prevention. For trusted products, visit Plumbers Supply Hub to explore durable gaskets and professional-grade sealants. Investing in reliable materials ensures your repair lasts for years.
By following these steps, you can confidently replace a leaking tub drain gasket, restore your bathtub to full function, and prevent future leaks. For the best selection of gaskets and tools, click here to view the latest products at Plumbers Supply Hub and secure your DIY repair success today.

 Nick Pupo Plumbing & Heating4.0 (7 reviews)
 Stewart Plumbing LLC5.0 (79 reviews)
 Nick Shembeda Plumbing and HVAC4.0 (127 reviews)
 AG Mechanical Corp0.0 (0 reviews)
 SMB Plumbing and Heating Corp4.0 (65 reviews)
 JMS PLUMBING LLC.5.0 (79 reviews)
 How to Unclog a Drain Using a Plunger
 What Causes Water Damage in Your Bathroom? Identifying Common Issues and Solutions
 Avoid These Mistakes When Clogged Drains: Expert Tips for Homeowners
 Best Ways to Fix a Leaking Faucet
 How to Choose the Right Pipe Materials for Your Plumbing Project
 How to Clean and Maintain Your Sump Pump for Reliable Performance