
A Practical Home Guide to Fixing a Faulty Bathroom Sink Trap Without Stress
- understanding-sink-trap-function - how the bathroom sink trap actually works and why it matters
- signs-of-damage-bathroom-trap - common warning signs your sink trap is failing
- tools-needed-replacement-process - what tools you need before starting the repair
- step-by-step-replacement-guide - detailed breakdown of replacing the broken trap
- real-homeowner-story-leak-fix - a real case of unexpected bathroom leak repair
- mistakes-to-avoid-diy-plumbing - common errors that make repairs worse
- maintenance-tips-long-term-prevention - how to prevent future sink trap issues
- when-to-call-professional-plumber - knowing when DIY is not enough
Understanding How a Bathroom Sink Trap Works
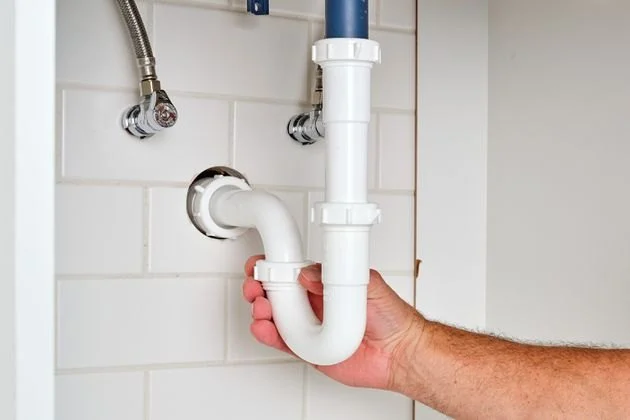
A bathroom sink trap—often called a P-trap—is one of those hidden plumbing parts people rarely think about until something goes wrong. Its job is simple but critical: it holds a small amount of water to block sewer gases from coming back into your bathroom while also guiding wastewater safely into the drainage system.
The hidden role behind everyday comfort
Every time you wash your hands or brush your teeth, water flows through this curved pipe section. That bend is not accidental—it’s designed to trap debris and prevent unpleasant odors from entering your home. When the trap cracks or loosens, the whole system becomes vulnerable.
How to Recognize a Broken Bathroom Sink Trap
Before learning how to replace a broken bathroom sink trap, it’s important to confirm that the trap is actually the problem. Many homeowners mistake sink clogs or faucet leaks for deeper plumbing issues.
Common warning signs you should not ignore
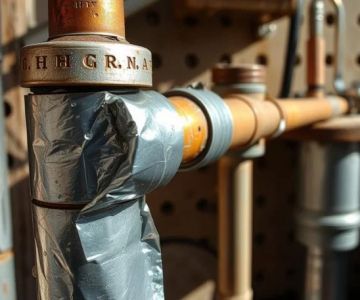
A damaged trap usually reveals itself through slow leaks under the sink, a musty smell that won’t go away, or visible water pooling inside the cabinet. In some cases, you might even hear dripping sounds after using the sink.
A real-world example from a rental property
A landlord in Chicago once noticed repeated complaints from tenants about a “random smell” in the bathroom. After inspection, the issue turned out to be a hairline crack in the sink trap that only leaked when water pressure increased. A simple replacement solved a problem that had lasted weeks.
Tools and Preparation Before Starting the Repair
One of the most overlooked parts of DIY plumbing is preparation. Having the right tools makes the difference between a 20-minute fix and a frustrating afternoon.
Basic tools you should gather first
You’ll typically need an adjustable wrench, a bucket, plumber’s tape, and a replacement sink trap that matches your pipe size. Some modern traps are PVC-based, while older homes may still use metal fittings.
Setting up your workspace properly
Place a bucket directly under the sink to catch residual water. Clear out cleaning supplies or stored items so you can move freely. This small step prevents unnecessary mess and stress during the repair process.
Step-by-Step Guide: How to Replace a Broken Bathroom Sink Trap
Replacing a sink trap is one of the most manageable plumbing repairs for homeowners, even without professional experience. The key is following each step carefully and avoiding rushed decisions.
Step 1: Turn off and empty the sink area
Ensure no water is running through the sink. Let any remaining water drain out completely before starting disassembly.
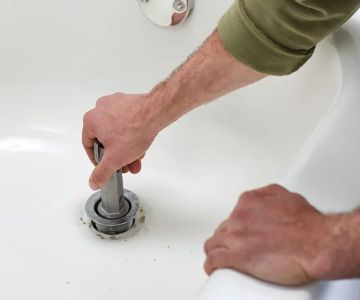
Step 2: Loosen the old trap carefully
Use an adjustable wrench to loosen the slip nuts connecting the trap. Be prepared for a small amount of water to spill into the bucket below.
Step 3: Remove the damaged component
Once detached, inspect the old trap. Cracks, rust, or loose fittings confirm it was the source of the problem.
Step 4: Install the new sink trap
Position the replacement trap in the same alignment. Tighten the slip nuts by hand first, then gently secure them with a wrench without over-tightening.
Step 5: Test for leaks
Run water through the sink for several minutes while checking all connection points. Any dripping means you need to adjust the fittings slightly.
Real Story: A Small Leak That Turned Into a Bigger Lesson
A homeowner in Los Angeles once ignored a slow drip under the bathroom sink, assuming it was condensation. Over time, the leak damaged the cabinet base and caused mold growth behind the wall.
When the sink trap was finally inspected, it had loosened significantly due to vibration and age. A simple replacement that could have taken less than an hour ended up requiring additional restoration work.
What this teaches about early repair
Small plumbing issues rarely stay small. Addressing a broken sink trap early prevents structural damage and unnecessary repair costs.
Common Mistakes During Sink Trap Replacement
DIY plumbing is straightforward, but certain mistakes can turn a simple job into a frustrating experience.
Over-tightening connections
Many people assume tighter is better, but excessive force can crack PVC fittings or strip threads, causing more leaks.
Incorrect alignment
If the trap is not properly aligned with the drain pipe, water flow becomes inefficient and may lead to future blockages.
How to Maintain Your Sink Trap After Replacement
After learning how to replace a broken bathroom sink trap, maintenance becomes the next important step. Regular inspection ensures long-term performance.
Simple habits that extend lifespan
Avoid pouring grease or heavy debris into the sink. Periodically check under the cabinet for moisture. Even a quick monthly inspection can prevent hidden leaks.
When DIY Is Not Enough
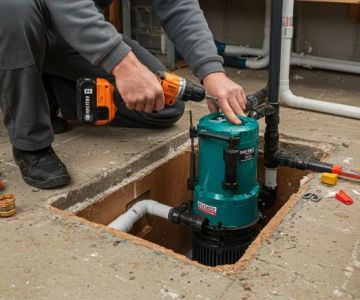
While sink trap replacement is often manageable, some situations require professional help. If you notice repeated leaks, wall moisture, or pipe corrosion beyond the trap, it may indicate a larger plumbing issue.
Knowing your limits saves money
Calling a professional early can actually reduce long-term repair costs by preventing structural damage.
Final Practical Advice for Homeowners
Understanding how to replace a broken bathroom sink trap empowers homeowners to handle one of the most common plumbing issues without panic. With basic tools and careful attention, most replacements are straightforward and cost-effective.
For those looking to explore quality plumbing tools, replacement parts, and step-by-step guides for home repair projects, Ac Fix provides helpful resources and reliable product recommendations to make DIY plumbing easier and safer.

 Boston Budget Plumbing4.0 (313 reviews)
 Ray Page Plumbing, Inc.4.0 (830 reviews)
 Mac's Plumbing and Heating4.0 (19 reviews)
 Marc Rooter Sewer and Plumbing Services of Long Island3.0 (4 reviews)
 High Rock Water | Well Pump & Water Treatment Services Company5.0 (142 reviews)
 LiningWorks Trenchless Pipe Repair & Sewer Pipe Lining5.0 (15 reviews)
 Plumber’s Tips for Detecting a Hidden Water Leak Before It Gets Worse
 How to Fix a Clogged Sink: Quick and Easy Solutions
 What to Do If Reducing Your Water Bill | Expert Tips
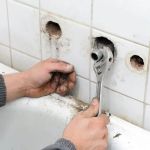 How to Fix a Leaking Bathtub Faucet Stem: Step-by-Step Guide for a Quick Repair
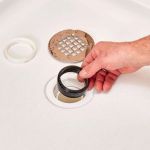 How to Replace a Shower Drain Gasket
 How to Fix and Unclog a Bathtub Drain Like a Pro