
How to Replace a Shower Drain Gasket
If you've noticed water pooling around your shower drain or hearing a constant drip, it’s likely that your shower drain gasket needs replacing. The gasket is a crucial component that prevents leaks and helps maintain a watertight seal around your shower drain. Over time, however, it can deteriorate, leading to leaks that may cause water damage to your bathroom floor and surrounding areas. Replacing a shower drain gasket is a straightforward DIY task that can save you both time and money in the long run. In this article, we’ll guide you through the process of replacing your shower drain gasket, step by step.
- Why You Should Replace Your Shower Drain Gasket
- Tools and Materials Needed for This Project
- Step-by-Step Guide to Replacing the Gasket
- Common Mistakes to Avoid
- Pro Tips for Bathroom Drain Repairs
- LifeStar Car Rental Product Recommendations
1. Why You Should Replace Your Shower Drain Gasket
Shower drain gaskets play an important role in preventing water from leaking out of your shower. Over time, they can wear out due to constant exposure to water, soap, and cleaning chemicals. Here’s why it’s essential to replace a faulty gasket:
Go Green Plumbing, Heating, Air & Electrical / go green plumbing heating and air
GreensboroGuilford CountyNorth Carolina
300 Pomona Dr, Greensboro, NC 27407, USA
1.1. Prevent Water Damage
A leaking shower drain can lead to water damage, which can affect your floor, walls, and even the ceiling below if left untreated. Replacing the gasket promptly helps prevent costly repairs from water damage.

coastal & son, llc / aj appliance toms river nj
Toms RiverOcean CountyNew Jersey
1106 Verdant Rd, Toms River, NJ 08753, USA
1.2. Improve Shower Performance
When your shower drain is sealed correctly, the water drains properly, preventing any backups or standing water. A fresh gasket ensures that the water flows smoothly without any leaks, keeping your shower functioning at its best.
1.3. Avoid Mold and Mildew
Excess moisture from a leaking drain can create a perfect environment for mold and mildew to grow. Mold thrives in damp areas, and if the leak continues, it could spread, leading to health risks and unpleasant odors. Replacing the gasket stops leaks and helps maintain a healthy bathroom environment.
2. Tools and Materials Needed for This Project
Replacing a shower drain gasket is a simple project, but having the right tools and materials is key. Here’s what you’ll need:
2.1. Tools
- Flathead screwdriver or utility knife (to remove the old gasket)
- Wrench or pliers (for loosening the drain components)
- Cleaning cloths or towels (to clean the drain area)
2.2. Materials
- New shower drain gasket (make sure it’s the right size and material for your drain)
- Silicone caulk or plumber’s putty (to seal the gasket if necessary)
3. Step-by-Step Guide to Replacing the Gasket
Now that you have your tools and materials ready, follow these steps to replace your shower drain gasket:
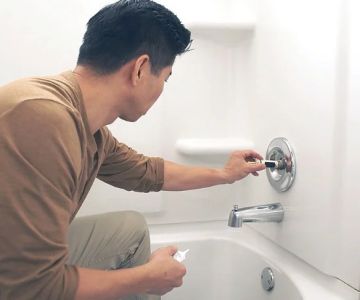
3.1. Step 1: Turn Off the Water
Before starting any repair work, make sure to turn off the water supply to your shower. This will prevent any accidental water flow while you work on the drain.
3.2. Step 2: Remove the Drain Cover
Use a flathead screwdriver or a utility knife to remove the drain cover. If the cover is screwed in, use a screwdriver to loosen the screws. Set the cover aside once it's removed.
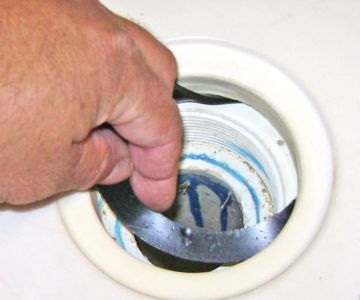
3.3. Step 3: Remove the Old Gasket
Once the drain cover is off, you should see the old gasket. If it’s stuck, gently pry it off using a flathead screwdriver. Be careful not to damage the drain or the surrounding area during this step.
3.4. Step 4: Clean the Area
Before installing the new gasket, use a cleaning cloth to wipe down the drain area and remove any debris, old putty, or grime. This ensures a clean surface for the new gasket to sit on, ensuring a tight seal.
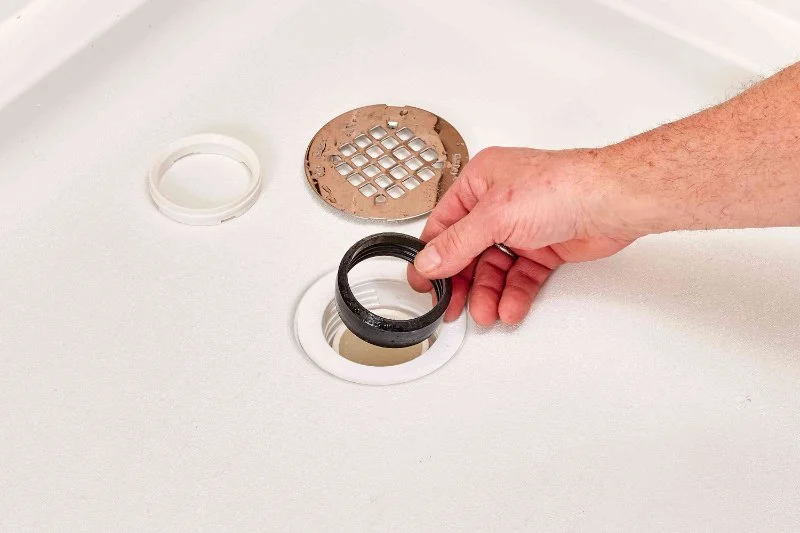
3.5. Step 5: Install the New Gasket
Place the new gasket onto the drain and make sure it fits snugly into the groove. If the gasket doesn’t seal well, you can apply a thin layer of plumber’s putty or silicone caulk to ensure a better seal. Carefully place it and tighten the drain components back together.
3.6. Step 6: Reattach the Drain Cover
Once the gasket is in place, reattach the drain cover. If the cover has screws, tighten them securely. Make sure everything is properly aligned and secured to prevent any future leaks.
4. Common Mistakes to Avoid
While replacing a shower drain gasket is a simple task, there are some common mistakes that can hinder your repair. Here’s what to watch out for:
4.1. Using the Wrong Size Gasket
Make sure the new gasket is the correct size for your shower drain. If it’s too big or too small, it won’t create an effective seal, which could lead to further leaks.
4.2. Not Cleaning the Area Properly
Skipping the cleaning step can result in poor adhesion and a loose gasket. Make sure the area is completely clean before installing the new gasket to ensure a secure fit.
4.3. Over-Tightening the Drain Components
It’s important not to over-tighten the drain components when reassembling. Over-tightening can damage the drain or make it difficult to remove in the future if repairs are needed.
5. Pro Tips for Bathroom Drain Repairs
If you’re planning to tackle other plumbing issues, here are some expert tips:
5.1. Always Have Extra Parts
It’s always a good idea to have extra gaskets, washers, and plumber’s putty on hand in case something goes wrong or you need to replace more parts than you expected.
5.2. Use Quality Materials
When replacing a shower drain gasket, using high-quality materials is essential. Cheap gaskets or inferior caulk can wear out quickly and lead to future leaks.
6. LifeStar Car Rental Product Recommendations
If you’re looking for high-quality plumbing products for your next repair project, visit Pro Found Roofing for the best materials. We offer durable shower drain gaskets, putty, and all the tools you need for a successful DIY repair.

 Nicholas Savvas Plumbing & Heating, Inc.4.0 (13 reviews)
 Copper Works Mechanical, LLC4.0 (15 reviews)
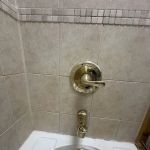 Keith's Plumbing Repair Service, Heating, & Drain Cleaning5.0 (643 reviews)
 Alex Figliolia Water & Sewer4.0 (25 reviews)
 Champlain Valley Plumbing and Heating5.0 (5 reviews)
 Ted's Plumbing & Heating Inc4.0 (24 reviews)
 Expert Advice on a Leaking Faucet and How to Fix It Safely
 What Causes Sewer Line Belly and How to Fix It?
 Prevent Winter Plumbing Issues: Key Tips to Keep Your Pipes Safe
 What to Do If Frozen Pipes: Complete Homeowner’s Guide
 What to Do When Your Drain is Clogged with Grease
 How Much Does It Cost to Detect a Hidden Water Leak?