
How to Replace a Broken Showerhead: Simple Repair Guide
- 1. Understanding When to Replace Your Showerhead
- 2. Tools You Need for Showerhead Replacement
- 3. Steps to Remove the Old Showerhead
- 4. Installing the New Showerhead
- 5. Testing the New Showerhead
- 6. Tips for Maintaining Your Showerhead
1. Understanding When to Replace Your Showerhead
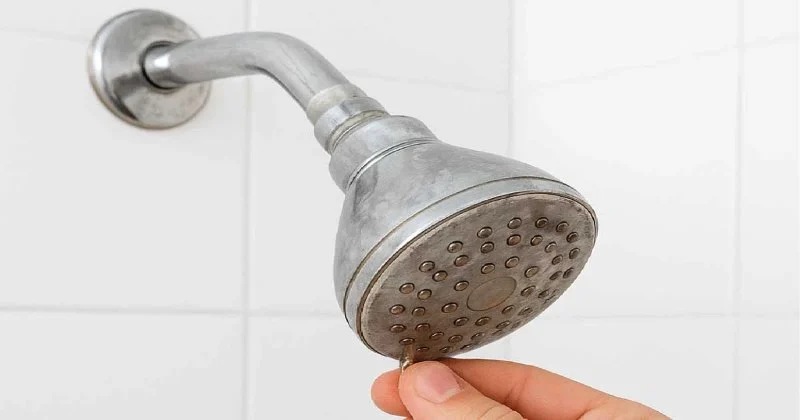
Showerheads can experience wear and tear over time, leading to issues such as low water pressure, leaking, or clogging. If your showerhead is showing signs of damage like rust, cracks, or persistent leaks, it might be time to replace it. Additionally, if the water flow has become uneven or there's a buildup of mineral deposits, replacing the showerhead can restore the shower to its optimal performance.
Lawrence Plumbing And Heating / lawrence plumbing
708 E Lake Ave, Baltimore, MD 21212, USA
2. Tools You Need for Showerhead Replacement
Replacing a showerhead is a relatively simple task that requires minimal tools. You will need the following:
- Adjustable Wrench: To loosen and tighten the showerhead.
- Plumber’s Tape: For sealing the threads to prevent leaks.
- New Showerhead: Choose a showerhead that suits your style and needs.
- Cloth or Rag: To protect the finish of your plumbing from damage.

Stashluk Mechanical Contractors Inc. / stashluk
Franklin TownshipHunterdon CountyNew Jersey
998 Croton Rd, Pittstown, NJ 08867, USA
3. Steps to Remove the Old Showerhead
Before you can install the new showerhead, you must remove the old one. Follow these steps:
- Turn off the water supply: Ensure that the water is completely turned off before you begin working.
- Cover the pipe: Use a cloth or rag to protect the pipe from damage while working with the wrench.
- Loosen the old showerhead: Use the adjustable wrench to carefully unscrew the old showerhead from the shower arm. Be gentle to avoid damaging the threads of the pipe.
- Inspect the threads: Once the old showerhead is removed, check the threads on the shower arm for any damage or buildup. Clean it thoroughly before installing the new one.
4. Installing the New Showerhead
Now that the old showerhead is removed, it’s time to install the new one. Here's how:
- Apply plumber’s tape: Wrap plumber’s tape around the threads of the shower arm to ensure a tight seal and prevent leaks.
- Screw on the new showerhead: Hand-tighten the new showerhead onto the shower arm. Be sure to screw it on straight to avoid cross-threading.
- Tighten with a wrench: Use the adjustable wrench to give the showerhead a final tightening, but avoid overtightening, as this can damage the threads or cause leaks.
5. Testing the New Showerhead
Once the new showerhead is installed, it's time to test it. Turn on the water and check for leaks. If you notice any drips around the base of the showerhead, it may need a little more tightening or an additional layer of plumber's tape. Adjust the water pressure to ensure everything is working as expected, and enjoy the refreshed shower experience.
6. Tips for Maintaining Your Showerhead
To ensure that your new showerhead lasts as long as possible, regular maintenance is essential. Here are some tips:
- Clean regularly: Remove mineral deposits and soap scum by soaking the showerhead in vinegar every few months.
- Check for leaks: Periodically check the showerhead for any signs of leaks and tighten it if necessary.
- Use a water softener: If you have hard water, using a water softener can help prevent mineral buildup in the showerhead.
 James Mechanical Plumbing & Heating4.0 (23 reviews)
 Bruka Bros Expert Drain & Sewer Cleaning Llc5.0 (23 reviews)
 Currier Inc. Plumbing And Rooter5.0 (4 reviews)
 Certified Sewer & Drain5.0 (1 reviews)
 Statewide Construction Co., Inc.5.0 (2 reviews)
 Good News Drain Services5.0 (51 reviews)
 How Much Does It Cost to Detect a Hidden Water Leak?
 Plumber's Tips for Maintaining Your Plumbing System
 How to Deal with Clogged Drains in Your Bathroom
 Beginner's Guide to Detecting a Hidden Water Leak
 Best Ways to Prevent and Fix Sump Pump Failures
 Why Choosing the Right Pipe Materials is Crucial for Your Plumbing Needs