
- identify-common-garbage-disposal-problems-before-you-fix
- reset-unclog-and-safely-inspect-your-disposal
- tools-and-diy-tips-for-effective-garbage-disposal-repair
- when-to-replace-or-call-in-a-professional
- real-experiences-that-highlight-fixing-garbage-disposals
1. Identify Common Garbage Disposal Problems Before You Fix
One of the top tips for fixing a garbage disposal is understanding the root cause of the issue. Whether it's a hum without rotation, slow draining, or no sound at all, each symptom hints at a different problem. It could be a jammed impeller, electrical fault, or a clog deeper in the drain line.
O'Neill Bros. Plumbing / oneill plumbing
RockvilleMontgomery CountyMaryland
12348 Wilkins Ave, Rockville, MD 20852, USA
1.1 Common Warning Signs
If your disposal hums but doesn’t grind, it’s likely jammed. A disposal that doesn’t turn on at all could have tripped a circuit or simply needs a reset. And if water backs up, the problem might not be the disposal itself but a blockage further down the pipe.
JetBlast Inc. Water Blasting Sewer & Drain Cleaning / jet blast drain cleaning
BaltimoreAnne Arundel CountyMaryland
6800 Fort Smallwood Rd, Baltimore, MD 21226, USA
1.2 Know What Not to Put In
Many disposal issues begin with what goes down the drain. Avoid fibrous vegetables like celery, grease, pasta, eggshells, or coffee grounds. These items either tangle blades or create buildup in the drain line. Keeping a mental “no-go” list near your sink helps prevent future problems.
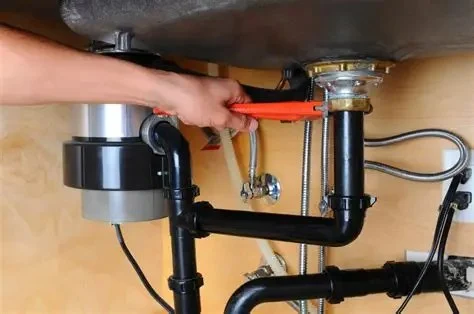
2. Reset, Unclog, and Safely Inspect Your Disposal
Before doing anything, always disconnect the power—either unplug the disposal or shut off the breaker. Many injuries occur when people assume the unit is off while it's still live.
2.1 Use the Reset Button
Garbage disposals have a reset button (usually a red or black switch underneath the unit). If the motor overheats or jams, this safety feature shuts the unit off. Press the button and wait a few minutes before testing the unit again.
2.2 Free Up a Jammed Impeller
If you hear a hum but no grinding, something may be jamming the blades. Most disposals come with an Allen (hex) wrench that fits into a socket underneath. Turn it back and forth to manually free the impeller. Never use your hands inside the disposal, even if the unit is off.
2.3 Inspect With a Flashlight
Use tongs or pliers to remove visible obstructions like chicken bones or silverware. Shine a flashlight into the chamber—often you’ll spot a culprit stuck between the blades. If you can't see it but still hear resistance, it may be time for deeper inspection or professional help.
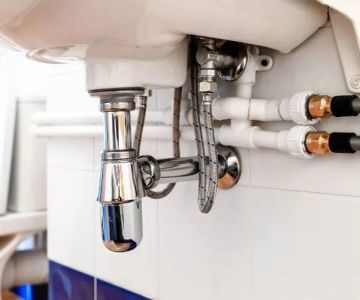
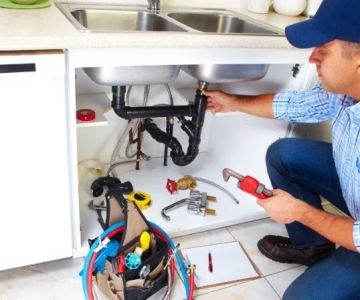
3. Tools and DIY Tips for Effective Garbage Disposal Repair
You don’t always need a plumber right away. With the right tools and a little know-how, you can solve most minor disposal issues on your own.
3.1 Must-Have Tools
- Hex (Allen) wrench – often comes with the unit
- Needle-nose pliers or tongs
- Flashlight
- Bucket and towels for potential leaks
3.2 DIY Fixes That Work
Try running ice cubes with a few lemon wedges to clean and deodorize your disposal. If the unit smells bad or sounds sluggish, this simple trick can help clear buildup without chemicals. For minor clogs, a plunger used on the sink (not inside the unit) can release pressure in the line.
3.3 Safety-First Mindset
Always assume the blades are active until you’ve confirmed the power is off. Even seasoned DIYers have made the mistake of bypassing safety checks. It takes seconds to unplug and can save you from serious injury.
4. When to Replace or Call In a Professional
Even with all the best efforts, some garbage disposals are simply past their prime. If your unit frequently trips, leaks from the bottom, or shows visible rust, it might be time to upgrade.
4.1 Signs You Need a New Unit
On average, garbage disposals last about 8–12 years. If you’re well past that and repairs are getting frequent or expensive, replacement is often more cost-effective. Newer models also come with quieter motors and more energy-efficient designs.
4.2 Knowing When to Call Help
If you’ve tried the reset, checked the blades, and cleared any jams but the disposal still won’t work—or if it leaks significantly—it’s best to contact a licensed plumber. That’s where PlumberNear can be your go-to resource for trusted pros in your area who specialize in kitchen plumbing and appliance repair.
5. Real Experiences That Highlight Fixing Garbage Disposals
Jared, a homeowner in Phoenix, discovered his disposal wasn’t just jammed—it was improperly installed, causing a slow leak into the cabinet below. He attempted to reseal the drain flange himself but finally called a technician. “In the end, I saved time and money by not making it worse,” he admitted.
5.1 A Quick Fix That Worked
Meanwhile, in Portland, Amy noticed her disposal humming but not spinning. A quick trip under the sink with the Allen wrench and a reset press later—it was back to normal. “I was surprised how simple it actually was,” she said. “I just needed the right steps.”
5.2 Lessons for Everyday Homeowners
These cases show how a bit of know-how can either solve the issue or help you realize when it’s time to hand it off. Understanding your disposal’s signs and limits is the real tip—along with knowing where to find help when DIY hits a wall.

 Guarded Plumbing LLC4.0 (21 reviews)
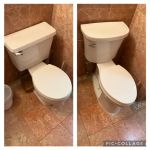 J&C Plumbing and Sewer Service, Inc.4.0 (272 reviews)
 Gould Plumbing & Heating4.0 (37 reviews)
 Order A Plumber Inc.5.0 (3 reviews)
 Blanchard Oil Company4.0 (51 reviews)
 Fairfax Electric Plumbing-Gas4.0 (160 reviews)
 Beginner's Guide to Installing a New Toilet: Step-by-Step Tips
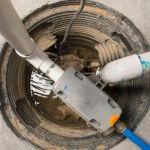 Signs You Need Sewer Line Backups Resolved Immediately
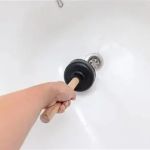 How to Fix and Unclog a Bathtub Drain Like a Pro
 Step-by-Step Guide to Clogged Drains and How to Fix Them
 Is It Safe to Installing a New Toilet
 How Often Should You Check Low Water Pressure in Your Home