
How to Install a New Bathroom Sink Drain Assembly Efficiently
- 1 - Tools-And-Materials-Needed
- 2 - Preparation-And-Safety-Tips
- 3 - Removing-The-Old-Drain
- 4 - Assembling-The-New-Drain
- 5 - Securing-And-Testing-The-Installation
- 6 - Common-Issues-And-Troubleshooting
- 7 - Professional-Insights-And-Tips
- 8 - Enhancing-Longevity-Of-Your-Drain
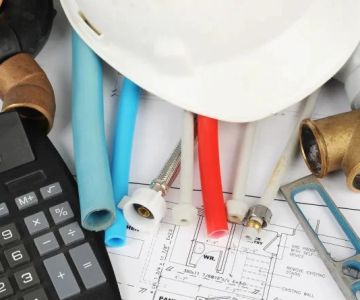
1. Tools and Materials Needed
Before beginning the installation, gather all necessary tools and materials to ensure a smooth process. This includes a new sink drain assembly, plumber’s putty, adjustable wrench, pliers, Teflon tape, and a bucket to catch any residual water.

Mike the Plumber / mike the plumber
1545 Ocean Ave A3, Bohemia, NY 11716, USA
1.1 Selecting the Right Drain Assembly
Choose a drain assembly compatible with your sink type. Consider materials like brass or stainless steel for durability and resistance to corrosion.
JetBlast Inc. Water Blasting Sewer & Drain Cleaning / jet blast drain cleaning
BaltimoreAnne Arundel CountyMaryland
6800 Fort Smallwood Rd, Baltimore, MD 21226, USA
1.2 Preparing Tools
Having an adjustable wrench and pliers at hand will help tighten connections securely without damaging pipes.
2. Preparation and Safety Tips
Proper preparation is essential to avoid leaks and ensure a safe installation.
2.1 Turn Off Water Supply
Shut off the water valves to prevent accidental flooding during drain removal and installation.
2.2 Clear Under-Sink Area
Remove items stored under the sink and place a bucket to catch any water remaining in the P-trap.
2.3 Wear Protective Gear
Use gloves and safety glasses to protect your hands and eyes from debris and chemical residue.
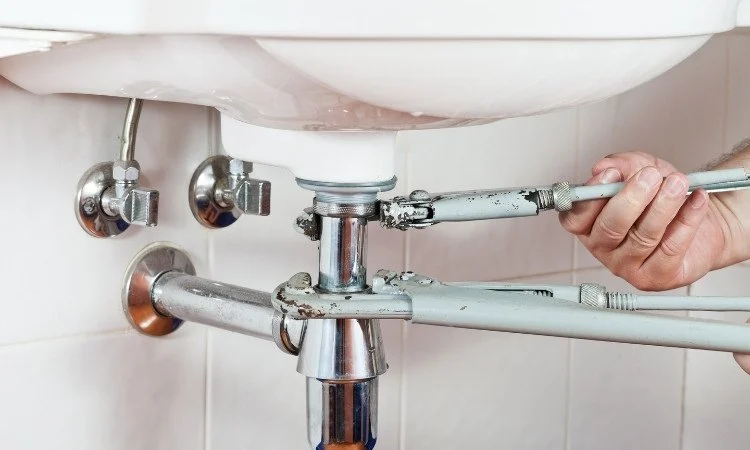
3. Removing the Old Drain
Carefully remove the existing drain assembly before installing the new one.
3.1 Disconnect P-Trap
Use the adjustable wrench to loosen the slip nuts connecting the P-trap to the drain tailpiece and wall drain pipe. Remove the trap and empty any water into the bucket.
3.2 Remove Drain Components
Unscrew the old drain flange and tailpiece. Clean the sink drain hole thoroughly, removing any old plumber’s putty or debris.
4. Assembling the New Drain
Install the new components carefully to ensure a leak-free setup.
4.1 Apply Plumber’s Putty
Roll a small amount of plumber’s putty into a rope and apply it around the underside of the drain flange to create a watertight seal.
4.2 Insert Drain Flange
Place the drain flange into the sink hole, pressing it firmly into the plumber’s putty.
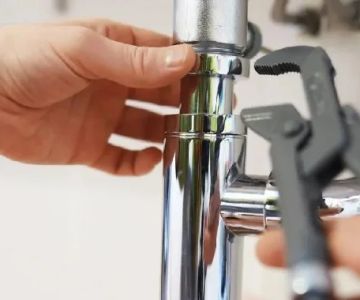
4.3 Attach Tailpiece and Gaskets
Secure the tailpiece under the sink with rubber gaskets and the provided locking nut, ensuring a snug fit.
5. Securing and Testing the Installation
Ensure all connections are tight and check for leaks before finishing.
5.1 Connect P-Trap
Reattach the P-trap to the tailpiece and the wall drain. Tighten all slip nuts by hand and gently with a wrench to avoid overtightening.
5.2 Test for Leaks
Turn on the water and observe all connections. Tighten any fittings as necessary to stop leaks.
5.3 Remove Excess Putty
Wipe away any plumber’s putty that squeezed out around the drain flange to leave a clean finish.
6. Common Issues and Troubleshooting
Even experienced DIYers may encounter minor issues during installation.
6.1 Leaks at Slip Joints
Ensure all gaskets are correctly positioned and slip nuts are tightened evenly without cross-threading.
6.2 Slow Drainage
Check for debris in the P-trap or tailpiece. Make sure all connections are aligned and not obstructed.
6.3 Noisy Drain
Confirm that the tailpiece and P-trap are properly supported and tightened. Loose fittings can create vibrations and noise.
7. Professional Insights and Tips
Leverage professional advice to enhance the DIY installation experience.
7.1 Use Teflon Tape
Wrapping threaded connections with Teflon tape provides an additional seal against leaks, especially in metal fittings.
7.2 Check Manufacturer Instructions
Always refer to the specific drain assembly manufacturer’s instructions for optimal installation techniques.
7.3 Inspect Components Before Assembly
Ensure all washers, gaskets, and nuts are present and in good condition to prevent issues during installation.
8. Enhancing Longevity of Your Drain
Proper maintenance extends the lifespan of your new sink drain assembly.
8.1 Routine Cleaning
Clean the drain and P-trap periodically to prevent clogs and buildup of hair, soap, and debris.
8.2 Avoid Harsh Chemicals
Use mild cleaners instead of harsh chemicals to protect metal components from corrosion.
8.3 Regular Inspection
Check for loose connections or leaks every few months to catch potential problems early.
Installing a new bathroom sink drain assembly can be straightforward with careful preparation, attention to detail, and proper tools. Following this guide ensures a leak-free and reliable installation. For high-quality drain assemblies and plumbing supplies, explore options from trusted sources and learn more about the latest products for your DIY bathroom upgrades.

 Michael J Ference Plumbing & Heating, Inc.0.0 (0 reviews)
 Cooper Mechanical Solutions4.0 (301 reviews)
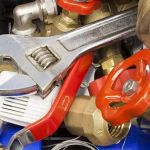 Kipp's Plumbing Heating Air Conditioning4.0 (5 reviews)
 Mr. Rooter Plumbing of Southern Fairfield County4.0 (667 reviews)
 Fast Response Plumbing4.0 (58 reviews)
 Snyder’s Plumbing and heating4.0 (11 reviews)
 Beginner's Guide to Reducing Your Water Bill - Practical Tips for Savings
 Why Is My Toilet Randomly Running at Night? Common Causes and Fixes
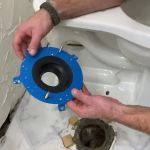 How to Install a New Toilet: A Complete Guide
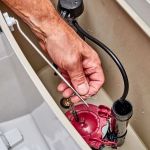 Why Is My Toilet Flush Valve Leaking?
 Plumber's Tips for Frozen Pipes
 Why Is My Water Heater Thermostat Not Working?