
Step-by-Step Installation of an Under-Sink Water Filtration System
- 1-Understanding-Your-Water-Filtration-Options
- 2-Gathering-Tools-and-Supplies
- 3-Preparing-the-Under-Sink-Area
- 4-Shutting-Off-Water-and-Draining-Lines
- 5-Installing-the-Filter-Housing-and-Mounting
- 6-Connecting-Inlet-and-Outlet-Lines
- 7-Flushing-and-Testing-the-System
- 8-Maintenance-Tips-for-Optimal-Performance
- 9-Real-Life-Installation-Examples
- 10-Choosing-the-Right-System-for-Your-Home
- 11-Final-Thoughts-and-Next-Steps
1. Understanding Your Water Filtration Options
Before installing an under-sink water filtration system, it’s essential to understand the types available. Options include carbon filters, reverse osmosis systems, and multi-stage filters. Each system targets different contaminants, from chlorine taste and odor to heavy metals and sediments.
Consider your household water quality, budget, and desired filtration level to choose the right system. Consulting consumer reports and user reviews can help identify reliable models for effective home use.

Warrior Plumbing & Heating / warrior plumbing
4123 Roland Ave, Baltimore, MD 21211, USA
2. Gathering Tools and Supplies
Preparation is key for a smooth installation. Common tools and supplies include:
- Adjustable wrench and pliers
- Screwdriver and drill for mounting brackets
- Teflon tape for secure connections
- Bucket and towels to catch any water spills
- The filtration system kit with cartridges and hoses
Having all components ready prevents interruptions and ensures a clean, organized installation process.
JetBlast Inc. Water Blasting Sewer & Drain Cleaning / jet blast drain cleaning
BaltimoreAnne Arundel CountyMaryland
6800 Fort Smallwood Rd, Baltimore, MD 21226, USA
3. Preparing the Under-Sink Area
Clear the area beneath your sink, removing cleaning supplies or other obstacles. Inspect the plumbing for leaks or corrosion and ensure there is enough space for the filter housing and tubing.
Label the cold and hot water lines if necessary, and confirm that the faucet location aligns with the filter output for convenient access.
4. Shutting Off Water and Draining Lines
Turn off the cold water supply valve under the sink. Open the faucet to relieve pressure and drain remaining water. This step is critical to avoid leaks and ensure safe handling of the system components.
For households with multiple valves, ensure the main supply is accessible in case of emergencies during installation.
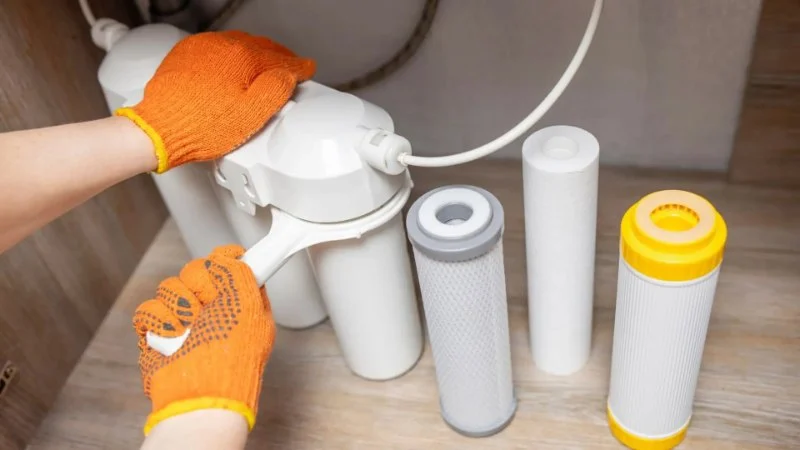
5. Installing the Filter Housing and Mounting
Select a convenient, accessible location on the cabinet wall for the filter housing. Use the provided bracket and screws to mount it securely. Ensure the housing is upright and can accommodate easy cartridge changes in the future.
Some systems include separate mounting points for multiple filter stages; follow the manufacturer’s diagram to maintain proper flow direction.
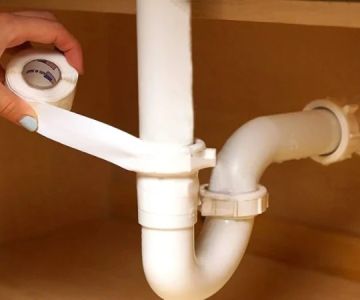
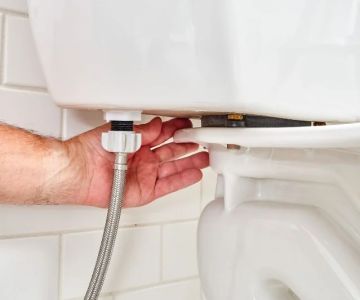
6. Connecting Inlet and Outlet Lines
Connect the cold water supply to the inlet side of the filter. The outlet line should run to the dedicated filtered water faucet. Use Teflon tape on threaded fittings and hand-tighten connections before securing with a wrench.
Check that tubing does not kink and that the lines are free from obstructions to maintain optimal water flow and pressure.
7. Flushing and Testing the System
Once connected, slowly open the water supply and check for leaks. Flush the system according to manufacturer instructions, typically running water for several minutes to remove any carbon fines or air trapped in the lines.
Test water taste and pressure to confirm proper installation. Address any leaks immediately to prevent damage to the cabinet or flooring.
8. Maintenance Tips for Optimal Performance
Regular maintenance ensures long-term water quality and system efficiency:
- Replace cartridges as recommended, often every 6-12 months
- Inspect connections and hoses for wear or leaks
- Sanitize the housing periodically to prevent bacterial growth
- Monitor water pressure for signs of clogging or filter exhaustion
Keeping a maintenance schedule prolongs system life and guarantees consistent clean water for your household.
9. Real-Life Installation Examples
For instance, a homeowner in Michigan installed a reverse osmosis system under their kitchen sink to address hard water and chlorine taste. Following the step-by-step guide, they completed the setup in under two hours and noticed significantly improved water quality immediately.
Another example involves a busy family who opted for a carbon block filter system. They appreciated the compact design, easy cartridge replacement, and reduction of sediment in their drinking water, enhancing safety and taste for everyday use.
10. Choosing the Right System for Your Home
Selecting the appropriate filtration system depends on water quality testing, household size, and budget. For households with higher contamination concerns, multi-stage or reverse osmosis systems may be necessary. For simpler needs, a standard carbon filter can effectively remove odors and improve taste.
Consider compatibility with your existing sink and plumbing, ease of maintenance, and cartridge cost over time to ensure a cost-effective solution.
11. Final Thoughts and Next Steps
Installing a water filtration system under sink enhances drinking water safety, taste, and household convenience. With proper preparation, attention to detail, and adherence to manufacturer instructions, most homeowners can complete the installation themselves efficiently.
Explore high-quality under-sink filtration systems today and take the first step toward cleaner, safer water in your home. Learn more and click here to check the latest products suitable for your household needs.

 Robert A Tull Inc3.0 (28 reviews)
 Speedy Rooter4.0 (8 reviews)
 Clear Water Plumbing - Quality Home Plumbing Repair Services, Professional Home Plumber4.0 (19 reviews)
 O'Neill Bros. Plumbing5.0 (31 reviews)
 Michael Donahue Plumbing & Heating4.0 (21 reviews)
 Paradise Plumbing & Heating Service, LLC. Lic# 120255.0 (5 reviews)
 Why Is My Water Heater Pilot Light Orange? Causes and Solutions
 What Causes Unclogging a Bathtub Drain and How to Fix It
 Is It Safe to Understand Plumbing Codes?
 How to Detect Plumbing Issues Early and Save Money
 What Causes Water Damage in Your Bathroom? Discover the Real Issues
 Top Tips for Reducing Your Water Bill: Practical Ways to Save on Your Water Usage