
Simple DIY Plumbing Fixes Every Homeowner Should Know About Angle Stop Valves
- Understanding What an Angle Stop Valve Does
- Warning Signs Your Valve Needs Replacement
- Tools and Materials Needed Before You Start
- How to Replace an Angle Stop Valve Step by Step
- Common Mistakes Homeowners Make During Installation
- Real Life Case Why a Small Leak Became a Big Problem
- Compression vs Quarter Turn Valves Which Is Better
- How to Maintain Your New Angle Stop Valve
- When You Should Call a Professional Plumber
- Choosing the Right Angle Stop Valve for Long Term Reliability
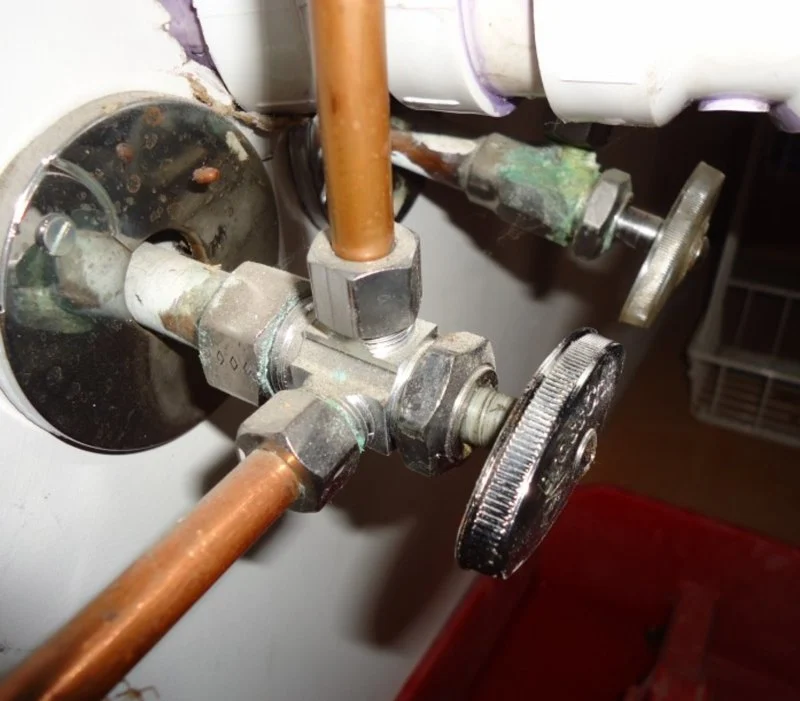
Understanding What an Angle Stop Valve Does
An angle stop valve is one of the smallest parts of a plumbing system, yet it plays a huge role in protecting your home from water damage. Most homeowners do not think about it until it starts leaking or fails completely. The valve controls water flow to fixtures like sinks, toilets, dishwashers, and bathroom vanities.
When working properly, the valve allows you to shut off water to one fixture without cutting water supply to the entire house. That convenience becomes extremely important during emergency plumbing repairs.

Mike the Plumber / mike the plumber
1545 Ocean Ave A3, Bohemia, NY 11716, USA
1. Why These Valves Often Fail Over Time
Most angle stop valves experience years of mineral buildup, corrosion, and pressure stress. In older American homes, especially those built before the early 2000s, original shut off valves are often neglected until they seize or begin dripping.

Warrior Plumbing & Heating / warrior plumbing
4123 Roland Ave, Baltimore, MD 21211, USA
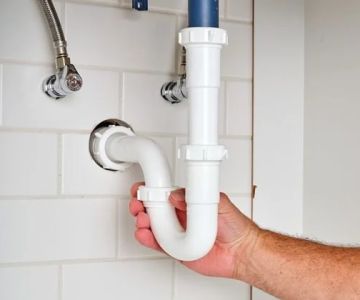
2. Common Locations Where They Are Installed
Bathroom Sinks
These valves are usually located beneath the vanity cabinet and connect directly to the faucet supply lines.
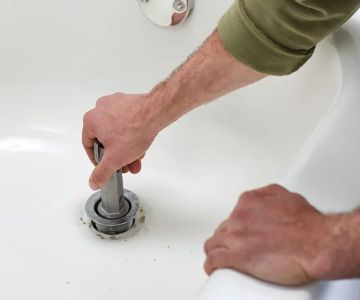
Toilets
Toilet shut off valves are commonly installed near the floor beside the toilet base.
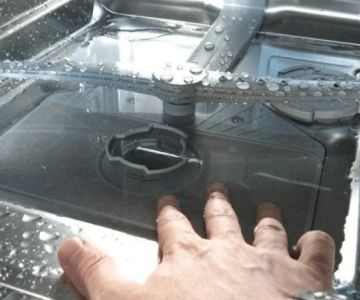
Kitchen Fixtures
Kitchen sink plumbing often contains two valves, one for hot water and one for cold water.
Warning Signs Your Valve Needs Replacement
Many homeowners ignore early warning signs because the leak appears small or harmless. Unfortunately, minor plumbing issues can quickly turn into expensive repairs.
1. Constant Dripping Around the Handle
If water slowly drips near the handle even after tightening, internal seals may already be damaged.
2. Corrosion Around the Valve Body
Green or white mineral deposits usually indicate ongoing moisture exposure.
3. Difficulty Turning the Valve
A healthy valve should rotate smoothly. If it feels stuck, overly stiff, or fragile, replacement is safer than forcing it.
4. Water Does Not Fully Shut Off
This is one of the clearest signs of valve failure. If water continues flowing after closing the valve, the internal mechanism has likely worn out.
Tools and Materials Needed Before You Start
One reason many DIY plumbing projects fail is poor preparation. Having the correct tools ready before shutting off water saves both stress and time.
1. Essential Plumbing Tools
Adjustable Wrench
This helps loosen compression nuts and tighten new fittings securely.
Pipe Cutter
If the copper pipe is damaged or too short, a pipe cutter may become necessary.
Bucket and Towels
Residual water almost always remains inside plumbing lines.
2. Replacement Materials
New Angle Stop Valve
Quarter-turn valves are generally more reliable than older multi-turn designs.
Compression Sleeve and Nut
Some installations require replacing these components for a proper seal.
Plumber's Tape
Useful for threaded fittings depending on valve type.
3. Safety Preparation
Always locate the home's main water shut off before starting. Even experienced DIY homeowners occasionally need to stop water flow quickly.
How to Replace an Angle Stop Valve Step by Step
Learning how to replace an angle stop valve is easier than many people expect, especially if the existing plumbing is accessible and undamaged.
1. Turn Off the Main Water Supply
Before touching any plumbing connection, shut off the main water supply completely. Open a nearby faucet to relieve pressure from the system.
2. Disconnect the Supply Line
Use a Wrench Carefully
Loosen the nut connecting the fixture supply line to the valve. Keep a towel nearby to catch remaining water.
3. Remove the Old Valve
Compression Style Removal
Most residential angle stop valves use compression fittings. Unscrew the compression nut slowly while stabilizing the pipe.
Inspect the Pipe Condition
If corrosion or deep scratches exist, trimming the pipe slightly may provide a cleaner installation surface.
4. Install the New Valve
Slide Compression Components into Position
Place the compression nut and sleeve onto the pipe before attaching the valve.
Tighten Carefully
Overtightening can crack fittings or damage threads. A snug fit is usually sufficient.
5. Restore Water Supply
Slowly reopen the home's main water valve and inspect carefully for leaks.
Watch for Slow Drips
Some leaks appear several minutes later as pressure stabilizes.
Common Mistakes Homeowners Make During Installation
Online DIY videos make plumbing look simple, but small mistakes can create expensive water damage.
1. Using Excessive Force
Many people overtighten fittings because they fear leaks. Ironically, this often damages the valve itself.
2. Ignoring Pipe Compatibility
Not every angle stop valve works with every plumbing material. Copper, PEX, and CPVC systems may require different fittings.
3. Reusing Old Compression Sleeves
Old sleeves can lose their sealing ability after years of compression.
4. Forgetting to Test Under Full Pressure
A valve may appear leak-free initially but fail once fixtures begin operating normally.
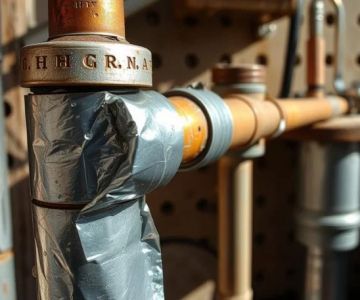
Real Life Case Why a Small Leak Became a Big Problem
A homeowner in Texas shared a story online that quickly gained attention in DIY repair communities. What began as a slow drip beneath a guest bathroom sink eventually caused cabinet damage, warped flooring, and mold growth inside the wall cavity.
The homeowner admitted ignoring the leak because it seemed minor and only appeared occasionally. By the time the problem became visible, repair costs exceeded several thousand dollars.
This situation highlights why replacing a faulty angle stop valve early matters so much. Water damage spreads quietly, especially in hidden spaces behind cabinets and walls.
1. Why Minor Plumbing Leaks Are Often Dangerous
Small leaks can remain unnoticed for months. Moisture trapped inside enclosed areas creates ideal conditions for mold growth and wood deterioration.
2. Insurance Claims Are Increasingly Common
Many insurance companies report rising water damage claims tied to aging plumbing components.
Compression vs Quarter Turn Valves Which Is Better
Modern homeowners often choose quarter-turn valves when replacing older shut off systems.
1. Traditional Multi-Turn Valves
Older valves require several rotations to open or close water flow. Over time, internal washers wear out.
2. Quarter-Turn Advantages
Faster Operation
A simple quarter turn fully controls water flow.
Improved Reliability
These valves usually last longer and resist wear more effectively.
Better Emergency Response
In urgent situations, shutting off water quickly becomes easier.
3. Why Many Plumbers Recommend Upgrading
Professional plumbers increasingly favor quarter-turn ball valves because they reduce maintenance concerns and improve long-term reliability.
How to Maintain Your New Angle Stop Valve
After installation, a little maintenance can dramatically extend valve lifespan.
1. Operate the Valve Occasionally
Turning the valve on and off every few months prevents mineral buildup from freezing internal components.
2. Check for Moisture During Cleaning
Whenever cleaning beneath sinks, inspect valves for condensation or tiny drips.
3. Avoid Hanging Heavy Objects on Supply Lines
Excess pressure on plumbing connections can weaken fittings over time.
4. Monitor Water Pressure
Excessively high water pressure stresses valves and household plumbing systems.
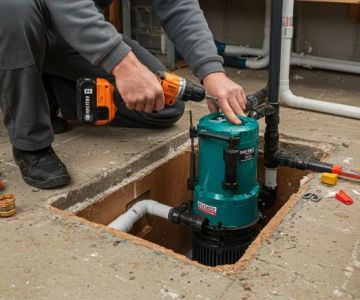
When You Should Call a Professional Plumber
Some valve replacements are simple, but certain plumbing situations require expert attention.
1. Severely Corroded Pipes
Old galvanized plumbing may crack during removal attempts.
2. Soldered Valve Connections
Sweat-soldered fittings often require specialized tools and experience.
3. Limited Access Areas
Tight spaces behind cabinets can complicate installation significantly.
4. Persistent Leaks After Replacement
If leaks continue after proper tightening, underlying plumbing damage may exist.
Choosing the Right Angle Stop Valve for Long Term Reliability
Not all plumbing hardware is created equal. Budget valves sometimes use lower-quality seals and thinner metal components that wear out quickly.
1. Brass Construction Usually Lasts Longer
Solid brass valves generally resist corrosion better than cheaper alternatives.
2. Trusted Plumbing Brands Matter
Experienced DIY homeowners often prefer brands with strong reputations for durability and leak prevention.
3. Look for Smooth Quarter-Turn Operation
High-quality valves should rotate smoothly without stiffness or grinding sensations.
4. Investing Early Prevents Bigger Expenses Later
A reliable valve may cost slightly more upfront, but it can help prevent major repair bills caused by future leaks or failures.
For homeowners researching how to replace an angle stop valve, understanding the differences between valve materials, compression fittings, and modern quarter-turn designs can make a major difference in long-term plumbing reliability. Whether you are handling a quick bathroom repair or upgrading aging shut off valves throughout your home, learning more about quality plumbing components now can help you avoid expensive water damage later. Many DIY homeowners choose to compare newer valve models and professional-grade plumbing supplies before starting their next repair project.

 Allbrook Plumbing Co.4.0 (9 reviews)
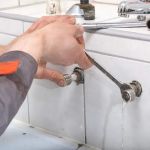 Guinea Station Engineering5.0 (1 reviews)
 Henicle's Plumbing Inc5.0 (6 reviews)
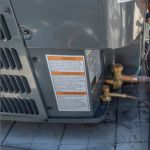 Aladdin Plumbing & Mechanical4.0 (48 reviews)
 Brooklyn Sewer Solutions5.0 (18 reviews)
 Catons Plumbing, Drains & Water Cleanup4.0 (1522 reviews)
 Signs You Need Detecting a Hidden Water Leak | Tips for Homeowners
 Preventing Plumbing Problems in Your New Home: What You Should Know
 DIY Fixes for Maintaining Your Plumbing System: Simple Solutions
 What to Do If Your Toilet Overflows: A Step-by-Step Guide
 What Is the Cost to Replace a Water Heater Expansion Tank?
 Why Is My Faucet Whistling? Common Causes and How to Fix It