
Beginner's Guide to Replacing Old Pipes
Replacing old pipes in your home can seem like a daunting task, especially for beginners. However, with the right tools, knowledge, and preparation, it’s possible to tackle the project and improve your plumbing system. Whether you’re dealing with leaking pipes, poor water pressure, or outdated materials, replacing old pipes can prevent further damage and help maintain a healthy home. In this guide, we’ll walk you through the steps involved in replacing old pipes, and offer tips to make the process as smooth as possible.
- Why Replace Old Pipes?
- Signs Your Pipes Need Replacing
- How to Replace Old Pipes
- Tools and Materials You’ll Need
- Common Challenges and How to Overcome Them
- When to Call a Professional Plumber
Why Replace Old Pipes?
Over time, plumbing pipes deteriorate due to factors such as age, corrosion, and wear and tear. Replacing old pipes is essential for maintaining the safety, efficiency, and integrity of your home’s plumbing system. Here are some of the top reasons why you might consider replacing your old pipes:
Sewer Xpress Corp / pipe xpress inc
Eastampton TownshipBurlington CountyNew Jersey
649 Powell Rd, Eastampton Township, NJ 08060, USA
1. Prevent Water Leaks and Flooding
Old pipes are more prone to leaks, which can lead to water damage and flooding. Leaks can weaken the structural integrity of your home and cause significant damage to walls, floors, and furniture. By replacing old pipes, you reduce the risk of water leaks and protect your property from potential harm.
Go Green Plumbing, Heating, Air & Electrical / go green plumbing heating and air
GreensboroGuilford CountyNorth Carolina
300 Pomona Dr, Greensboro, NC 27407, USA
2. Improve Water Quality
Over time, old pipes—especially those made of galvanized steel or lead—can contaminate your water supply. Corrosion and buildup inside the pipes can lead to discolored, foul-smelling, or even unsafe water. Replacing outdated pipes with modern, non-corrosive materials like copper or PEX helps improve water quality for drinking, cooking, and bathing.
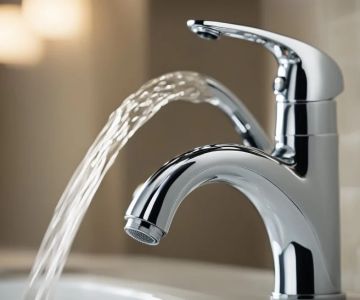
3. Boost Water Pressure
If you’ve noticed a decrease in water pressure, it could be due to blockages or mineral buildup in your old pipes. Replacing old, clogged pipes can restore normal water flow, improving water pressure throughout your home and making daily tasks like showering and washing dishes much more efficient.
Signs Your Pipes Need Replacing
Before you begin the process of replacing old pipes, it's important to recognize the signs that indicate it’s time for an upgrade. Here are some of the most common signs that your pipes may need replacing:
1. Frequent Leaks
If you’re experiencing frequent leaks or your pipes seem to be constantly springing new leaks, this is a clear indication that the pipes are aging and may need to be replaced. Repeated repairs can be costly and ineffective, making a full replacement the more practical solution.
2. Low Water Pressure
Low water pressure is often a sign of buildup in the pipes or pipe damage. If you’ve noticed that water pressure is consistently low in certain areas of your home, or if it fluctuates, replacing the pipes may be necessary to restore proper flow.
3. Discolored or Smelly Water
Rusty, brown, or foul-smelling water can be a sign that your pipes are deteriorating. Corroded metal pipes, in particular, can cause discoloration or unpleasant smells in your water. If this is the case, replacing old pipes will help improve the water’s quality and safety.
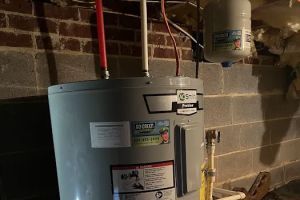
4. Old, Outdated Materials
Homes built before the 1970s may have plumbing systems made of outdated materials like lead or galvanized steel. These materials are prone to corrosion and can pose health risks. If your home has these types of pipes, it’s wise to replace them with modern, safer materials such as copper or PEX.
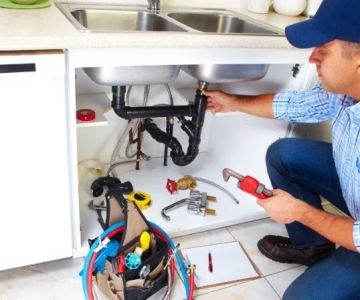
How to Replace Old Pipes
Replacing old pipes involves several key steps, and while the process can be complex, it’s manageable if you follow the right procedure. Here’s an overview of the general steps involved in replacing old pipes:
1. Turn Off the Water Supply
Before you begin, make sure to turn off the main water supply to your home. This will prevent any accidents or flooding while you work. Locate the main water shut-off valve, usually near the water meter, and turn it off completely.
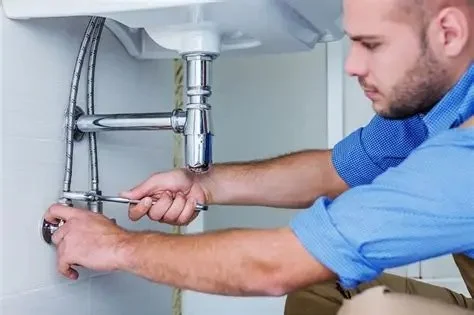
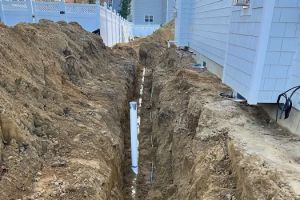
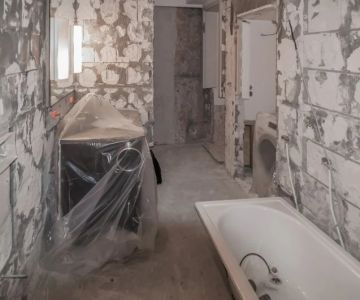
2. Access the Pipes
In most cases, you’ll need to access the pipes either by cutting open drywall or removing any coverings around the pipe areas. For pipes that are underground or within the foundation, you may need to dig or break through the concrete.
3. Remove the Old Pipes
Once you have access to the pipes, use the appropriate tools to cut and remove the old pipes. Depending on the material, you may need a pipe cutter, hacksaw, or pipe wrenches to loosen and remove the pipes. Be sure to dispose of old pipes properly, especially if they contain hazardous materials like lead.
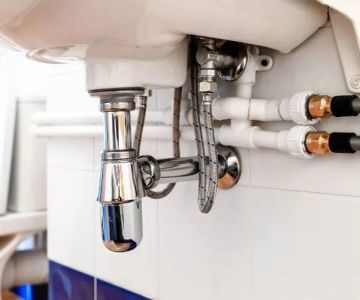
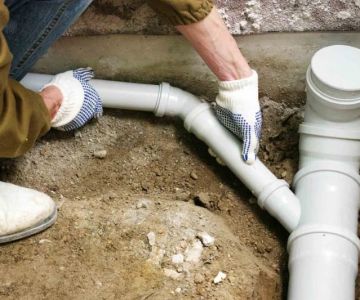
4. Install New Pipes
After removing the old pipes, it’s time to install the new ones. Measure and cut the new pipes to fit the spaces where the old ones were. Be sure to use the correct connectors and fittings to ensure a tight, leak-free seal. Follow all manufacturer instructions for installation.
5. Test the System
Once the new pipes are installed, turn the water supply back on and check for any leaks. It’s important to test the system thoroughly to make sure everything is functioning correctly. If you notice any issues, turn the water off and make the necessary adjustments.
Tools and Materials You’ll Need
Replacing old pipes requires the right tools and materials. Here’s a list of some of the essential items you’ll need:
1. Pipe Cutter or Hacksaw
You’ll need a pipe cutter or hacksaw to cut through old pipes, especially if they’re metal or PVC. Make sure the blade is sharp for clean, precise cuts.
2. Pipe Wrenches
Pipe wrenches are essential for loosening and removing old pipe fittings. They can be used to grip and turn pipes that are stuck or difficult to remove.
3. New Pipes and Fittings
Depending on the type of piping you’re replacing, you’ll need new pipes made from materials like copper, PEX, or PVC. Be sure to buy pipes and fittings that are compatible with your existing plumbing system.
4. Teflon Tape and Pipe Joint Compound
Teflon tape and pipe joint compound are used to create watertight seals between pipe connections. These materials help prevent leaks and ensure a secure, durable connection.
5. Safety Gear
Don’t forget to wear safety goggles, gloves, and a dust mask while working. Protecting yourself from debris, chemicals, and sharp edges is essential during the process.
Common Challenges and How to Overcome Them
While replacing old pipes can be a rewarding project, there are some common challenges you may face. Here are some of the most frequent issues and how to deal with them:
1. Rusted or Stubborn Fittings
Rust can cause fittings to become stuck, making it difficult to remove pipes. If you encounter stubborn fittings, try using penetrating oil or heating the area with a blowtorch to loosen the connections. In extreme cases, you may need to cut the fitting and replace it entirely.
2. Accessibility Issues
If the pipes are located in hard-to-reach areas, such as under the floor or within walls, you may need to cut open drywall or dig through concrete. Be prepared for additional work if access is limited.
3. Leaks After Installation
If you notice leaks after installing new pipes, it may be due to improper connections or insufficient sealing. Double-check the fittings, joints, and pipe connections. Reapply pipe joint compound or Teflon tape if necessary.
When to Call a Professional Plumber
While replacing old pipes is a DIY-friendly task for some, there are situations where calling a professional plumber is the best option. If you’re dealing with complex plumbing systems, inaccessible pipes, or significant damage, it’s wise to seek professional help to ensure the job is done correctly and safely.
For expert plumbing services and product recommendations, visit PlumberNear to find the best local plumbers and tools for your project.
 Guarded Plumbing LLC4.0 (21 reviews)
 J&C Plumbing and Sewer Service, Inc.4.0 (272 reviews)
 Gould Plumbing & Heating4.0 (37 reviews)
 Order A Plumber Inc.5.0 (3 reviews)
 Blanchard Oil Company4.0 (51 reviews)
 Fairfax Electric Plumbing-Gas4.0 (160 reviews)
 Beginner's Guide to Installing a New Toilet: Step-by-Step Tips
 Signs You Need Sewer Line Backups Resolved Immediately
 How to Fix and Unclog a Bathtub Drain Like a Pro
 Step-by-Step Guide to Clogged Drains and How to Fix Them
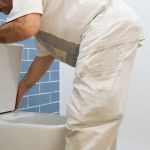 Is It Safe to Installing a New Toilet
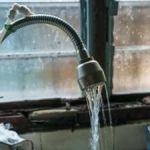 How Often Should You Check Low Water Pressure in Your Home