
- 1. Understanding Why Pipes Freeze
- 2. How to Prevent Pipes From Freezing
- 3. What to Do If Frozen Pipes Burst
- 4. How to Repair Burst Pipes
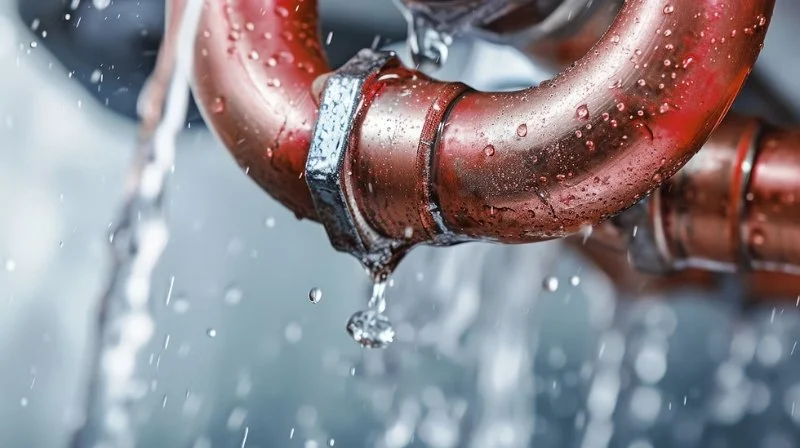
1. Understanding Why Pipes Freeze
Frozen pipes are a common problem, especially in colder climates during the winter months. When water inside the pipes freezes, it expands, causing pressure to build up. The pressure can cause the pipe to burst, leading to significant water damage. Pipes that are more vulnerable to freezing include those located in unheated areas like basements, attics, and exterior walls. It's crucial to understand why and when pipes freeze to take preventive measures before the damage occurs.
Hardy Plumbing / hardy plumbing
Port ClintonSchuylkill CountyPennsylvania
149 Penn St, Port Clinton, PA 19549, USA
2. How to Prevent Pipes From Freezing
Taking the right steps to prevent your pipes from freezing can save you from a major plumbing disaster. Here are some preventive tips to keep in mind:
Sewer Xpress Corp / pipe xpress inc
Eastampton TownshipBurlington CountyNew Jersey
649 Powell Rd, Eastampton Township, NJ 08060, USA
1. Insulate Exposed Pipes
Insulating your pipes, especially those located in unheated spaces, can help prevent freezing. Use foam insulation or heat tape to keep the temperature around the pipes above freezing. This is particularly important for pipes in attics, basements, and garages.
2. Let Faucets Drip
If you're expecting a cold snap, let the faucets in your kitchen and bathrooms drip slowly. This keeps water flowing through the pipes, reducing the chances of freezing. It may sound wasteful, but the cost of a burst pipe and subsequent repairs is far greater than the cost of a little extra water.
3. Keep Cabinet Doors Open
If you have pipes located under sinks, especially those on exterior walls, open the cabinet doors to allow warm air to circulate around the pipes. This simple action can help maintain a higher temperature around the pipes and prevent freezing.
4. Seal Cracks and Gaps
Inspect the areas around your pipes and seal any cracks or gaps in walls, floors, or around windows. Cold air can enter through these openings, raising the risk of frozen pipes. Use caulk or foam sealant to block these entry points for cold air.
5. Maintain a Consistent Temperature
Keep your home at a consistent temperature, even when you're away. If you plan to travel, set your thermostat to at least 55°F (13°C) to ensure that your pipes remain warm enough to avoid freezing.
3. What to Do If Frozen Pipes Burst
If you find yourself dealing with a burst pipe due to freezing, it's important to act quickly to minimize water damage. Here’s what you need to do:
1. Turn Off the Water Supply
The first step is to turn off the water supply to your home. Locate the main water shut-off valve, which is typically located in your basement, garage, or outside the home. Shutting off the water prevents further flooding and limits the damage caused by the burst pipe.
2. Open Faucets
Open the faucets that are connected to the burst pipe. This will help drain the remaining water and relieve the pressure in the system, which may prevent more pipes from bursting.
3. Call a Professional Plumber
While you can try to temporarily stop the flow of water, the best course of action is to call a professional plumber. They have the tools and expertise to repair the pipe quickly and safely. A plumber will also assess the extent of the damage and provide advice on repairs.
4. Document the Damage
Before you start cleaning up, take photos or videos of the damage for insurance purposes. Your homeowners’ insurance may cover the cost of repairs if the burst pipe was caused by freezing conditions.
5. Dry and Clean the Area
After the plumber has completed the repairs, it's essential to dry and clean the affected area. Use fans, dehumidifiers, and towels to soak up as much water as possible. This will help prevent mold growth and further damage to your walls and flooring.
4. How to Repair Burst Pipes
If you're handy and have some plumbing experience, you may be able to perform a temporary repair until a plumber can arrive. Here’s how:
1. Use a Pipe Repair Clamp
A pipe repair clamp can be used to stop the leak temporarily. This clamp fits over the crack in the pipe and helps to seal it. Follow the manufacturer’s instructions for installation to ensure it’s done correctly.
2. Use Epoxy Putty
Epoxy putty can be applied directly to the crack or hole in the pipe. It hardens quickly and can seal the pipe until a plumber can make a permanent repair. This is best used for small cracks or holes.
3. Use Rubber and Hose Clamps
If the damage is minor, you can use a piece of rubber (like a bike inner tube) to wrap around the pipe. Secure the rubber with hose clamps to create a temporary seal.
While these fixes can help prevent further damage, they are not permanent solutions. A professional plumber should always handle the final repair.
 Guarded Plumbing LLC4.0 (21 reviews)
 J&C Plumbing and Sewer Service, Inc.4.0 (272 reviews)
 Gould Plumbing & Heating4.0 (37 reviews)
 Order A Plumber Inc.5.0 (3 reviews)
 Blanchard Oil Company4.0 (51 reviews)
 Fairfax Electric Plumbing-Gas4.0 (160 reviews)
 Beginner's Guide to Installing a New Toilet: Step-by-Step Tips
 Signs You Need Sewer Line Backups Resolved Immediately
 How to Fix and Unclog a Bathtub Drain Like a Pro
 Step-by-Step Guide to Clogged Drains and How to Fix Them
 Is It Safe to Installing a New Toilet
 How Often Should You Check Low Water Pressure in Your Home