
- 1. Understanding Common Water Heater Issues
- 2. Tools You’ll Need to Repair a Broken Water Heater
- 3. Step-by-Step Guide to Repairing a Broken Water Heater
- 4. Common Mistakes to Avoid When Repairing Water Heaters
- 5. Case Study: Successful Water Heater Repair
- 6. Why Choose PlumberNear for Professional Water Heater Repairs
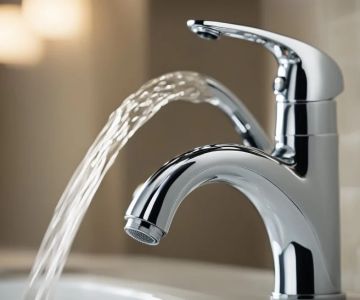
1. Understanding Common Water Heater Issues
Water heaters are essential appliances in our homes, providing hot water for showers, dishwashing, and more. However, over time, these systems can experience issues that lead to malfunctioning. The most common problems include:
- No hot water
- Inconsistent water temperature
- Strange noises
- Water leakage
Before attempting repairs, it's important to identify the problem. In this guide, we’ll cover how to troubleshoot and fix these common issues step by step, ensuring you restore your hot water supply without needing to replace the entire unit.

Bill Trombly Plumbing - Heating - Cooling - Electric / jim trombly heating
ManchesterHillsborough CountyNew Hampshire
76 Maple St, Manchester, NH 03103, USA
2. Tools You’ll Need to Repair a Broken Water Heater
To begin repairing your water heater, you'll need to have the right tools on hand. Here's a list of essential tools to make the repair process easier:
- Multimeter (for checking electrical components)
- Adjustable wrench
- Pipe insulation tape
- Bucket (to catch water during the repair process)
- Screwdriver
- Replacement heating elements or thermostat (if needed)
- Plumber's tape
These tools will help you address common issues such as a faulty thermostat, broken heating elements, or leaks from pipes connected to the water heater.
Stashluk Mechanical Contractors Inc. / stashluk
Franklin TownshipHunterdon CountyNew Jersey
998 Croton Rd, Pittstown, NJ 08867, USA
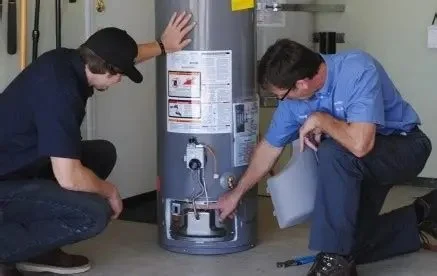
3. Step-by-Step Guide to Repairing a Broken Water Heater
Repairing a water heater can sound intimidating, but with the right steps and patience, it’s often a DIY-friendly project. Here's a step-by-step guide:
3.1. Step 1: Turn Off the Power or Gas
The first thing to do when repairing your water heater is to cut off the power supply. For electric heaters, unplug the unit or turn off the circuit breaker. For gas heaters, turn off the gas supply to avoid any safety hazards.
3.2. Step 2: Drain the Water Heater
Draining the water heater will allow you to access the parts that need repair. Attach a hose to the drain valve and open the valve to let the water flow into a nearby drain or container. Be sure to wear gloves to protect your hands from hot water.
3.3. Step 3: Check the Heating Elements
If your water heater isn't producing hot water, a broken heating element may be the culprit. Use a multimeter to check the resistance of the heating elements. If they are defective, replace them with new ones. Make sure to install the new elements according to the manufacturer’s instructions.
3.4. Step 4: Inspect and Replace the Thermostat
The thermostat controls the temperature of the water inside the heater. If it malfunctions, it can lead to inconsistent water temperatures. Use a multimeter to check if the thermostat is working properly. If it isn’t, replace it with a new one that matches the model of your water heater.
3.5. Step 5: Seal Leaks in the Tank
If you notice leaks from the tank, it may be necessary to replace the water heater entirely. However, if the leaks are coming from the pipes or connections, tightening the connections or using plumber's tape can seal the issue. Be sure to check for any loose connections and secure them tightly.
3.6. Step 6: Refill the Tank and Test the Heater
After making the necessary repairs, refill the tank with water and check for leaks. Turn the power or gas back on, and set the thermostat to your desired temperature. Test the heater by running hot water through your faucets to ensure everything is functioning properly.
4. Common Mistakes to Avoid When Repairing Water Heaters
Even if you follow the steps carefully, it’s easy to make mistakes that could damage the water heater or lead to inefficiency. Here are some common mistakes to avoid:
4.1. Skipping the Safety Checks
Always double-check that the power is off before working on your water heater. Failing to do so can lead to electrical shocks or gas leaks, which are dangerous and costly.
4.2. Using the Wrong Replacement Parts
When replacing heating elements or thermostats, make sure you use the correct parts designed for your model. Using incompatible parts can result in malfunction or even damage to the water heater.
4.3. Ignoring Proper Insulation
Insulating the pipes and the tank helps keep the water warm and reduces energy consumption. Failing to insulate can lead to higher energy bills and less efficient heating.
5. Case Study: Successful Water Heater Repair
Case Study: Fixing a Faulty Electric Water Heater
In a recent case, a homeowner named Jack experienced no hot water in his home for several days. After troubleshooting, he found that the heating element had failed. With the right tools, Jack replaced the faulty element and restored his hot water supply. He also replaced the thermostat to ensure consistent water temperature. By following the step-by-step process, he saved money on professional repairs and learned valuable skills in the process.
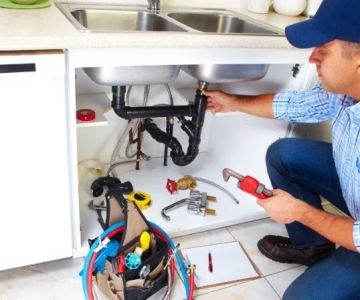
6. Why Choose PlumberNear for Professional Water Heater Repairs
If you're not comfortable repairing your water heater on your own, it’s always a good idea to consult a professional. PlumberNear offers expert water heater repair services, ensuring your system is fixed quickly and efficiently. Whether you're dealing with electrical issues, leaks, or other common problems, our team has the knowledge and experience to restore your heater to perfect working condition. Visit us today to schedule an inspection or get professional advice on your water heater repair needs.
 Guarded Plumbing LLC4.0 (21 reviews)
 J&C Plumbing and Sewer Service, Inc.4.0 (272 reviews)
 Gould Plumbing & Heating4.0 (37 reviews)
 Order A Plumber Inc.5.0 (3 reviews)
 Blanchard Oil Company4.0 (51 reviews)
 Fairfax Electric Plumbing-Gas4.0 (160 reviews)
 Beginner's Guide to Installing a New Toilet: Step-by-Step Tips
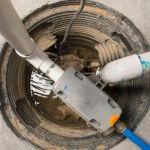 Signs You Need Sewer Line Backups Resolved Immediately
 How to Fix and Unclog a Bathtub Drain Like a Pro
 Step-by-Step Guide to Clogged Drains and How to Fix Them
 Is It Safe to Installing a New Toilet
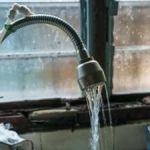 How Often Should You Check Low Water Pressure in Your Home