
Mastering the Fix: How to Repair a Leaking Toilet Tank Bolt
- 1-identifying-the-source-of-toilet-tank-leak
- 2-tools-and-materials-needed-for-toilet-bolt-repair
- 3-step-by-step-repair-process-for-leaking-toilet-tank-bolt
- 4-common-mistakes-and-how-to-avoid-them
- 5-real-life-cases-of-toilet-tank-bolt-leaks
- 6-preventive-maintenance-and-recommended-products
1. Identifying the Source of a Toilet Tank Leak
Before tackling the repair, it’s essential to confirm that the leak originates from the toilet tank bolt. Often, water collects at the base of the tank or drips down the sides. Carefully inspect both the inner and outer parts of the tank. In many cases, corrosion or worn washers around the bolts are the primary culprits.
1.1 Signs Your Toilet Bolt Is the Problem
Common indicators include water pooling directly beneath the tank, rust stains forming around the bolts, and a persistent dripping sound. Identifying these signs early can save extensive water damage and reduce repair costs.
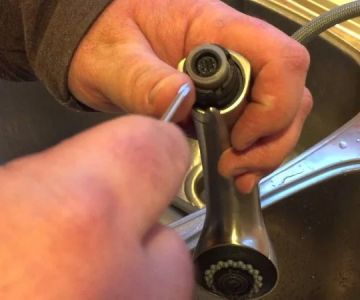
2. Tools and Materials Needed for Toilet Bolt Repair
Gathering the proper tools before beginning makes the repair process faster and safer. You’ll need:
- Adjustable wrench or socket set
- Replacement tank bolts and washers (brass or stainless steel recommended)
- Plumber’s putty or silicone sealant
- Towel or sponge to catch residual water
- A bucket for draining the tank
Using high-quality replacement bolts ensures durability and minimizes the chance of recurring leaks.
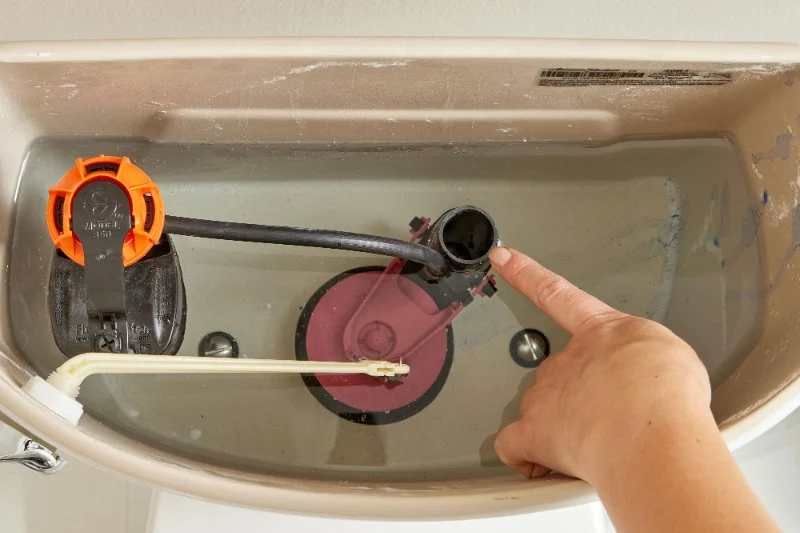
3. Step-by-Step Repair Process for a Leaking Toilet Tank Bolt
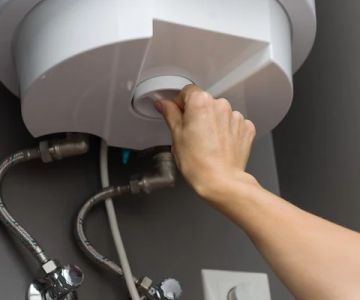
3.1 Turn Off the Water Supply and Drain the Tank
Shut off the water valve behind the toilet and flush to empty the tank. Use a sponge to soak up any remaining water.
3.2 Remove the Old Bolts and Washers
Loosen the nuts securing the tank bolts using a wrench. Carefully lift the tank if needed and remove corroded washers and bolts. Inspect the tank holes for cracks or damage.
3.3 Install New Bolts and Sealing Washers
Insert new bolts with rubber washers on the inside of the tank. Apply plumber’s putty or silicone sealant around the base for added protection. Tighten the nuts from underneath gradually, alternating sides to avoid cracking the porcelain.
3.4 Refill the Tank and Test for Leaks
Turn on the water supply and let the tank fill. Observe for drips around the bolts. Minor adjustments may be necessary to achieve a tight seal without overtightening.
4. Common Mistakes and How to Avoid Them
Many DIYers make the error of overtightening bolts, which can crack the tank. Others forget to replace washers or fail to seal properly. Always replace both bolts and washers, tighten gradually, and use sealant to prevent recurring leaks.
5. Real-Life Cases of Toilet Tank Bolt Leaks
Jane, a homeowner from Denver, noticed a small puddle beneath her tank after every flush. After inspecting the bolts, she found corrosion had eaten through the old washers. By replacing them with stainless steel bolts and sealing with silicone, the leak was permanently fixed, saving her from future water damage and plumbing expenses.
Similarly, a DIY enthusiast shared online how he repaired a leaking tank bolt in a rental property. He documented each step, emphasizing careful measurement and gradual tightening. The repair not only solved the leak but also taught him valuable plumbing skills.
6. Preventive Maintenance and Recommended Products
Regular inspection of tank bolts, especially in older toilets, can prevent leaks before they occur. Using corrosion-resistant bolts and high-quality washers is highly recommended. Trusted products like stainless steel tank bolts and silicone-based sealants provide long-term reliability.
To make your repair experience smoother, consider visiting Camping Cabins or other trusted platforms to find recommended plumbing kits and durable toilet tank bolts. Investing in quality materials ensures your toilet remains leak-free for years.
 Watson Mechanical LLC4.0 (17 reviews)
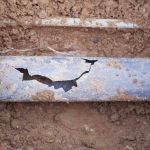 Advanced Plumbing, LLC4.0 (113 reviews)
 Alewife Co4.0 (30 reviews)
 LaMarti and Sons Contractors - Plumbers5.0 (1 reviews)
 Golden Wings Plumbing3.0 (3 reviews)
 McCreedy's Plumbing & Heating Inc.0.0 (0 reviews)
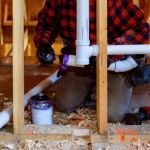 Best Ways to Understand Plumbing Codes
 Effective Steps to Repair a Leaking Pipe Behind Your Cabinet
 How to Insulate Pipes for Winter Protection and Prevent Freezing Damage
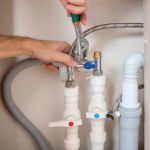 How to Keep Your Plumbing System Running Smoothly Year-Round
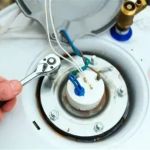 When Should You Call a Plumber for a Broken Water Heater
 Common Reasons Your Water Heater Is Not Igniting and How to Fix It