
Fixing a Running Toilet Without Panic: A Practical Home Repair Story
- understanding-toilet-flush-valve-problems-leaks-continuous-running-water-causes
- tools-and-preparation-for-toilet-flush-valve-replacement-safety-and-setup
- step-by-step-process-for-how-to-replace-a-toilet-flush-valve-at-home
- real-homeowner-story-saving-water-and-money-with-simple-repair
- maintenance-tips-to-prevent-future-toilet-tank-failure-and-leaks
Why Learning How to Replace a Toilet Flush Valve Matters More Than You Think
A constantly running toilet is one of those household problems that starts quietly but quickly becomes impossible to ignore. The sound of water refilling every few minutes is not just annoying—it can also significantly increase your water bill. Understanding How to Replace a Toilet Flush Valve gives homeowners control over a problem that many assume requires a plumber.
In reality, most flush valve issues are mechanical wear problems inside the tank. Rubber seals degrade, chains loosen, and mineral buildup interferes with proper sealing. Once you understand the system, the repair becomes surprisingly manageable even for beginners.

Landry Mechanical Inc Plumbing HVAC & Electric / landry mechanical
FraminghamMiddlesex CountyMassachusetts
763 Waverly St unit 32, Framingham, MA 01702, USA
Understanding What the Flush Valve Actually Does
The Role of the Flush Valve Inside the Tank
The flush valve is the gateway between the toilet tank and the bowl. When you flush, it lifts and allows water to rush into the bowl, clearing waste. Once the tank empties, the valve closes again to allow refilling. If it doesn’t seal properly, water continuously leaks into the bowl.
This is one of the most common causes of a “ghost flushing” toilet, where water refills randomly without anyone touching the handle.

Warrior Plumbing & Heating / warrior plumbing
4123 Roland Ave, Baltimore, MD 21211, USA
Common Signs You Need a Replacement
Homeowners usually notice small symptoms before full failure:
The toilet runs intermittently, the flush feels weaker than usual, or there is visible water movement in the bowl. In many cases, these signs indicate it is time to learn How to Replace a Toilet Flush Valve rather than repeatedly adjusting parts.
Preparing for a Toilet Flush Valve Repair
Gathering Tools and Replacement Parts
Before starting the repair, preparation makes the entire process smoother. Most flush valve replacements require basic household tools like an adjustable wrench, sponge, towel, and a replacement flush valve kit compatible with your toilet model.
Many homeowners choose universal kits, but matching the exact size of the existing valve improves long-term performance and reduces leaks.
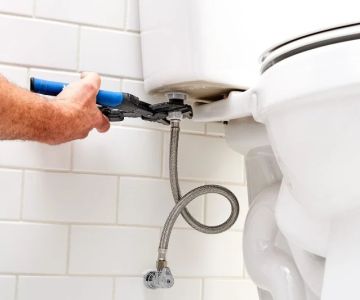
Water Shutoff and Tank Safety
The first practical step is turning off the water supply and flushing the toilet to empty the tank. Any remaining water should be soaked up with a sponge or towel. Working in a dry tank ensures better grip and reduces accidental spills during removal.
Step-by-Step Process for How to Replace a Toilet Flush Valve
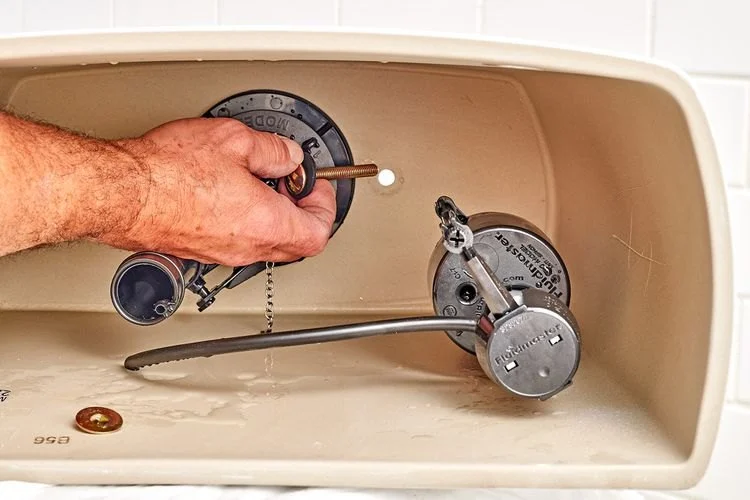
Step 1: Removing the Toilet Tank Lid and Components
Carefully lift the tank lid and set it aside. Inside, you’ll see the flush handle, chain, flapper, and fill valve system. Disconnect the chain from the handle lever to fully free the flushing mechanism.
Step 2: Detaching the Old Flush Valve
Depending on the model, the flush valve may be secured with a locknut beneath the tank. Use a wrench to loosen it while holding the valve steady inside. Once loosened, the old valve can be lifted out.
This step often reveals mineral buildup or worn rubber seals, which are the root cause of leakage issues.
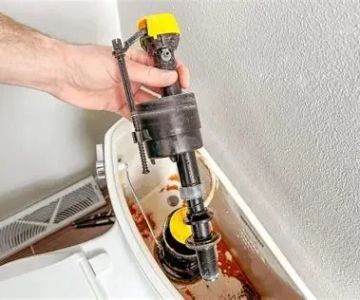
Step 3: Installing the New Flush Valve
Place the new flush valve into position, ensuring it sits firmly against the tank opening. Tighten the locking nut underneath without over-tightening, as excessive force can crack the porcelain tank.
This is the most critical part of How to Replace a Toilet Flush Valve because alignment determines whether future leaks will occur.
Step 4: Reconnecting Internal Components
Attach the chain back to the flush handle lever, ensuring there is slight slack but not too much tension. Recheck the flapper movement to confirm smooth operation.
Step 5: Restoring Water Flow and Testing
Turn the water supply back on and allow the tank to fill. Flush several times to ensure proper sealing and refilling. If water continues to leak into the bowl, minor adjustments to chain length or valve seating may be required.
Real Home Repair Story: A Small Fix That Saved a Big Water Bill
A homeowner in Ohio once ignored a slow-running toilet for weeks, assuming it was harmless. Over time, the water bill increased noticeably. After researching How to Replace a Toilet Flush Valve, they decided to attempt the repair themselves.
With a basic replacement kit and under an hour of work, the issue was resolved. The next billing cycle showed a significant reduction in water usage. What seemed like a minor inconvenience turned out to be a costly hidden leak.
This story reflects a common reality: small plumbing issues often have bigger financial consequences if left unresolved.
Common Mistakes During Flush Valve Replacement
Overtightening the Locknut
One frequent mistake is applying too much force during installation. While it may feel more secure, overtightening can damage the tank or create uneven pressure that leads to leaks.
Incorrect Chain Adjustment
If the chain is too tight, the flapper may not seal properly. If too loose, the flush may feel weak or incomplete. Finding the right balance is essential for smooth operation.
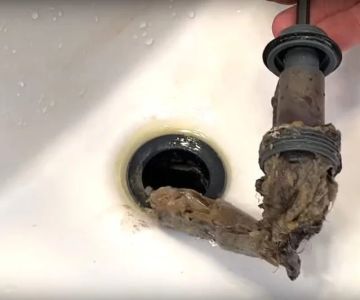
Ignoring Tank Cleaning During Repair
Many people replace the valve without cleaning the inside of the tank. However, sediment buildup can affect new parts as well, reducing lifespan and efficiency.
Maintenance Tips After Replacing a Flush Valve
Once you understand How to Replace a Toilet Flush Valve, maintaining it becomes much easier. Regular inspection every few months helps catch early signs of wear. Cleaning mineral deposits and checking chain tension can prevent future issues.
For homeowners who prefer ready-made repair kits or upgraded plumbing parts, exploring trusted home improvement resources like Reliable Damage Hub can help identify better-quality replacement options and maintenance tools.
Why DIY Toilet Repair Is Worth Learning
Learning simple plumbing repairs builds long-term confidence and reduces dependence on emergency service calls. More importantly, it helps homeowners understand how essential systems in their home actually function.
A toilet flush valve may seem like a small component, but its role in water efficiency and household maintenance is significant. Once you’ve completed your first repair successfully, future fixes become far less intimidating.

 Cardinal Plumbing & Drain Services4.0 (242 reviews)
 Revere Plumbing & Heating LLC4.0 (69 reviews)
 Koberlein Environmental Services - WRE4.0 (462 reviews)
 Roto-Rooter Plumbing & Water Cleanup of Medford4.0 (127 reviews)
 DeWolfe Plumbing, Heating & Cooling4.0 (609 reviews)
 Eco American Pump & Plumbing, Inc.3.0 (41 reviews)
 Avoid These Mistakes When Understanding Plumbing Codes
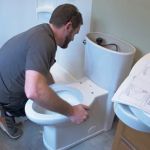 DIY Fixes for Installing a New Toilet – A Complete Guide
 How to Protect Your Plumbing System During Renovations
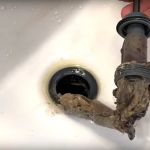 How to Unclog a Bathroom Sink with Hair Blockage Fast
 How to Secure Your Water Heater: A Beginner’s Guide to Diagnosing & Fixing Issues
 How Much Does It Cost to Replacing Old Pipes in Your Home?