
How to Replace a Broken Outdoor Faucet Stem: A Step-by-Step Guide
- 1. Understanding the Structure of Your Outdoor Faucet
- 2. Tools You'll Need for Faucet Stem Replacement
- 3. Step-by-Step Guide to Replacing the Faucet Stem
- 4. Common Problems and Troubleshooting Tips
- 5. How to Prevent Future Faucet Issues
1. Understanding the Structure of Your Outdoor Faucet
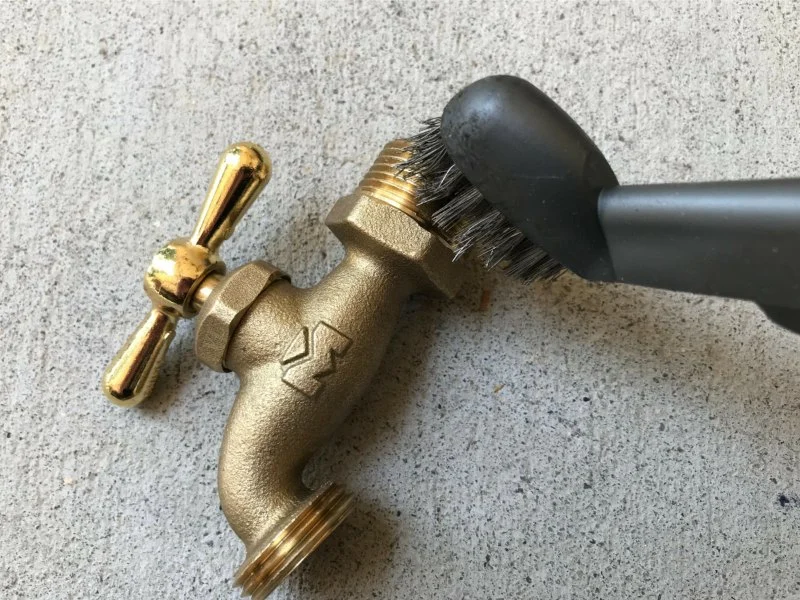
Before diving into repairs, it’s crucial to understand how your outdoor faucet works. The stem is the core component that controls the flow of water. If the stem becomes damaged, water may leak or the faucet may not turn off completely. Familiarizing yourself with its parts can make the replacement process smoother and help you avoid complications later.
Outdoor faucets typically consist of a handle, valve body, and the stem. The stem is attached to the valve body and extends into the faucet. When the handle is turned, it moves the stem, which opens or closes the valve. A broken stem can cause leaks or prevent the faucet from shutting off properly.
2. Tools You'll Need for Faucet Stem Replacement
Replacing a faucet stem isn’t as complicated as it may seem, but you will need a few key tools to get the job done:
- Pipe Wrench: To loosen the faucet body and remove the broken stem.
- Replacement Stem: Make sure you buy the correct size and type for your faucet model.
- Channel Lock Pliers: For tightening and adjusting components during reassembly.
- Plumber’s Tape: Used to prevent leaks around the threads when installing the new stem.
- Screwdriver: To remove screws from the faucet handle or other components.
- Adjustable Wrench: To help loosen any stubborn parts without damaging them.
3. Step-by-Step Guide to Replacing the Faucet Stem
Now that you’ve gathered your tools, it’s time to get to work. Follow these simple steps to replace your broken outdoor faucet stem:
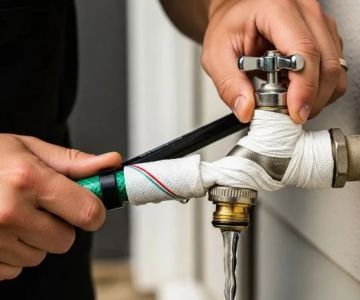
Step 1: Turn Off the Water Supply
Before doing any work on the faucet, make sure to shut off the water supply to avoid flooding or water damage. If your faucet is connected to an irrigation system, locate the main water valve and turn it off.
Step 2: Remove the Faucet Handle
Use your screwdriver to remove the screws that hold the faucet handle in place. After loosening the screws, carefully lift the handle off the faucet body.
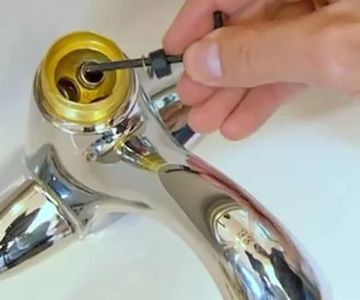
Step 3: Loosen the Faucet Stem
Use a pipe wrench or adjustable wrench to loosen the nut that holds the faucet stem in place. Once loose, carefully remove the old stem by pulling it straight out. Be cautious not to damage the valve body as you remove the stem.
Step 4: Install the New Stem
Before installing the new stem, apply plumber’s tape to the threads to ensure a watertight seal. Insert the new stem into the faucet body, making sure it aligns properly with the valve. Tighten the nut securely to hold the new stem in place.
Step 5: Reassemble the Faucet
Once the stem is securely in place, reattach the faucet handle. Tighten the screws to secure it, and make sure everything is properly aligned. Turn the water supply back on to check for any leaks.
4. Common Problems and Troubleshooting Tips
While replacing the faucet stem is a straightforward process, there are a few common issues that DIYers may encounter:
Leaking After Installation
If your faucet continues to leak after replacing the stem, check the following:
- Check the O-Ring: Make sure the O-ring on the stem is in good condition. A worn O-ring can lead to leaks.
- Reapply Plumber’s Tape: If the threads weren’t sealed properly, water could leak from the connection. Reapply plumber’s tape and tighten the nut again.
Stem Doesn’t Fit
If the new stem doesn’t fit properly, ensure that you’ve selected the correct replacement part. Different faucets may require specific stem types or sizes, so double-check the part number before purchasing.
5. How to Prevent Future Faucet Issues
To avoid having to replace your outdoor faucet stem again in the future, consider these maintenance tips:
- Regularly Inspect Your Faucet: Check for any signs of wear or leaks, and replace parts as necessary.
- Winterize Your Faucet: During the colder months, drain any water from your outdoor faucet to prevent freezing and cracking of the stem or valve.
- Use the Faucet Properly: Avoid forcing the handle too hard, as this can damage the stem over time.
Replacing a broken outdoor faucet stem is an easy DIY project that can save you money on repairs. With the right tools and some patience, you can restore your faucet’s functionality and prevent future issues.
If you’re looking for quality faucet replacement parts or tools to get the job done, check out LifeStar Plumbing Supplies for all your plumbing needs. From faucet stems to tools, we’ve got you covered!


 Eric Baker and Daughters Plumbing and Heating Inc5.0 (1 reviews)
 Gault Enterprises, LLC5.0 (37 reviews)
 Farfaras & Son Plumbing & Heating Co Inc0.0 (0 reviews)
 Timothy A. Giard & Son Plumbing & Heating Inc4.0 (44 reviews)
 George´s Drain Cleaning Services4.0 (27 reviews)
 Contemporary Plumbing & Heating5.0 (21 reviews)
 DIY Fixes for Choosing the Right Pipe Materials
 Avoid These Mistakes When a Leaking Faucet: Expert Plumbing Tips
 Is It Safe to Detect a Hidden Water Leak? Expert Guide on Leak Detection
 How Much Does It Cost to Fix a Garbage Disposal in the U.S.?
 Signs You Need Detecting a Hidden Water Leak | Tips for Homeowners
 Beginner’s Guide to a Running Toilet: Diagnose and Fix Common Issues