
- 1. Understanding the Sink Drain Tailpiece
- 2. Tools You’ll Need to Fix the Leak
- 3. Step-by-Step Guide to Fixing the Leak
- 4. Preventing Future Leaks
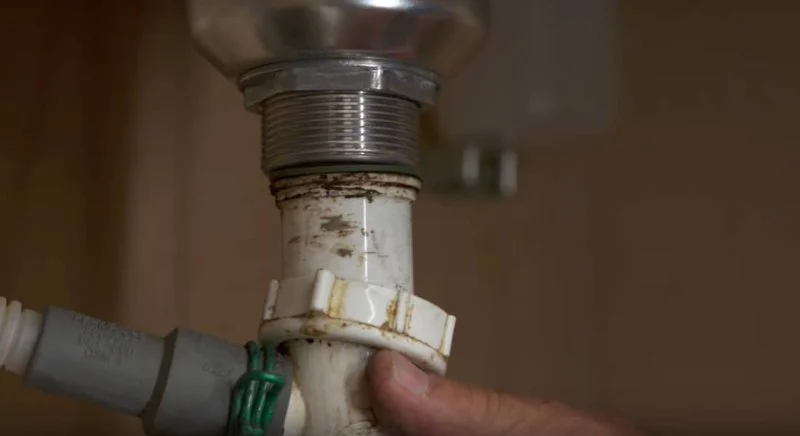
1. Understanding the Sink Drain Tailpiece
The sink drain tailpiece is the pipe that connects the sink drain to the plumbing beneath the sink. Over time, wear and tear or improper installation can cause it to leak. Understanding how to properly address a leaking tailpiece can save you from costly plumbing repairs and prevent water damage to your home.
O'Neill Bros. Plumbing / oneill plumbing
RockvilleMontgomery CountyMaryland
12348 Wilkins Ave, Rockville, MD 20852, USA
2. Tools You’ll Need to Fix the Leak
Before starting the repair, make sure you have the right tools for the job. Here's what you'll need:
- Adjustable Wrench: To tighten or loosen the nuts.
- Plumber’s Tape: For creating a watertight seal.
- Bucket or Towel: To catch any excess water when disconnecting the pipes.
- Pipe Cleaner or Brush: To clean the area before reassembling.
- Replacement Parts: A new tailpiece, washer, or nut if damaged.
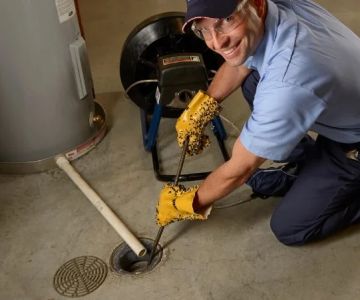
3. Step-by-Step Guide to Fixing the Leak
Follow this easy-to-understand guide to fix your leaking sink drain tailpiece:

Bill Trombly Plumbing - Heating - Cooling - Electric / jim trombly heating
ManchesterHillsborough CountyNew Hampshire
76 Maple St, Manchester, NH 03103, USA
3.1 Turn Off the Water Supply
Before you begin, ensure that the water supply to the sink is turned off. This will prevent any water from spilling when you disconnect the pipes.
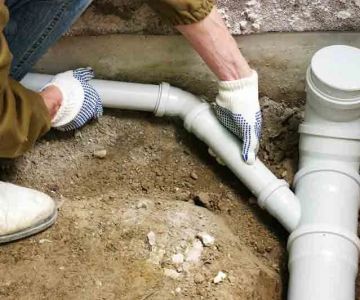
3.2 Remove the Old Tailpiece
Place a bucket or towel under the sink to catch any residual water. Using an adjustable wrench, unscrew the nuts holding the tailpiece in place. Remove the tailpiece carefully and clean the area of any debris or grime.
3.3 Install the New Tailpiece
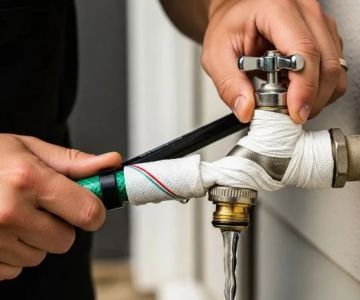
Take your new tailpiece and attach it to the drain pipe. Use plumber's tape around the threads to ensure a tight seal. Screw the new tailpiece into place, making sure it’s aligned correctly.
3.4 Tighten the Nuts
Use your adjustable wrench to tighten the nuts securely. Be careful not to overtighten, as this could cause damage to the pipes or cause leaks.
3.5 Test for Leaks
Turn on the water supply and run the faucet. Check the connections for any signs of leaking. If the connections are dry, you’ve successfully fixed the leak!
4. Preventing Future Leaks
Here are a few tips to prevent your sink drain tailpiece from leaking again in the future:
- Regular Inspection: Check the tailpiece and connections regularly for signs of wear or loose fittings.
- Proper Installation: Ensure the tailpiece is properly installed and aligned to avoid stress on the connections.
- Use Plumber’s Tape: Always use plumber's tape when installing or reassembling the drain to ensure a secure, leak-free seal.


 William J. Riley Plumbing & Heating Co Inc4.0 (62 reviews)
 John Neill Plumbing & Heating4.0 (54 reviews)
 Dellarocco Plumbing & Heating, Inc.0.0 (0 reviews)
 Roto-Rooter Plumbing & Water Cleanup4.0 (632 reviews)
 Advanced Plumbing And Drain Services, LLC3.0 (3 reviews)
 DiDio Plumbing and Drain Services Inc5.0 (1 reviews)
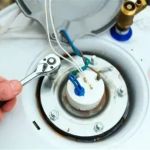 When Should You Call a Plumber for a Broken Water Heater
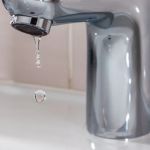 How to Fix a Leaking Faucet in Your Home the Right Way
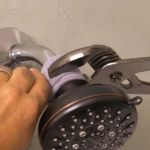 How to Install a New Showerhead and Save Water
 Ultimate Guide to Fixing a Garbage Disposal: Troubleshoot & Repair
 Best Ways to Fix a Leaking Faucet: Easy DIY Solutions and Expert Tips
 Why Is My Kitchen Sink Filling with Water When Washing Machine Drains?