
Stop That Drip: A Practical Guide to Handling Washer Hose Leaks at Home
- -Why Washing Machine Hoses Start Leaking
- -How to Identify the Exact Source of the Leak
- -Step-by-Step Fix for a Leaking Hose
- -When to Repair vs Replace the Hose
- -A Real Home Incident and What It Taught
- -How to Prevent Future Washing Machine Leaks
1. Why Washing Machine Hoses Start Leaking
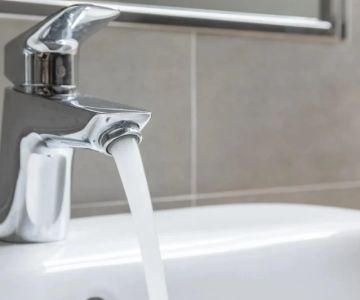
Understanding how to fix a leaking washing machine hose starts with knowing why it happens in the first place. Most homeowners don’t think about these hoses until there’s water pooling on the floor, but they’re under constant pressure every time you run a cycle.
Lawrence Plumbing And Heating / lawrence plumbing
708 E Lake Ave, Baltimore, MD 21212, USA
1.1 Wear and Tear Over Time
Rubber hoses, especially older ones, tend to crack or weaken after years of use. Even small hairline fractures can turn into noticeable leaks when water pressure builds up.

coastal & son, llc / aj appliance toms river nj
Toms RiverOcean CountyNew Jersey
1106 Verdant Rd, Toms River, NJ 08753, USA
1.2 Loose Connections
Sometimes the issue isn’t the hose itself but the connection points. Vibrations from regular washing cycles can slowly loosen fittings, leading to dripping or spraying water.
1.3 High Water Pressure
Excessive water pressure in some homes can stress the hose material, increasing the chances of leaks or sudden bursts.
2. How to Identify the Exact Source of the Leak
Before jumping into repairs, pinpointing the exact problem is essential when learning how to fix a leaking washing machine hose effectively.
2.1 Inspect the Hose Surface
Look closely along the length of the hose for cracks, bulges, or damp spots. These are clear indicators of material failure.
2.2 Check the Connection Points
Examine both ends of the hose where it connects to the washing machine and the water supply. Leaks often occur at these joints rather than in the middle of the hose.
2.3 Run a Short Cycle Test
Turn on the machine briefly and observe carefully. This helps you confirm whether the leak happens under pressure or is constant.
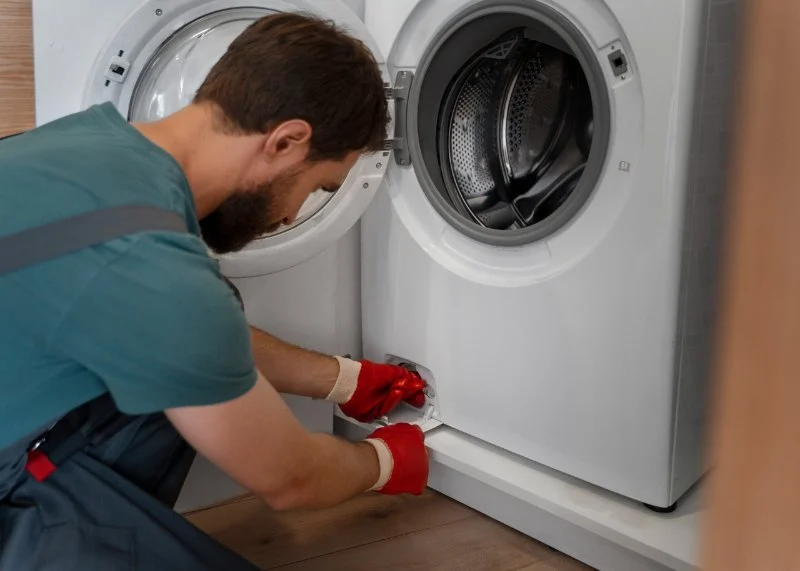
3. Step-by-Step Fix for a Leaking Hose
Once you’ve identified the issue, you can move forward with a practical solution. Knowing how to fix a leaking washing machine hose step by step can save you both time and costly repairs.
3.1 Turn Off Water Supply
Always start by shutting off the water valves connected to the washing machine. This prevents further leakage and keeps the repair process safe.
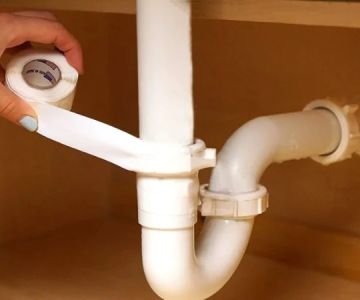
3.2 Tighten or Reposition Connections
If the leak is coming from a loose fitting, use a wrench to gently tighten the connection. Avoid overtightening, as this can damage threads or seals.
3.3 Replace Damaged Washers
Inside the hose connectors are small rubber washers that create a seal. If these are worn out, replacing them can often solve the problem instantly.
3.4 Replace the Hose if Necessary
If the hose itself is cracked or weakened, replacement is the safest option. Modern stainless steel braided hoses are more durable and resistant to bursting compared to traditional rubber ones.
4. When to Repair vs Replace the Hose
One of the most common questions when dealing with leaks is whether to fix or replace the hose entirely.
4.1 Minor Issues Can Be Repaired
Loose fittings or worn washers are usually quick fixes that don’t require full replacement.
4.2 Visible Damage Means Replacement
If you notice cracks, bulges, or brittleness, replacing the hose is the smarter long-term solution.
4.3 Age Matters More Than You Think
Experts often recommend replacing washing machine hoses every 3–5 years, even if they appear fine. It’s a small investment compared to the cost of water damage.
5. A Real Home Incident and What It Taught
A homeowner once shared how a small drip behind their washing machine turned into a flooded laundry room overnight. They had noticed a minor leak but assumed it could wait.
5.1 What Went Wrong
The hose had a hidden crack that expanded under pressure during a late-night wash cycle. By morning, water had spread across the floor and damaged nearby cabinets.
5.2 What Fixed It
After replacing the hose with a reinforced braided version and checking the connections regularly, they never faced the issue again.
5.3 The Key Lesson
Small leaks are rarely harmless. Acting early is always cheaper and less stressful than dealing with major water damage.
6. How to Prevent Future Washing Machine Leaks
Once you’ve learned how to fix a leaking washing machine hose, the next step is making sure it doesn’t happen again.
6.1 Regular Inspections
Check your hoses every few months for signs of wear. A quick inspection can catch problems before they escalate.
6.2 Upgrade to Better Materials
Switching to high-quality braided hoses can significantly reduce the risk of leaks and extend the lifespan of your setup.
6.3 Turn Off Water When Not in Use
If you’re leaving home for an extended period, turning off the water supply can prevent unexpected leaks from causing damage.
6.4 Invest in Leak Detection Tools
Simple leak detectors placed near your washing machine can alert you early, giving you time to act before serious damage occurs.
Mastering How to Fix a Leaking Washing Machine Hose not only protects your home but also gives you confidence in handling everyday maintenance. If you’re ready to upgrade your setup, explore durable hoses, replacement kits, and smart leak detection tools to keep your laundry area safe and worry-free. Taking action now can save you from costly repairs later.

 Anchor Plumbing Corporation4.0 (4 reviews)
 Rooter-Man4.0 (13 reviews)
 Burgess Plumbing Inc.4.0 (10 reviews)
 MG Property Management & Associates , LLC / DBA : Phoenixville Plumber4.0 (18 reviews)
 RMD Plumbing4.0 (8 reviews)
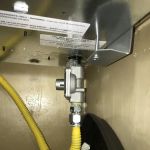 Metro City Group4.0 (4 reviews)
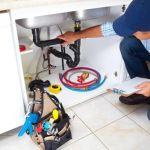 Ultimate Guide to Maintaining Your Plumbing System
 What to Do If Reducing Your Water Bill: Practical Tips and Solutions
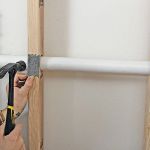 What to Do If Replacing Old Pipes: A Step-by-Step Guide for Homeowners
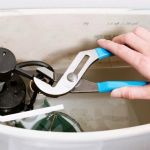 How to Fix a Toilet That Won’t Stop Running
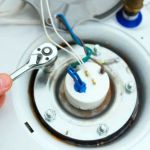 How to Safely Repair a Broken Water Heater
 How Much Does It Cost to Finding a Reliable Plumber