
- 1. Understanding the Causes of a Leaking Shower Door Seal
- 2. Tools You Will Need to Fix a Leaking Shower Door Seal
- 3. Step-by-Step Guide to Fixing a Leaking Shower Door Seal
- 4. Preventing Future Leaks and Maintaining Your Shower Seal
- 5. When to Call a Professional for Shower Door Seal Repair
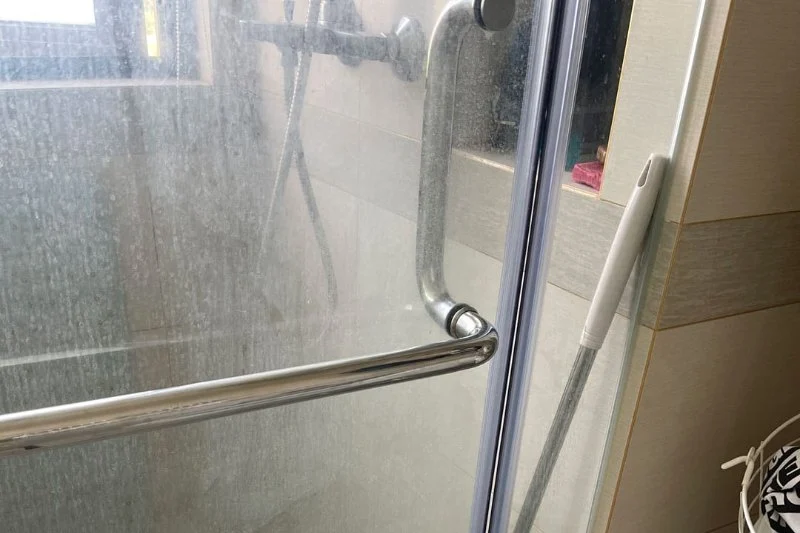
1. Understanding the Causes of a Leaking Shower Door Seal
A leaking shower door seal can be frustrating, and it often leads to water damage in your bathroom. Over time, the seal around your shower doors may wear out or become damaged, leading to leaks. Understanding the common causes of these leaks can help you fix the problem quickly.
Common causes of leaking shower doors include:
- Worn-out seal: Most shower door seals wear down over time due to constant exposure to water and cleaning agents.
- Improper installation: If the shower door seal wasn't installed correctly from the start, it might not form a perfect seal.
- Damage to the seal: Scrapes, cuts, or other damage to the seal can lead to water leakage.
- Accumulation of debris: Dirt, soap scum, or mold buildup can compromise the integrity of the seal.
Identifying the root cause of the leak will help determine the best way to fix it.
2. Tools You Will Need to Fix a Leaking Shower Door Seal
Fixing a leaking shower door seal is a simple task that requires a few essential tools. Here’s what you’ll need to get started:
- Replacement seal: You will need to purchase a new seal that fits your shower door. These are available at most hardware stores.
- Screwdriver: You may need a screwdriver to remove the old seal or any fasteners on the shower door frame.
- Utility knife: A utility knife will help you remove the old seal and cut the new seal to the appropriate length.
- Measuring tape: Use the measuring tape to ensure you cut the new seal to the right length for your door.
- Cleaning supplies: Clean any mold, mildew, or soap scum from the door frame before installing the new seal.
Having these tools on hand will make the repair process go smoothly and efficiently.
3. Step-by-Step Guide to Fixing a Leaking Shower Door Seal
Follow these simple steps to fix your leaking shower door seal:
- Step 1: Remove the old seal. Use a utility knife or screwdriver to carefully remove the old, damaged seal. Be cautious not to damage the shower door frame during removal.
- Step 2: Clean the area. Clean the door frame and surrounding areas to remove any mold, mildew, or soap scum. This ensures the new seal adheres properly.
- Step 3: Measure the new seal. Use a measuring tape to determine the length needed for the new seal. If the seal is too long, trim it with a utility knife.
- Step 4: Install the new seal. Place the new seal along the edge of the shower door, making sure it fits securely. Press it into place, ensuring there are no gaps.
- Step 5: Check for leaks. After installing the new seal, close the door and test it by running water over the edges. If no leaks are present, the repair is complete.
By following these steps, you should be able to fix your leaking shower door seal quickly and easily.
4. Preventing Future Leaks and Maintaining Your Shower Seal
Once your shower door seal is fixed, it’s important to take steps to prevent future leaks and extend the life of your seal:
- Regular cleaning: Clean the seal and surrounding areas regularly to prevent mold, soap scum, and other debris from building up.
- Inspect the seal: Periodically check the seal for signs of wear or damage. Early detection can prevent larger issues down the road.
- Keep the door dry: After each shower, dry the shower door and seal with a towel to prevent water buildup that can lead to leaks.
By maintaining your shower door seal properly, you can avoid the hassle of future leaks and ensure your shower remains leak-free for longer.
5. When to Call a Professional for Shower Door Seal Repair
In some cases, a leaking shower door seal may require professional attention. You may need to call a plumber or handyman if:
- The seal is severely damaged or beyond repair.
- There are structural issues with the shower door frame.
- You are unable to fix the leak despite multiple attempts.
While DIY repairs can save you money, a professional can ensure that the job is done correctly and that any underlying issues are addressed.
 Citywide Sewer & Drain4.0 (5 reviews)
 VP Plumbing & Heating4.0 (227 reviews)
 McBride Plumbing, Heating and Gas Work5.0 (5 reviews)
 Steve Scillieri Plumbing & Heating4.0 (64 reviews)
 Bond & Son Plumbing & Heating Inc2.0 (3 reviews)
 Evergreen Plumbing, Heating, & Cooling Home Services4.0 (478 reviews)
 Ultimate Guide to Choosing the Right Pipe Materials for Your Plumbing Needs
 Signs You Need Understanding Plumbing Codes for Better Home Repairs
 When Should You Call a Plumber for Sewer Line Backups?
 What Causes Unclogging a Bathtub Drain and How to Fix It
 How to Replace a Broken Drain Vent Pipe - Step-by-Step Guide
 Step-by-Step Guide to Preventing Winter Plumbing Issues in the U.S.