

Stop the Drip: Practical Ways to Repair a Bathtub Faucet Stem Like a Pro
- Why Bathtub Faucet Stems Start Leaking
- Signs Your Faucet Stem Needs Attention
- Tools and Materials You Will Need
- Preparing for the Repair
- Step-by-Step Faucet Stem Repair
- Common Mistakes Homeowners Make
- When Replacing the Stem Is Better
- Preventing Future Faucet Leaks
- Real-World Repair Story
- Repair Versus Professional Help
- Long-Term Bathroom Plumbing Care
- Next Steps for Homeowners
Why Bathtub Faucet Stems Start Leaking
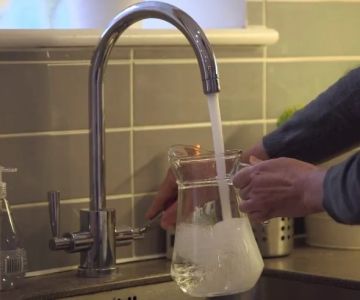
A leaking bathtub faucet stem is one of the most common plumbing issues homeowners face. At first, the steady drip may seem harmless. However, over time, even a slow leak can waste hundreds of gallons of water, increase utility bills, and create unnecessary wear on plumbing components.
The faucet stem is the internal mechanism responsible for controlling water flow. Every time the handle turns, the stem moves to either allow or stop water from passing through. Because this component experiences constant use, it eventually wears down.

Stashluk Mechanical Contractors Inc. / stashluk
Franklin TownshipHunterdon CountyNew Jersey
998 Croton Rd, Pittstown, NJ 08867, USA
1. Worn Washers
One of the primary causes of a leaking bathtub faucet stem is a worn rubber washer. These small components create a watertight seal. After years of use, friction causes them to crack, flatten, or deteriorate.
Go Green Plumbing, Heating, Air & Electrical / go green plumbing heating and air
GreensboroGuilford CountyNorth Carolina
300 Pomona Dr, Greensboro, NC 27407, USA
2. Damaged O-Rings
O-rings help prevent water from escaping around the stem assembly. When they become brittle or stretched, water can leak around the faucet handle and stem area.
3. Corrosion and Mineral Deposits
Hard water often leaves mineral buildup inside plumbing fixtures. Over time, these deposits can interfere with the proper operation of the stem, making leaks more likely.
4. Aging Faucet Components
Many faucet stems can last for years, but eventually metal fatigue, corrosion, and general wear reduce their effectiveness. In older homes, aging stems are often the root cause of persistent drips.
Signs Your Faucet Stem Needs Attention
Before learning how to fix a leaking bathtub faucet stem, it is important to identify the warning signs correctly.
Visible Dripping
The most obvious symptom is water continuously dripping from the spout after the faucet is fully closed.
Water Around the Handle
If moisture appears around the faucet handle, the stem seal or O-ring may be failing.
Difficulty Turning the Handle
A handle that feels stiff or unusually loose often indicates stem damage.
Whistling or Squeaking Sounds
Unusual noises during operation may signal worn internal parts or restricted water flow.
Tools and Materials You Will Need
Successful faucet stem repairs start with proper preparation.
Essential Tools
- Screwdriver set
- Adjustable wrench
- Socket wrench
- Needle-nose pliers
- Flashlight
- Utility knife
Replacement Parts
- New faucet stem
- Replacement washers
- O-rings
- Plumber's grease
- Plumber's tape
Many homeowners find it helpful to take the old stem to a hardware store to ensure an exact replacement match.
Preparing for the Repair
Preparation is often the difference between a quick repair and a frustrating project.
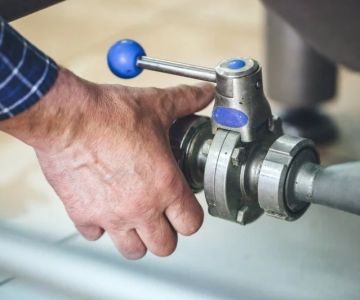
1. Shut Off the Water Supply
Always turn off the home's water supply before beginning any plumbing work. If local shut-off valves exist near the bathroom, use those instead.
2. Protect the Drain
Cover the drain opening with a rag or stopper. Small screws and washers can easily fall into the drain during disassembly.
3. Organize Components
Place removed parts in order on a towel. This makes reassembly significantly easier.
Step-by-Step Faucet Stem Repair
Step 1: Remove the Faucet Handle
Locate the decorative cap covering the handle screw. Carefully pry it off using a flat-head screwdriver.
Remove the screw and pull the handle straight outward. If the handle is stuck due to mineral buildup, gently wiggle it while applying steady pressure.
Step 2: Access the Stem Assembly
With the handle removed, the stem assembly becomes visible. Depending on the faucet design, you may need to remove an escutcheon plate or trim sleeve.
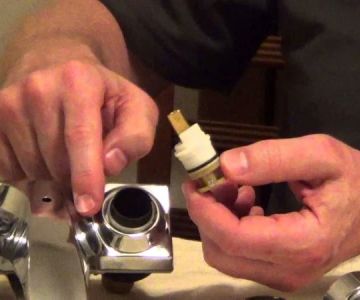
Step 3: Unscrew the Faucet Stem
Use an adjustable wrench to loosen the stem assembly. Turn counterclockwise until it can be removed completely.
Inspect the stem carefully once removed.
Check for:
- Cracked washers
- Damaged O-rings
- Corrosion
- Warped threads
- Mineral buildup
Step 4: Replace Damaged Components
If the stem itself remains in good condition, replacing the washers and O-rings may solve the problem.
Apply a small amount of plumber's grease to new O-rings before installation. This helps ensure smooth operation and improves durability.
Step 5: Install a New Stem If Necessary
If significant wear or corrosion exists, replacing the entire stem is often the better solution.
Insert the new stem carefully and tighten it securely without overtightening.
Step 6: Reassemble the Faucet
Replace trim pieces, reinstall the handle, and secure all screws.
Step 7: Restore Water Supply
Turn the water back on gradually and test the faucet. Open and close it several times while checking for leaks.
Common Mistakes Homeowners Make
Using Excessive Force
Many DIY repairs become more expensive because components are overtightened or forced apart. Plumbing fixtures often require patience rather than strength.
Buying the Wrong Parts
Not all stems are universal. Even faucets from the same manufacturer may use different stem designs.
Ignoring Small Leaks
A minor drip can eventually become a major plumbing problem. Addressing issues early often saves significant money.
Skipping Lubrication
Proper lubrication extends component life and prevents premature wear.
When Replacing the Stem Is Better
Sometimes repairs are only temporary. Replacing the entire stem makes more sense when:
1. Corrosion Is Extensive
Heavy rust or mineral damage can weaken structural integrity.
2. The Faucet Is More Than Ten Years Old
Older components often experience multiple simultaneous failures.
3. Repairs Have Failed Before
If the faucet continues leaking after replacing washers and O-rings, the stem itself is likely damaged.
4. Replacement Parts Are Inexpensive
In many cases, a complete stem costs only slightly more than individual repair parts.
Preventing Future Faucet Leaks
Perform Regular Inspections
Check bathroom fixtures every few months for signs of moisture or unusual operation.
Address Hard Water Issues
Installing a water softener can reduce mineral buildup significantly.
Avoid Over-Tightening Handles
Many people force faucet handles closed. This places unnecessary strain on internal seals.
Replace Aging Components Proactively
Preventive maintenance often costs far less than emergency plumbing repairs.
Real-World Repair Story
A homeowner in Arizona noticed a small bathtub drip that seemed insignificant. For nearly six months, the faucet leaked continuously. Eventually, the family received a water bill that was noticeably higher than normal.
After investigating, they discovered the faucet stem washer had deteriorated completely. What began as a simple repair had already wasted a substantial amount of water.
The repair itself took less than one hour and required only a replacement washer and O-ring. The experience highlighted a valuable lesson: small plumbing problems rarely stay small forever.
Repair Versus Professional Help
Many homeowners successfully learn how to fix a leaking bathtub faucet stem without professional assistance. However, certain situations warrant expert help.
Call a Professional If:
- The stem is seized and cannot be removed.
- The plumbing behind the wall is leaking.
- The faucet body is cracked.
- You discover corrosion inside supply lines.
- Multiple fixtures show similar issues.
Professional plumbers can quickly identify hidden problems that may not be obvious during a DIY inspection.
Long-Term Bathroom Plumbing Care
Successful homeowners treat plumbing maintenance the same way they treat vehicle maintenance. Small inspections performed regularly prevent costly surprises.
Monthly Checks
Look for dripping faucets, moisture around fixtures, and unusual sounds.
Seasonal Maintenance
Inspect supply valves, clean aerators, and remove mineral buildup from fixtures.
Annual Reviews
Evaluate older plumbing components and consider replacing heavily used parts before they fail.
Keeping a simple maintenance schedule can extend fixture lifespan significantly.
Next Steps for Homeowners
Learning how to fix a leaking bathtub faucet stem is one of the most valuable DIY plumbing skills a homeowner can develop. The repair is usually affordable, requires only basic tools, and can prevent water waste while extending the life of your bathroom fixtures.
If you are planning a repair project, take time to identify the exact faucet model, gather quality replacement components, and follow each step carefully. For homeowners who want additional repair guides, maintenance advice, replacement parts, and trusted plumbing recommendations, exploring specialized home improvement resources can make future projects much easier.
The sooner you address a leaking bathtub faucet stem, the sooner you can stop wasting water, reduce utility costs, and protect your plumbing system from larger issues. Whether you choose a simple washer replacement or a complete stem upgrade, taking action today can save significant time and money in the future.
 A G Sewer Repair, LLC4.0 (1 reviews)
 Tomco Plumbing5.0 (3 reviews)
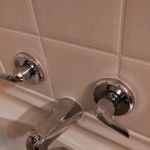 Royal Plumbing Services, LLC4.0 (72 reviews)
 Tech Berati LLC - Plumbing Heating & Cooling5.0 (39 reviews)
 Drain Pro4.0 (27 reviews)
 Pittinger Plumbing, Inc.0.0 (0 reviews)
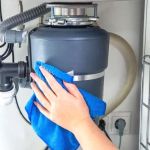 Expert Advice on Fixing a Garbage Disposal
 What Causes and Prevents Winter Plumbing Issues in U.S. Homes
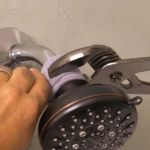 How to Install a New Showerhead and Save Water
 How Often Should You Check for Water Damage in Your Bathroom
 How to Troubleshoot and Fix a Toilet Tank That Won’t Hold Water
 How to Fix a Leaking Shower Drain Flange: Step-by-Step Guide