
Repairing a Leaking Shower Drain Flange Effectively
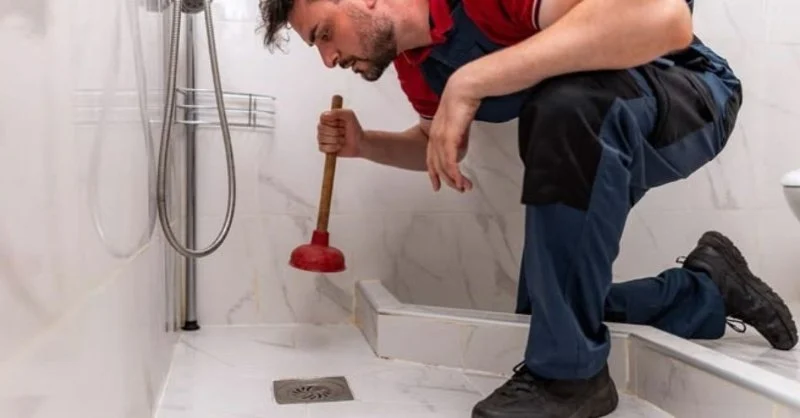
- 1 - Identifying the Leak Source
- 2 - Gathering Tools and Materials
- 3 - Preparing the Shower Area
- 4 - Removing the Old Shower Flange
- 5 - Installing the New Flange
- 6 - Sealing and Testing
- 7 - Tips for Preventing Future Leaks
- 8 - Real-Life Case Studies
- 9 - Choosing Quality Products
1. Identifying the Leak Source
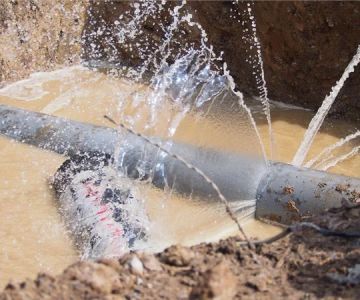
Before repairing a leaking shower drain flange, it’s crucial to locate the source of the leak. Check for water pooling around the base of the drain, inspect the subfloor, and observe if leaks appear only during showers. Identifying whether the leak originates from the flange, gasket, or pipes ensures you address the correct problem efficiently.

Stashluk Mechanical Contractors Inc. / stashluk
Franklin TownshipHunterdon CountyNew Jersey
998 Croton Rd, Pittstown, NJ 08867, USA
2. Gathering Tools and Materials
For a successful repair, gather all necessary tools and materials. This includes a new shower drain flange, plumber’s putty, adjustable wrench, screwdrivers, plumber’s tape, and bucket for water drainage. Ensuring you have all tools on hand reduces interruptions and makes the process smoother.

coastal & son, llc / aj appliance toms river nj
Toms RiverOcean CountyNew Jersey
1106 Verdant Rd, Toms River, NJ 08753, USA
3. Preparing the Shower Area
Clear the area around the shower drain and remove any obstructions. Dry the area thoroughly to prevent slipping and create a clean workspace. If the shower is tiled, consider protecting tiles with painter’s tape to avoid scratches during the repair process.
4. Removing the Old Shower Flange
Carefully unscrew and remove the old flange using an adjustable wrench. If the flange is stuck due to old plumber’s putty or corrosion, apply gentle heat or penetrating oil to loosen it. Take care not to damage the surrounding drain or shower floor during removal.
5. Installing the New Flange
Apply a generous amount of plumber’s putty around the base of the new flange. Position the flange carefully and secure it with screws. Ensure it sits flush with the shower floor to prevent gaps that could lead to future leaks. Tighten screws gradually and evenly to avoid cracking the flange.
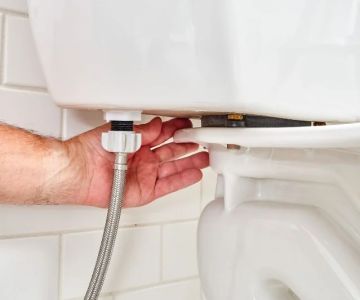
6. Sealing and Testing
Once installed, seal around the flange with silicone caulk for added protection. Allow the putty and caulk to cure as per manufacturer instructions. Test the repair by running water in the shower and checking for leaks around the flange. Address any issues immediately before finalizing the repair.
7. Tips for Preventing Future Leaks
- Regularly inspect the shower drain for signs of wear or loosened screws.
- Replace plumber’s putty or silicone caulk every few years to maintain a watertight seal.
- Avoid harsh cleaning chemicals that can degrade the flange or sealant.
- Consider upgrading to a higher-quality flange or gasket for long-term durability.
8. Real-Life Case Studies
Homeowners often report persistent leaks even after minor fixes. One case involved a family replacing their shower flange after repeated water damage to the subfloor. Following a careful replacement with plumber’s putty and silicone sealant, the leak was fully resolved. Sharing these real-life experiences illustrates the importance of proper installation and quality materials.
9. Choosing Quality Products
Using reliable products ensures the repair lasts for years. Opt for durable shower drain flanges, high-quality plumber’s putty, and professional-grade sealants. For recommendations and trusted suppliers, visit Camping Cabins to explore a selection of plumbing tools and accessories that make DIY repairs easier and more effective. Learn more and click to check the latest products for fixing a leaking shower drain flange efficiently.
 coastal & son, llc4.0 (6 reviews)
 Newberry Plumbing5.0 (192 reviews)
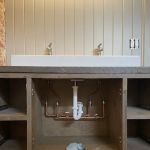 Palazzo Plumbing & Heating3.0 (3 reviews)
 Rice Plumbing & Heating4.0 (616 reviews)
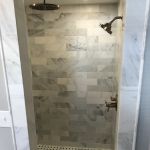 Alps Plumbing, Llc4.0 (16 reviews)
 Garden State Sewer & Drain5.0 (2 reviews)
 How to Detect and Fix Leaking Water Pipes in Your Home
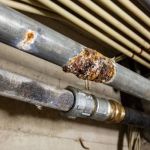 How to Prevent Plumbing Problems in Older Homes
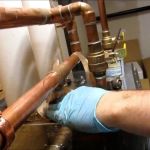 How to Fix a Leaking Pipe Under Concrete
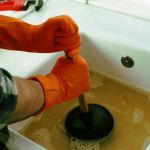 Best Ways to Clogged Drains
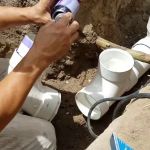 DIY Fixes for Sewer Line Backups: Simple Solutions to Prevent Costly Repairs
 Why Is My Garbage Disposal Humming But Not Working? Common Causes and Solutions