
A Practical Home Guide to Fixing a Leaking Shower Without Calling a Plumber
- How-to-Replace-a-Shower-Cartridge-Step-by-Step-basics - Understanding what a shower cartridge does - Why failure causes leaks and temperature issues
- How-to-Replace-a-Shower-Cartridge-Step-by-Step-tools-prep - Essential tools and preparation before starting repair - How to avoid common beginner mistakes
- How-to-Replace-a-Shower-Cartridge-Step-by-Step-process - Step-by-step replacement instructions - How to safely remove and install a new cartridge
- How-to-Replace-a-Shower-Cartridge-Step-by-Step-troubleshooting - Fixing leaks, stiffness, and installation errors - When DIY is not enough
- How-to-Replace-a-Shower-Cartridge-Step-by-Step-real-case - Real homeowner experience with shower repair - Lessons learned and cost-saving insights
Why Learning How to Replace a Shower Cartridge Step by Step Matters
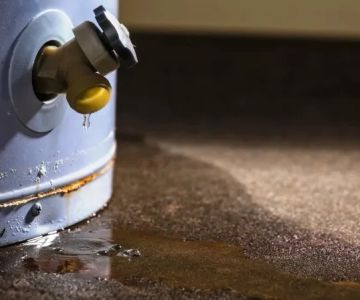
A leaking shower might seem like a minor annoyance at first, but over time it can waste hundreds of gallons of water and significantly increase utility bills. Understanding How to Replace a Shower Cartridge Step by Step gives homeowners the confidence to handle one of the most common plumbing issues without immediately calling a professional.
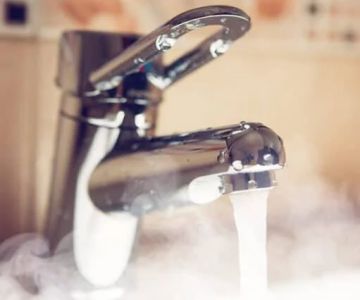
In many modern homes across the U.S., shower systems rely on cartridge valves to control water flow and temperature. When this small component wears out, it can cause dripping, inconsistent water temperature, or even complete failure of the faucet handle.

Warrior Plumbing & Heating / warrior plumbing
4123 Roland Ave, Baltimore, MD 21211, USA
Why shower cartridges fail over time
Cartridges are constantly exposed to water pressure, minerals, and temperature changes. Hard water, especially in areas like Arizona or California, accelerates wear by leaving mineral deposits that restrict movement inside the valve.
Even high-quality cartridges eventually degrade, making replacement a normal part of home maintenance rather than a rare repair.
Hardy Plumbing / hardy plumbing
Port ClintonSchuylkill CountyPennsylvania
149 Penn St, Port Clinton, PA 19549, USA
Tools and Preparation Before Starting the Repair
Before beginning How to Replace a Shower Cartridge Step by Step, it is essential to prepare the right tools and ensure water safety. Many DIY mistakes happen simply because homeowners rush into the process without proper preparation.
Essential tools you will need
Most shower cartridge replacements require basic tools such as an adjustable wrench, screwdriver set, needle-nose pliers, and sometimes a cartridge puller depending on the faucet brand.
A towel and a small container for screws and parts are also highly recommended to avoid losing small components during the process.
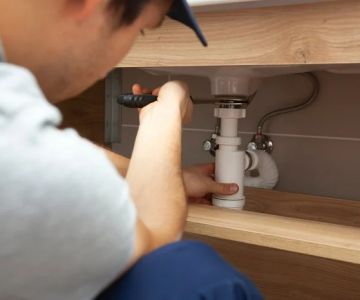
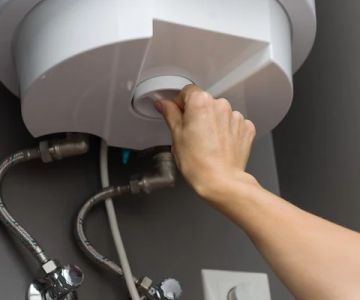
Turning off water supply safely
Before touching any plumbing fixture, always shut off the main water supply or the bathroom isolation valve. Skipping this step can result in unexpected water pressure release, leading to flooding or damage.
Step-by-Step Guide to Replacing a Shower Cartridge
Now let’s walk through the actual process of How to Replace a Shower Cartridge Step by Step in a practical and beginner-friendly way.
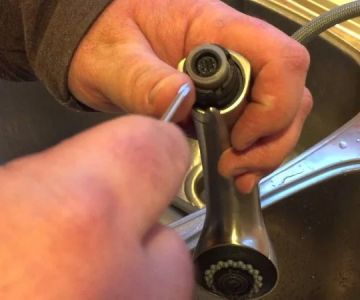
Step 1: Remove the shower handle
Most shower handles are secured with a small screw hidden under a decorative cap. Carefully remove the cap and unscrew the handle. Gently pull it off without forcing it, as excessive pressure may damage internal components.
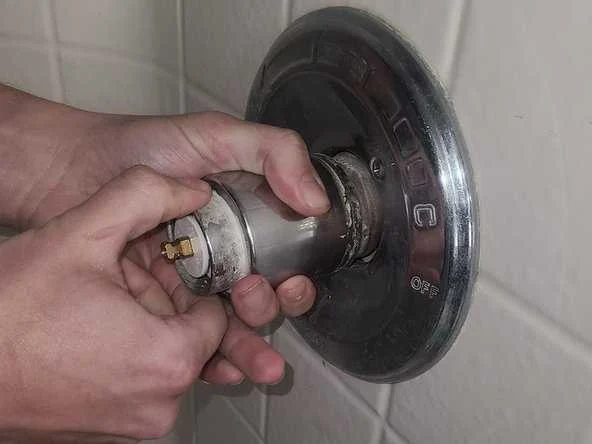
Step 2: Expose the cartridge assembly
Once the handle is removed, you will see the cartridge housing. Depending on the model, there may be a retaining clip or nut holding the cartridge in place.
This is where patience matters. Forcing the part can damage the valve body, which would significantly increase repair costs.
Step 3: Remove the old cartridge
Use pliers or a cartridge puller to gently extract the old cartridge. If it feels stuck, it may be due to mineral buildup. Applying a small amount of penetrating lubricant can help loosen it.
Step 4: Insert the new cartridge
Align the new cartridge carefully with the valve slots. Incorrect alignment is one of the most common mistakes in DIY plumbing repairs.
Push it in firmly but gently until it sits securely in place.
Step 5: Reassemble the handle
Once the cartridge is installed, reattach the retaining clip, screw the handle back, and restore the decorative cover.
Turn the water supply back on slowly to check for leaks or irregular flow.
Common Problems After Replacement and How to Fix Them
Even after following How to Replace a Shower Cartridge Step by Step, some issues may still occur if installation is slightly off or if the wrong cartridge model is used.
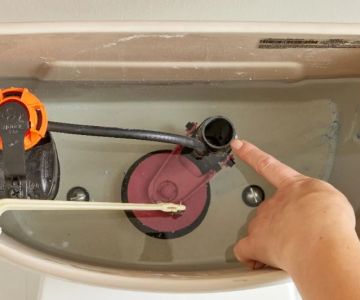
Water leaking after installation
This usually indicates that the cartridge is not fully seated or that the O-rings are not properly aligned. In most cases, removing and reinstalling the cartridge resolves the issue.
Difficulty adjusting water temperature
If the water is too hot or too cold, the cartridge may not be calibrated correctly. Some models require manual adjustment to align temperature control settings.
Stiff or loose handle movement
This often happens when debris remains inside the valve body. Cleaning the interior before installation can prevent this issue.
Real Homeowner Story: A Simple Leak Turned Into a Big Lesson
A homeowner in Texas once ignored a slow drip in the shower for months, assuming it was not urgent. Over time, the leak worsened, and the water bill increased significantly.
Eventually, they attempted How to Replace a Shower Cartridge Step by Step after watching online tutorials. While the first attempt failed due to using the wrong cartridge model, the second attempt succeeded after consulting a hardware specialist.
The experience taught a valuable lesson: even simple plumbing issues require attention to detail and correct parts selection.
When DIY Is Enough and When to Call a Professional
Not every plumbing issue should be handled alone. If the valve body is cracked, corroded, or incompatible with replacement cartridges, professional help is necessary.
However, in most standard cases, following How to Replace a Shower Cartridge Step by Step is enough to restore full functionality without expensive service calls.
Choosing the Right Replacement Cartridge
Selecting the correct cartridge is crucial. Brands vary widely, and even small differences in model numbers can affect compatibility.
Homeowners are encouraged to bring the old cartridge to a hardware store or check manufacturer specifications carefully before purchasing a replacement.
Why quality matters
Cheap cartridges may save money initially but often fail faster, leading to repeated repairs. Investing in a reliable part reduces long-term maintenance costs and improves shower performance.
Where to Find Reliable Plumbing Parts and Guidance
For homeowners looking for trusted guidance and quality replacement parts, platforms specializing in home repair solutions can be extremely helpful.
Understanding How to Replace a Shower Cartridge Step by Step becomes much easier when paired with the right tools and professional-grade components.
Exploring curated product options and repair advice can help ensure your next DIY plumbing project is both successful and cost-effective.
With the right preparation and careful execution, replacing a shower cartridge is one of the most practical and rewarding home maintenance tasks you can learn.
 Deluxe Plumbing & Heating4.0 (504 reviews)
 T&D Piping0.0 (0 reviews)
 P.A.C. Plumbing, Heating, & A/C4.0 (1946 reviews)
 On Point Maintenance & Mechanical, Llc5.0 (67 reviews)
 A Julian Plumbing and Heating LLC5.0 (115 reviews)
 John Lockwood Plumbing4.0 (173 reviews)
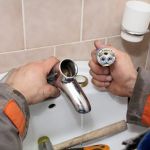 Preventing Plumbing Problems in Your New Home: What You Should Know
 Avoid These Mistakes When Sewer Line Backups Occur
 Understanding the Cost to Replace Your Main Plumbing Stack
 How to Handle Water Damage From Ceiling Leaks
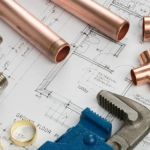 Top Tips for Understanding Plumbing Codes in U.S. Homes
 Best Ways to Reducing Your Water Bill: Expert Tips