
- 1. Why Installing a Garbage Disposal Is Important
- 2. Tools and Materials Needed for Installation
- 3. Step-by-Step Guide to Installing a Garbage Disposal
- 4. Common Mistakes to Avoid During Installation
- 5. When to Call a Professional for Garbage Disposal Installation
1. Why Installing a Garbage Disposal Is Important
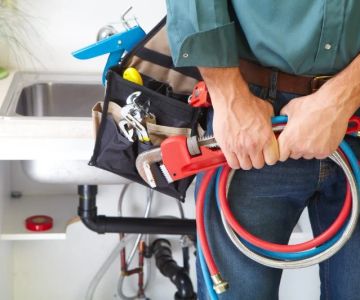
Installing a garbage disposal in your kitchen sink offers numerous benefits. Not only does it help reduce food waste in landfills, but it also keeps your kitchen cleaner by easily grinding food scraps. With a properly functioning garbage disposal, you can eliminate odors from food waste and keep your sink clear of debris.
Additionally, garbage disposals make cleaning up after meals much easier, as they allow you to simply grind and wash away food scraps instead of scraping them into the trash. This helps keep your kitchen running smoothly and minimizes unpleasant smells.
Hardy Plumbing / hardy plumbing
Port ClintonSchuylkill CountyPennsylvania
149 Penn St, Port Clinton, PA 19549, USA
2. Tools and Materials Needed for Installation
Before you begin installing your new garbage disposal, make sure you have all the necessary tools and materials. Here’s what you’ll need:

Stashluk Mechanical Contractors Inc. / stashluk
Franklin TownshipHunterdon CountyNew Jersey
998 Croton Rd, Pittstown, NJ 08867, USA
2.1 Tools
- Screwdriver
- Pliers
- Pipe wrench
- Adjustable wrench
- Drill (for making holes if needed)
- Hacksaw (if you need to cut pipes)
2.2 Materials
- New garbage disposal unit
- Plumbing pipe connectors
- Rubber gasket
- Electrical connections (for powered disposals)
- Plumber’s putty
- Dishwasher hose (if you have a dishwasher)
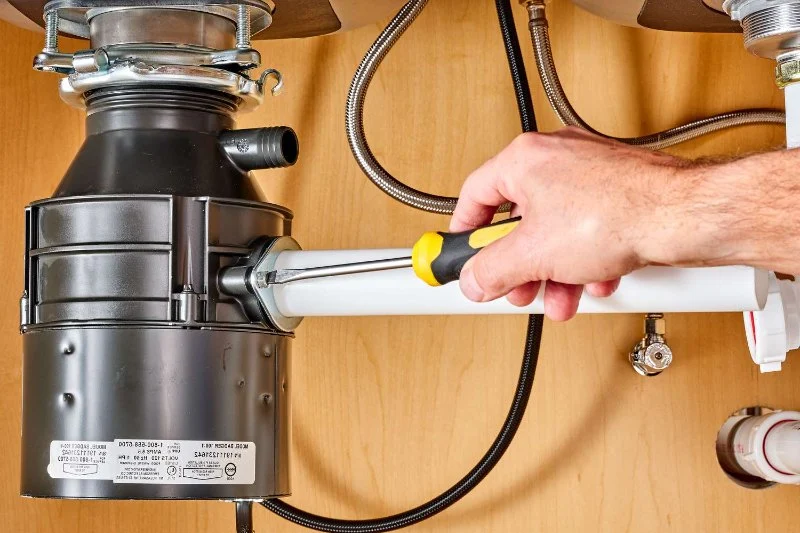
3. Step-by-Step Guide to Installing a Garbage Disposal
Now that you’ve gathered all your tools and materials, here’s a step-by-step guide to help you install your garbage disposal:
3.1 Turn Off the Power and Water
Before starting any work, make sure to turn off the power to the disposal unit at the circuit breaker. Also, turn off the water supply to avoid any accidents during installation.
3.2 Disconnect the Old Garbage Disposal (If Replacing)
If you’re replacing an old garbage disposal, begin by disconnecting the power supply and plumbing connections. Use pliers to disconnect the drain lines, then remove any screws or bolts that are securing the disposal to the sink mounting bracket. Carefully remove the old unit and set it aside.
3.3 Install the Mounting Bracket
Next, install the mounting bracket onto the sink. Apply a thin layer of plumber’s putty around the edge of the bracket to ensure a tight seal. Attach the mounting bracket to the sink using screws, making sure it's securely in place.
3.4 Attach the New Garbage Disposal
Once the mounting bracket is installed, attach the new garbage disposal unit. Align the disposal with the bracket and twist it into place. Use the included mounting hardware to secure it to the bracket. Be sure the unit is tightly connected and doesn’t move or wobble.
3.5 Connect the Drain and Dishwasher (If Applicable)
After the disposal is secured, connect the drain pipe to the disposal’s outlet. If you have a dishwasher, connect the dishwasher hose to the disposal’s inlet. Make sure all the connections are tight to prevent leaks.
3.6 Make the Electrical Connections
For powered disposals, you’ll need to make the electrical connections. Follow the manufacturer’s instructions for connecting the wires properly. If you're not familiar with electrical work, it may be a good idea to have a licensed electrician handle this part.
3.7 Test the Unit
Once everything is connected, turn the water and power back on. Test the disposal by running water through it and turning it on to ensure it’s working properly. Check for any leaks around the drain and connections. If there are no issues, you're all set!
4. Common Mistakes to Avoid During Installation
While installing a garbage disposal is a relatively straightforward process, there are a few common mistakes that can cause problems later on:
4.1 Not Properly Sealing Connections
Ensure all plumbing connections are properly sealed. If you don’t use enough plumber’s putty or tighten the fittings properly, leaks can occur, leading to water damage.
4.2 Overloading the Disposal
Once your new garbage disposal is installed, avoid overloading it with large amounts of food waste at once. Doing so can cause the motor to burn out or the disposal to jam.
4.3 Forgetting to Test the Unit
Always test the garbage disposal after installation to make sure it’s running smoothly. It’s much easier to fix small issues before you start using the unit regularly.
5. When to Call a Professional for Garbage Disposal Installation
While installing a garbage disposal is a manageable DIY task, there are situations where it’s best to call in a professional:
5.1 Complicated Plumbing or Electrical Issues
If your plumbing or electrical setup is complicated or if you don’t feel comfortable handling these systems, it’s safer to call a plumber or electrician to handle the installation.
5.2 Lack of Time or Experience
If you’re not confident in your ability to complete the installation or simply don’t have the time, hiring a professional can save you stress and ensure the job is done correctly.
Installing a new garbage disposal can enhance the functionality of your kitchen and make cleanup a breeze. By following these simple steps and avoiding common mistakes, you can easily complete the installation on your own. For more tips or to purchase the best garbage disposal systems, visit PlumberNear for expert recommendations and the best deals.


 Cronin Plumbing and Heating5.0 (93 reviews)
 Delco Storm & Sewer Services5.0 (138 reviews)
 Davidson H & C Co Inc4.0 (33 reviews)
 Green State Plumbing & Heating LLC4.0 (5 reviews)
 Total Plumbing & Heating3.0 (7 reviews)
 Pennucci Plumbing, LLC4.0 (9 reviews)
 Ultimate Guide to Preventing Winter Plumbing Issues for Your Home
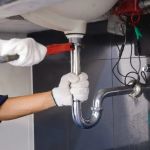 Expert Advice on Maintaining Your Plumbing System | Plumbing Tips and Tricks
 Prevent Winter Plumbing Issues: A Beginner's Guide to Pipe Protection
 How to Fix a Garbage Disposal: Simple Steps for Quick Repairs
 How Much Does It Cost to Maintain Your Plumbing System?
 Beginner's Guide to Detecting a Hidden Water Leak