
- 1. Understanding Showerhead Leaks
- 2. Common Causes of Leaky Showerheads
- 3. Tools You’ll Need to Fix Your Showerhead
- 4. Step-by-Step Guide to Fixing a Leaky Showerhead
- 5. How to Prevent Future Showerhead Leaks
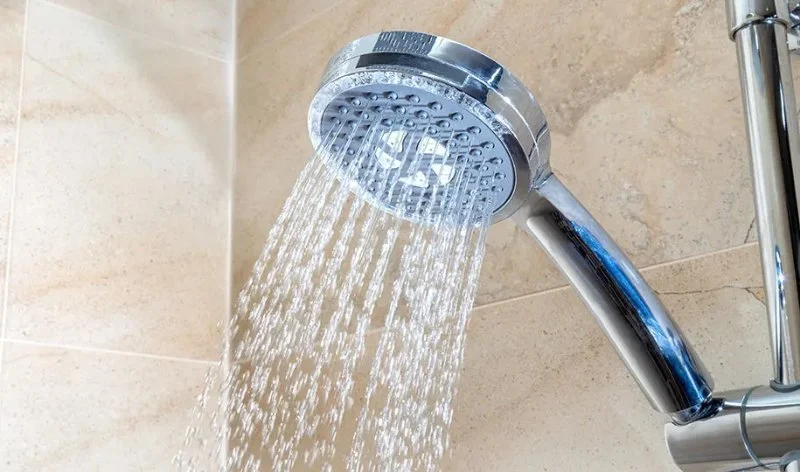
1. Understanding Showerhead Leaks
Showerheads are one of the most commonly used fixtures in the home, but a leaky showerhead can be a frustrating problem. Not only does it waste water, but it can also lead to higher water bills and potential water damage over time. Understanding the root causes of showerhead leaks and learning how to fix them will save you money and frustration.
In this guide, we’ll walk you through the process of fixing a leaky showerhead yourself. Whether the issue is a small drip or a constant stream of water, the solution is usually straightforward. With the right tools and a little patience, you can restore your shower to its proper working condition.
Hardy Plumbing / hardy plumbing
Port ClintonSchuylkill CountyPennsylvania
149 Penn St, Port Clinton, PA 19549, USA
2. Common Causes of Leaky Showerheads
Before you start fixing your showerhead, it’s important to understand why it might be leaking in the first place. Here are some common causes of showerhead leaks:

Warrior Plumbing & Heating / warrior plumbing
4123 Roland Ave, Baltimore, MD 21211, USA
1. Worn-Out Washer or O-Ring
The most common cause of a leaky showerhead is a worn-out rubber washer or O-ring inside the showerhead connection. Over time, the rubber seals that prevent water from escaping degrade, causing leaks.
2. Loose Showerhead Connection
If the showerhead is not tightly screwed onto the arm, it may cause water to leak. A loose connection allows water to escape around the threads, causing drips or sprays of water during use.
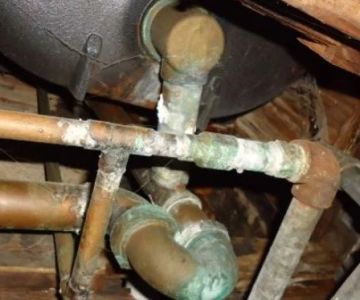
3. Mineral Buildup
Hard water minerals can accumulate inside the showerhead, restricting water flow and causing leaks. The minerals can also clog the small holes in the showerhead, leading to poor performance and uneven water distribution.
4. Faulty Diverter Valve
If you have a tub-shower combo, a leaky diverter valve could be the culprit. The diverter controls whether the water flows to the tub or showerhead, and if it’s malfunctioning, it could cause water to leak from the showerhead when the tub faucet is on.
3. Tools You’ll Need to Fix Your Showerhead
To fix a leaky showerhead, you’ll need a few basic tools. Gather these items before starting your repair:
- Adjustable Wrench – To loosen or tighten the showerhead connection.
- Plumber’s Tape – To seal threads and prevent leaks.
- Replacement Washers/O-Rings – For replacing any worn-out rubber seals.
- Rubber Gloves – To protect your hands and grip the parts securely.
- Cleaning Brush – For removing mineral deposits from the showerhead holes.
With these tools, you should be ready to begin fixing the leak in your showerhead. It’s a simple repair that requires just a little time and effort, but the results will be well worth it.
4. Step-by-Step Guide to Fixing a Leaky Showerhead
Now that you understand the causes and have gathered the necessary tools, let’s dive into the step-by-step process for fixing your leaky showerhead:
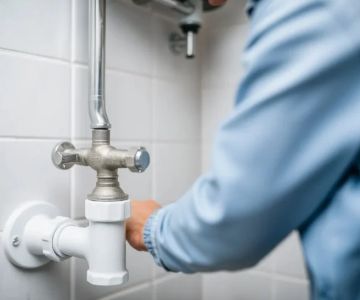
Step 1: Turn Off the Water
Before you begin, turn off the water supply to the shower to avoid any accidental spills or sprays during the repair process. Make sure the water is off completely before proceeding.
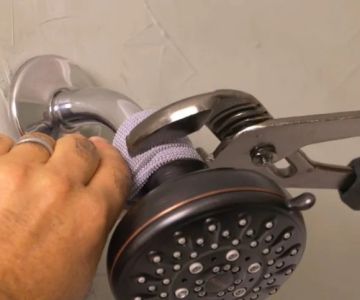
Step 2: Remove the Showerhead
Use the adjustable wrench to carefully loosen the showerhead from the shower arm. Be sure to grip it tightly and avoid over-tightening the wrench, as this can cause damage to the threads. Once loose, remove the showerhead by hand.
Step 3: Inspect the Washer or O-Ring
Look inside the showerhead connection for any worn-out washers or O-rings. If they appear cracked, worn, or damaged, replace them with new ones. These rubber seals can be found at any hardware store, and they are usually inexpensive and easy to replace.
Step 4: Clean the Showerhead
If mineral buildup is causing the leak, soak the showerhead in a mixture of equal parts vinegar and water. Let it soak for at least 30 minutes to dissolve any mineral deposits. After soaking, use a small brush to scrub away any remaining buildup from the showerhead holes.
Step 5: Reinstall the Showerhead
Apply a layer of plumber’s tape to the threads of the shower arm to ensure a tight seal. Then, screw the showerhead back onto the arm and tighten it with the adjustable wrench. Be careful not to overtighten, as this can damage the threads.
Step 6: Test for Leaks
Turn the water supply back on and check for leaks. If the leak persists, you may need to adjust the showerhead or replace the washer again. If you’re still having trouble, you may need to consult a professional plumber for further assistance.
5. How to Prevent Future Showerhead Leaks
To avoid future leaks, follow these simple maintenance tips:
1. Regularly Clean the Showerhead
To prevent mineral buildup, regularly clean your showerhead by soaking it in vinegar and water. This will help keep the holes clear and improve water flow.
2. Check for Leaks Periodically
Periodically inspect your showerhead for any signs of wear or leaks. Early detection will allow you to address the problem before it becomes more serious.
3. Replace Washers Every Few Years
Rubber washers and O-rings wear out over time, so it’s a good idea to replace them every few years to maintain a tight seal and prevent leaks.
If you’re unsure about repairing your leaky showerhead or need replacement parts, visit PlumberNear for high-quality tools, parts, and expert services that will help you keep your home’s plumbing in top condition.
 Alpha Plumbing4.0 (1364 reviews)
 US Pipelining LLC.5.0 (10 reviews)
 Duane co plumbing & hvac3.0 (3 reviews)
 E.F. Winslow Home Services4.0 (310 reviews)
 B & B Plumbing & Heating3.0 (2 reviews)
 Drain Express, Inc4.0 (42 reviews)
 Avoid These Mistakes When Finding a Reliable Plumber
 Top Tips for Reducing Your Water Bill: Practical Ways to Save on Your Water Usage
 How Long Does It Take to Replace Old Pipes?
 Why Is My Low Water Pressure: Causes and Solutions
 How to Safely Understand Plumbing Codes | Plumbing Code Compliance for Homeowners
 How to Handle Water Damage From Ceiling Leaks