
How to Fix a Leaking Pipe Under the Sink: A Step-by-Step Guide
- 1. Understanding the Problem: Why Your Pipe Might Be Leaking
- 2. Tools and Materials You Need to Fix the Leak
- 3. Step-by-Step Instructions for Fixing the Leak
- 4. How to Prevent Future Leaks Under the Sink
1. Understanding the Problem: Why Your Pipe Might Be Leaking
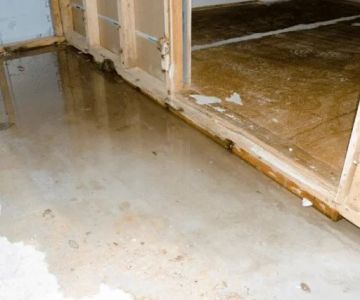
A leaking pipe under the sink is a common household issue that can cause water damage and mold growth if left unchecked. Understanding the cause of the leak is the first step in fixing it. Leaks typically occur due to wear and tear, improper installation, or damage to the pipe. Over time, the joints between pipes can become loose, or the pipe material may crack or corrode, leading to leaks.
JetBlast Inc. Water Blasting Sewer & Drain Cleaning / jet blast drain cleaning
BaltimoreAnne Arundel CountyMaryland
6800 Fort Smallwood Rd, Baltimore, MD 21226, USA
1.1 Common Causes of Pipe Leaks
Some of the most common causes of leaks under the sink include:
- Loose or worn-out pipe fittings
- Cracked or broken pipes due to age or pressure
- Corrosion from prolonged exposure to water
- Improper installation or sealing
2. Tools and Materials You Need to Fix the Leak
Before you begin fixing the leaking pipe, make sure you have all the necessary tools and materials. Having everything you need on hand will make the process go more smoothly. Here’s a list of what you’ll need:
- Adjustable wrench
- Pipe cutter or hacksaw (for cutting the pipe if necessary)
- Plumbing tape or pipe sealant
- Replacement pipe or fittings
- Bucket or container to catch water
- Towels or rags to clean up the water
3. Step-by-Step Instructions for Fixing the Leak
Once you have gathered all your tools and materials, follow these steps to fix the leaking pipe under your sink:

Mike the Plumber / mike the plumber
1545 Ocean Ave A3, Bohemia, NY 11716, USA
3.1 Step 1: Turn Off the Water Supply
The first thing you need to do before starting any plumbing repair is to turn off the water supply. Find the shut-off valve under the sink or the main water valve in your home, and turn it off to prevent water from flowing while you work.
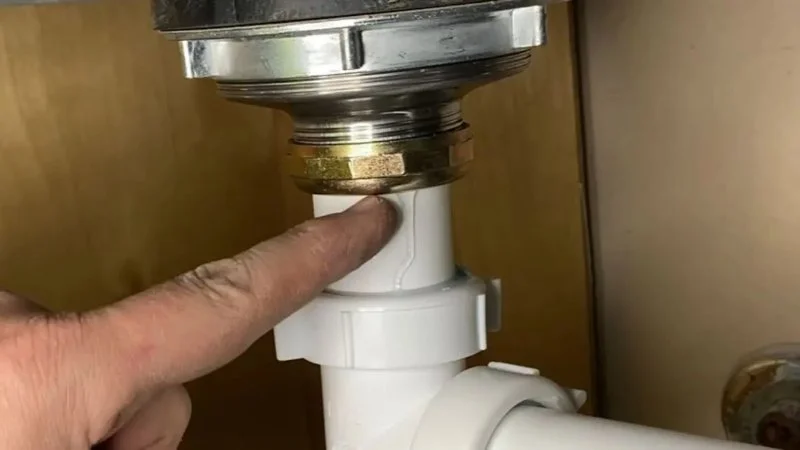
3.2 Step 2: Inspect the Leak
Examine the leaking pipe carefully to identify the exact source of the leak. Check for cracks, holes, or loose connections. If the leak is at a joint, it may just need tightening, but if it’s in the pipe itself, you may need to replace the damaged section.
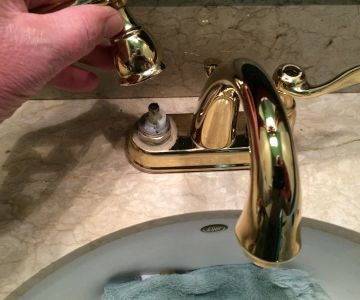
3.3 Step 3: Tighten the Pipe Fittings
If the leak is coming from a loose fitting, use an adjustable wrench to tighten the connection. Be sure not to overtighten, as this can cause further damage to the pipe or fitting.
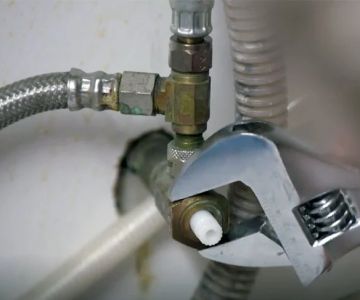
3.4 Step 4: Replace Damaged Pipes or Fittings
If the pipe is cracked or corroded, you will need to cut out the damaged section and replace it. Use a pipe cutter or hacksaw to remove the damaged pipe, then install a new section. Make sure to use plumbing tape or sealant around the threads to ensure a secure seal.
3.5 Step 5: Turn on the Water Supply and Test
After you’ve completed the repair, turn the water supply back on slowly and check for any remaining leaks. If everything is dry, you’ve successfully fixed the pipe! Clean up any water and dispose of the old parts.
4. How to Prevent Future Leaks Under the Sink
To avoid future leaks, consider the following tips:
- Inspect your pipes regularly for signs of wear and tear or corrosion.
- Replace old or damaged pipes before they become a bigger problem.
- Ensure all connections are tightly secured and properly sealed.
- Consider upgrading to high-quality materials that resist corrosion and wear.
By staying proactive with maintenance and repairs, you can prevent leaks and extend the lifespan of your plumbing system.
 McStay Plumbing5.0 (5 reviews)
 Sharpe Plumbing Co5.0 (2 reviews)
 Roto Drains4.0 (15 reviews)
 M Purtill Plumbing4.0 (43 reviews)
 Yankee Home Plumbing5.0 (84 reviews)
 Alpha Plumbing & Heating5.0 (19 reviews)
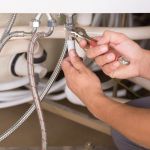 How to Maintain Your Home's Plumbing During the Summer
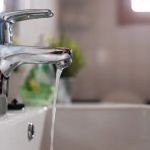 Why Is My Low Water Pressure: Causes and Solutions
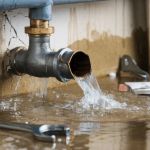 What Causes a Burst Pipe and How to Prevent It in Winter | Essential Tips
 Ultimate Guide to Installing a New Toilet – Expert Installation Tips
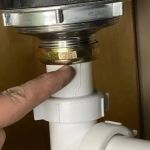 How to Fix a Leaking Pipe Under the Sink: A Step-by-Step Guide
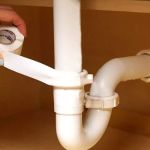 How to Replace a Broken PVC Drain Trap