
- 1. Understanding the Toilet Seal
- 2. When to Replace the Toilet Seal
- 3. Tools and Materials Needed for Toilet Seal Replacement
- 4. Step-by-Step Guide to Replacing the Toilet Seal
- 5. Common Mistakes to Avoid When Replacing a Toilet Seal
- 6. How PlumberNear Can Help
1. Understanding the Toilet Seal
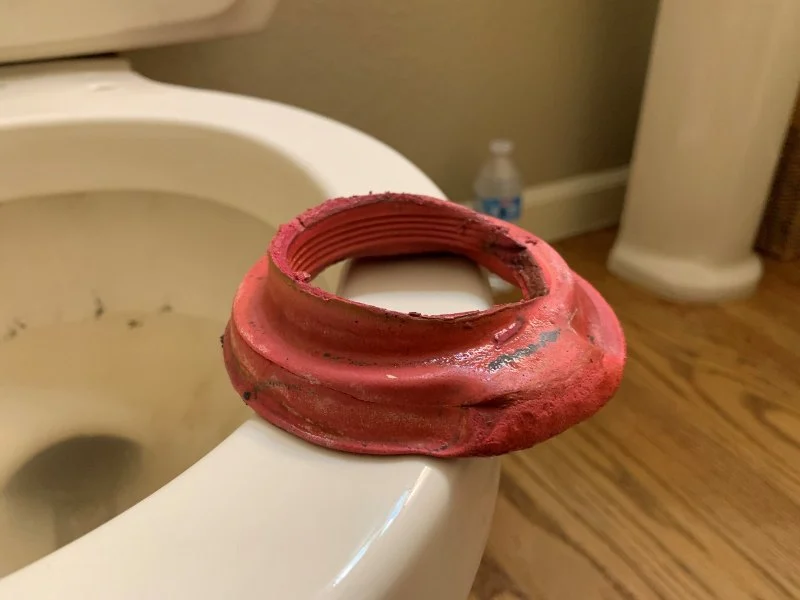
The toilet seal, often referred to as the wax ring, is a critical component of your toilet installation. It creates a watertight seal between the base of the toilet and the drainpipe, preventing leaks and odors. Over time, this seal can wear out, crack, or degrade, leading to water leakage and potential damage to your bathroom floor. Replacing the toilet seal is an essential home maintenance task that can help you avoid costly water damage and maintain a clean, functional bathroom.
O'Neill Bros. Plumbing / oneill plumbing
RockvilleMontgomery CountyMaryland
12348 Wilkins Ave, Rockville, MD 20852, USA
2. When to Replace the Toilet Seal
There are several signs that indicate it's time to replace your toilet seal. Some of the most common signs include:
- Water pooling around the base: If you notice water around the base of your toilet, this could indicate a faulty seal allowing water to leak out.
- Unpleasant odors: A degraded seal can allow sewer gases to escape, causing foul odors in your bathroom.
- Rocking toilet: If your toilet feels loose or wobbles when you sit on it, the seal may no longer be providing a secure fit.
3. Tools and Materials Needed for Toilet Seal Replacement
Before you begin replacing your toilet seal, gather the following tools and materials:
- New wax ring: Ensure that you purchase the right size and type for your toilet. Some toilets may require a reinforced wax ring for extra sealing.
- Wrench or socket set: For removing the toilet bolts that secure the toilet to the floor.
- Flathead screwdriver: Useful for prying up the old seal and cleaning any debris from the flange.
- Gloves and rags: To keep things clean and handle any unpleasant messes during the process.
- Plumbing tape or sealant (optional): For additional sealing around the toilet base if needed.
4. Step-by-Step Guide to Replacing the Toilet Seal
Now that you have all your tools ready, follow these easy steps to replace the toilet seal:
- Step 1 - Turn off the water supply: Begin by shutting off the water supply to the toilet, typically located behind the toilet. Flush the toilet to drain the tank.
- Step 2 - Disconnect the toilet from the floor: Use a wrench to remove the bolts that secure the toilet to the floor. Carefully lift the toilet off the flange and set it aside on a towel or blanket to protect the floor.
- Step 3 - Remove the old wax ring: Use a flathead screwdriver to scrape off any remnants of the old wax ring from the toilet base and the flange. Clean the area thoroughly to ensure a good seal.
- Step 4 - Install the new wax ring: Place the new wax ring onto the flange, making sure it fits securely. If your toilet requires a reinforced ring, ensure it is positioned correctly.
- Step 5 - Reinstall the toilet: Carefully lift the toilet back into place, aligning it with the bolts on the floor. Press down firmly to compress the wax ring and create a tight seal.
- Step 6 - Secure the toilet: Tighten the bolts back into place, being careful not to overtighten and crack the toilet base. Reconnect the water supply line and turn the water back on.
- Step 7 - Test the seal: Once the toilet is secured, flush it several times and check for any leaks around the base. If everything looks good, you're done!
5. Common Mistakes to Avoid When Replacing a Toilet Seal
While replacing a toilet seal is a relatively simple DIY project, there are a few mistakes to watch out for:
- Not cleaning the flange: Leaving debris on the flange can prevent the new seal from forming a tight connection, leading to future leaks.
- Incorrectly placing the wax ring: Ensure the wax ring is centered properly on the flange. If it shifts out of place during installation, it can lead to leaks.
- Over-tightening the bolts: Tightening the toilet bolts too much can crack the toilet base. Tighten them until the toilet is secure, but avoid excessive force.
6. How PlumberNear Can Help
If you're not comfortable replacing the toilet seal yourself or encounter any issues during the process, PlumberNear is here to help. Our network of trusted professionals can assist with any plumbing issues, including toilet seal replacements. We provide high-quality plumbing services, ensuring your toilet works properly and that your bathroom remains leak-free. Explore our services today and get the job done right the first time!

 Coastline Plumbing LLC4.0 (12 reviews)
 GMT MECHANICAL & PLUMBING LLC5.0 (4 reviews)
 Avantel Plumber of Boston MA5.0 (32 reviews)
 LaMarti and Sons Contractors - Plumbers5.0 (1 reviews)
 Perma-Fix Plumbing & Heating4.0 (22 reviews)
 Kino's Plumbing and Drain5.0 (64 reviews)
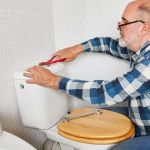 Expert Advice on Installing a New Toilet: A Complete Guide
 Should I Replace or Repair Low Water Pressure?
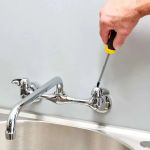 Expert Advice on a Leaking Faucet and How to Fix It Safely
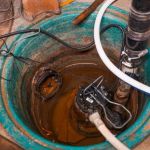 When Should You Call a Plumber for Sump Pump Failure
 How Much Does It Cost to Maintain Your Plumbing System?
 How to Identify and Fix Plumbing Issues Before They Get Worse