PlumberNear
PlumberNearPlumbing TipsPlumber Near Me
ConnecticutMarylandMassachusettsNew JerseyNew YorkPennsylvaniaVermont
PlumberNearPlumbing Tips

How to Fix Water Damage in Your Bathroom

How to Fix Water Damage in Your Bathroom

1. Identifying Bathroom Water Damage

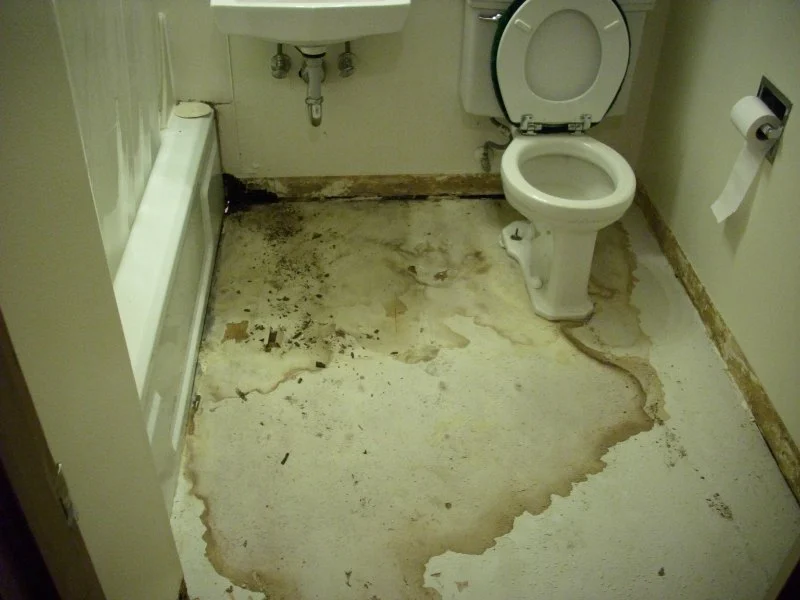
Bathrooms are one of the most common places in the home to experience water damage due to constant exposure to moisture. Signs of damage can often go unnoticed until they become serious. Look out for peeling paint, swollen wood, moldy grout, or a musty odor. If you see bubbling on walls, warped flooring, or stains on the ceiling below your bathroom, water has likely seeped into areas it shouldn’t.In some cases, water damage may start small—such as a minor leak under the sink—but can eventually cause significant structural issues if ignored. A professional inspection from a service like PlumberNear can help you identify the source before it becomes costly to fix.

2. Common Causes of Bathroom Water Damage

Understanding the source of bathroom water damage is key to preventing it from happening again. The most frequent causes include:1. Leaky Pipes or FixturesOver time, plumbing connections can loosen or crack. Even a slow drip from a faucet or showerhead can lead to water damage behind walls or under flooring.2. Poor VentilationA lack of airflow traps moisture inside, encouraging mold growth and damaging drywall or paint. Always ensure your bathroom fan is functioning properly and vents outside the home.3. Cracked Tiles and GroutCracks allow water to seep through to the subfloor. Regularly sealing grout and replacing cracked tiles can prevent hidden leaks.4. Overflowing Tubs or ToiletsAccidents happen—but water left sitting for too long can seep into floors and walls, causing long-term deterioration.5. Faulty WaterproofingIf your bathroom’s waterproofing layer was poorly installed or worn down over time, water can easily penetrate walls and subfloors.

3. Step-by-Step: How to Fix Water Damage

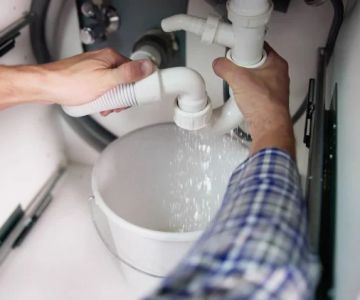
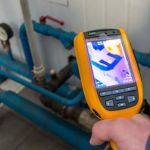
Repairing bathroom water damage depends on the extent of the problem. Follow these steps for a safe and effective restoration:Step 1: Identify and Stop the Source of the LeakBefore you begin repairs, locate and fix the leak. Turn off the water supply and inspect all plumbing lines and seals. If the problem is not visible, professionals from PlumberNear can use advanced detection tools to pinpoint the hidden leak.Step 2: Dry the Area ThoroughlyUse fans, dehumidifiers, and open windows to speed up the drying process. Moisture left behind can lead to mold growth, so this step is crucial. For severe cases, industrial drying equipment may be needed.Step 3: Remove Damaged MaterialsCut out water-damaged drywall, flooring, or insulation. Dispose of all materials that show signs of mold or rot. Safety gear such as gloves and masks should be worn when handling contaminated areas.Step 4: Treat for MoldEven if mold isn’t visible, treat the affected areas with a mold-killing solution to prevent spores from spreading. Products like hydrogen peroxide or specialized mold removers work well for this purpose.Step 5: Repair and Replace SurfacesOnce everything is dry and clean, replace the damaged materials. Install new drywall, re-tile the floor, or reseal areas around bathtubs and sinks. If the damage was extensive, consider upgrading your waterproofing layer for added protection.Step 6: Repaint and RestoreUse mold-resistant paint and finishes to ensure durability. This not only restores your bathroom’s appearance but also provides long-term protection against future damage.

4. Preventing Future Water Damage

Prevention is always better than costly repairs. Here are key strategies to help avoid future water damage:1. Regular Maintenance ChecksInspect plumbing fixtures, seals, and caulking around bathtubs and sinks at least twice a year. Small cracks or loose connections can lead to big problems if left unchecked.2. Use a Quality Exhaust FanEnsure your fan is rated for the bathroom’s size and runs for at least 15 minutes after every shower to remove excess humidity.3. Seal and Grout RegularlyReseal grout and caulk lines once a year to prevent water from seeping behind tiles.4. Use Water-Resistant MaterialsOpt for materials like ceramic tile, vinyl flooring, or waterproof wall panels to minimize water absorption.5. Monitor Water BillsAn unexplained spike in your water bill may indicate a hidden leak. Catching these early can save you from severe water damage.

5. Real-Life Example of Bathroom Restoration

Consider Sarah from Austin, Texas, who noticed a musty smell near her bathroom vanity. After contacting PlumberNear, technicians discovered a slow leak behind the sink that had caused water to pool under her flooring. They removed the damaged sections, dried the area with industrial fans, and replaced the flooring with waterproof vinyl. The final touch—a coat of mold-resistant paint—made the bathroom look brand new.Sarah’s case shows that quick action and professional guidance can turn a stressful situation into a successful restoration. Whether the issue is small or large, addressing water damage promptly prevents further deterioration and maintains the safety and beauty of your home.If you suspect water damage in your bathroom, professional inspection and repair from PlumberNear can ensure a lasting fix with high-quality service and materials.

Trending Blog Articles

Popular Blog Posts

Categories

Top Visited Sites

Must-Read Plumbing Tips Posts

Top Plumber Searches

Trending Plumbing Tips Posts